
1De app installeren#
Waar dit hoofdstuk over gaat — de app op uw telefoon of tablet krijgen.
Waarom het uitmaakt — de juiste app uit de juiste bron installeren is de ene stap waarbij een vergissing zich moeilijk laat terugdraaien.
Wat u ziet — hoe u installeert uit de App Store of Google Play, wat u doet als uw praktijk u een rechtstreekse download stuurde, hoe u twee gelijkende apps uit elkaar houdt, en hoe u het Platform gebruikt zonder iets te installeren.
1.1 Uit de appwinkel#
Zoek in uw winkel op de naam die uw praktijk u gaf, en installeer de app zoals gewoonlijk.
- iPhone en iPad — de App Store. Vereist een recente versie van iOS.
- Android-telefoons en -tablets — Google Play.
Installeer alleen de app die uw praktijk genoemd heeft. Verschijnen er meerdere gelijkende apps, kijk dan naar de naam van de uitgever voordat u installeert.
1.2 Als uw praktijk u een rechtstreekse download stuurde#
Sommige praktijken verspreiden hun app rechtstreeks in plaats van via een winkel, meestal als een Android-bestand met de extensie .apk.
- Open de link die uw praktijk stuurde, op de telefoon zelf.
- Download het bestand.
- Tik erop en sta de installatie toe wanneer uw telefoon erom vraagt.
- Zet de toestemming « onbekende apps installeren » daarna weer uit.
Installeer nooit een bestand dat niet van uw praktijk komt, via een kanaal dat u vertrouwt. Komt er onverwacht een link binnen — ook een die er goed uitziet — overleg dan met hen voordat u hem opent.
1.3 Als u meer dan één van deze apps hebt#
Sommige organisaties draaien verschillende apps met een eigen merknaam op hetzelfde Platform. Ze staan naast elkaar en zitten elkaar niet in de weg. Kijk naar de naam en het pictogram van de app voordat u zich aanmeldt, zodat u uw aanmeldgegevens van de praktijk niet in de app van een andere organisatie probeert.
1.4 Gebruiken zonder te installeren#
Het Platform draait ook in de browser van een telefoon, op het webadres van uw praktijk. Alles werkt, maar u krijgt geen pushmeldingen en geen appslot. Installeer de app als u kunt.
2Eerste start en toestemmingen#
Waar dit hoofdstuk over gaat — waar de app om vraagt als u hem voor het eerst opent, en waarom.
Waarom het uitmaakt — de toestemmingen die u hier geeft, bepalen of u aan een videosessie kunt deelnemen en of herinneringen u op tijd bereiken.
Wat u ziet — elke toestemmingsvraag in gewone woorden, en waarom meldingen de ene vraag is waar u ja op zegt.
De app vraagt om toestemming op het moment dat hij die nodig heeft, niet allemaal tegelijk. Elke toestemming ontsluit iets bepaalds.
| Toestemming | Wanneer gevraagd | Wat zonder niet werkt |
|---|---|---|
| Meldingen | Bij de eerste start | Boekingsherinneringen, berichtsignalen, sessiealarmen |
| Camera | Leeftijdscontrole, videogesprekken, uw foto wijzigen | Identiteitscontrole, videogesprekken |
| Microfoon | Spraak- of videogesprek | Gesprekken |
| Foto's | Een afbeelding bij een ticket of profiel voegen | Bijlagen |
| Face ID / vingerafdruk | Snel aanmelden of het appslot aanzetten | Snel aanmelden, appslot |
Zeg ja tegen meldingen#
Dit is de toestemming die bij de eerste start het toestaan waard is. Zonder krijgt u geen boekingsherinneringen en geen signaal wanneer uw sessie begint — en dat is de meest voorkomende oorzaak van een gemiste sessie.
Hebt u al geweigerd, dan kunt u het later alsnog aanzetten in de instellingen van de telefoon zelf (§12.2).
3Aanmelden — en voortaan sneller aanmelden#
Waar dit hoofdstuk over gaat — aanmelden, en elke aanmelding daarna tot een seconde terugbrengen.
Waarom het uitmaakt — u opent deze app vaak, en elke keer een wachtwoord typen is wat mensen ermee doet stoppen.
Wat u ziet — hoe u een account aanmaakt, hoe u zich aanmeldt, hoe u aanmelden met vingerafdruk of gezicht instelt, en hoe u zich netjes afmeldt.
3.1 Een account aanmaken#
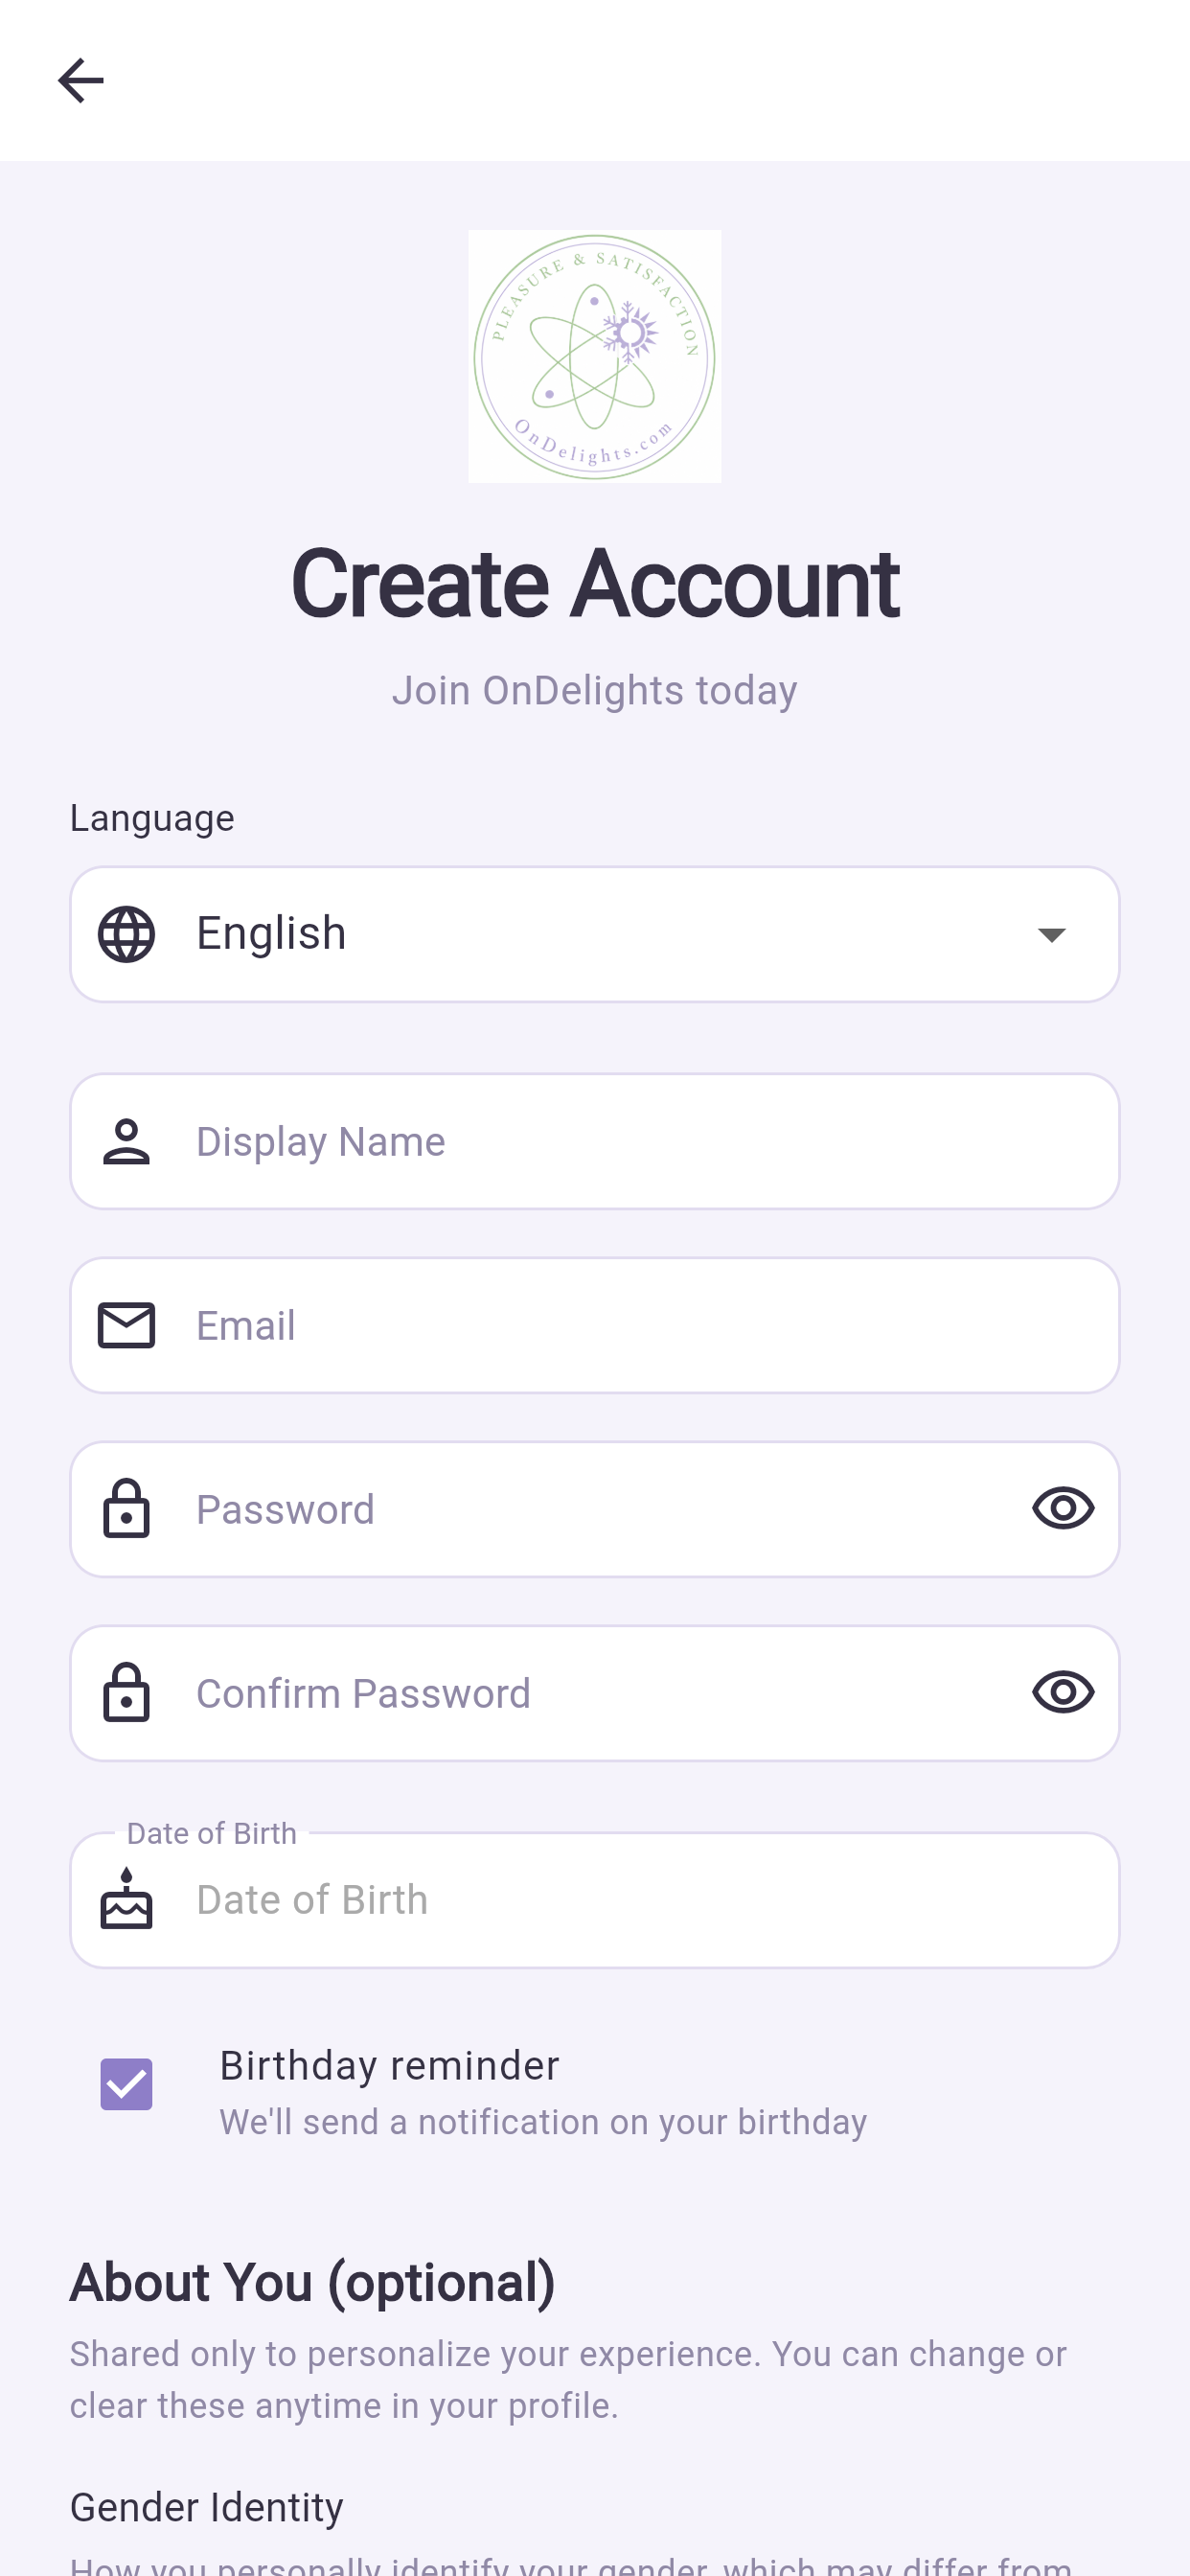
- Tik op Aan de slag (Get Started).
- Tik op Registreren (Register).
- Vul uw naam, e-mailadres en een wachtwoord in.
- Vul uw geboortedatum in. Die is verplicht — ze bevestigt dat u de minimumleeftijd haalt.
- Aanvaard de voorwaarden.
- Tik op Account aanmaken (Create account).
3.2 Aanmelden#
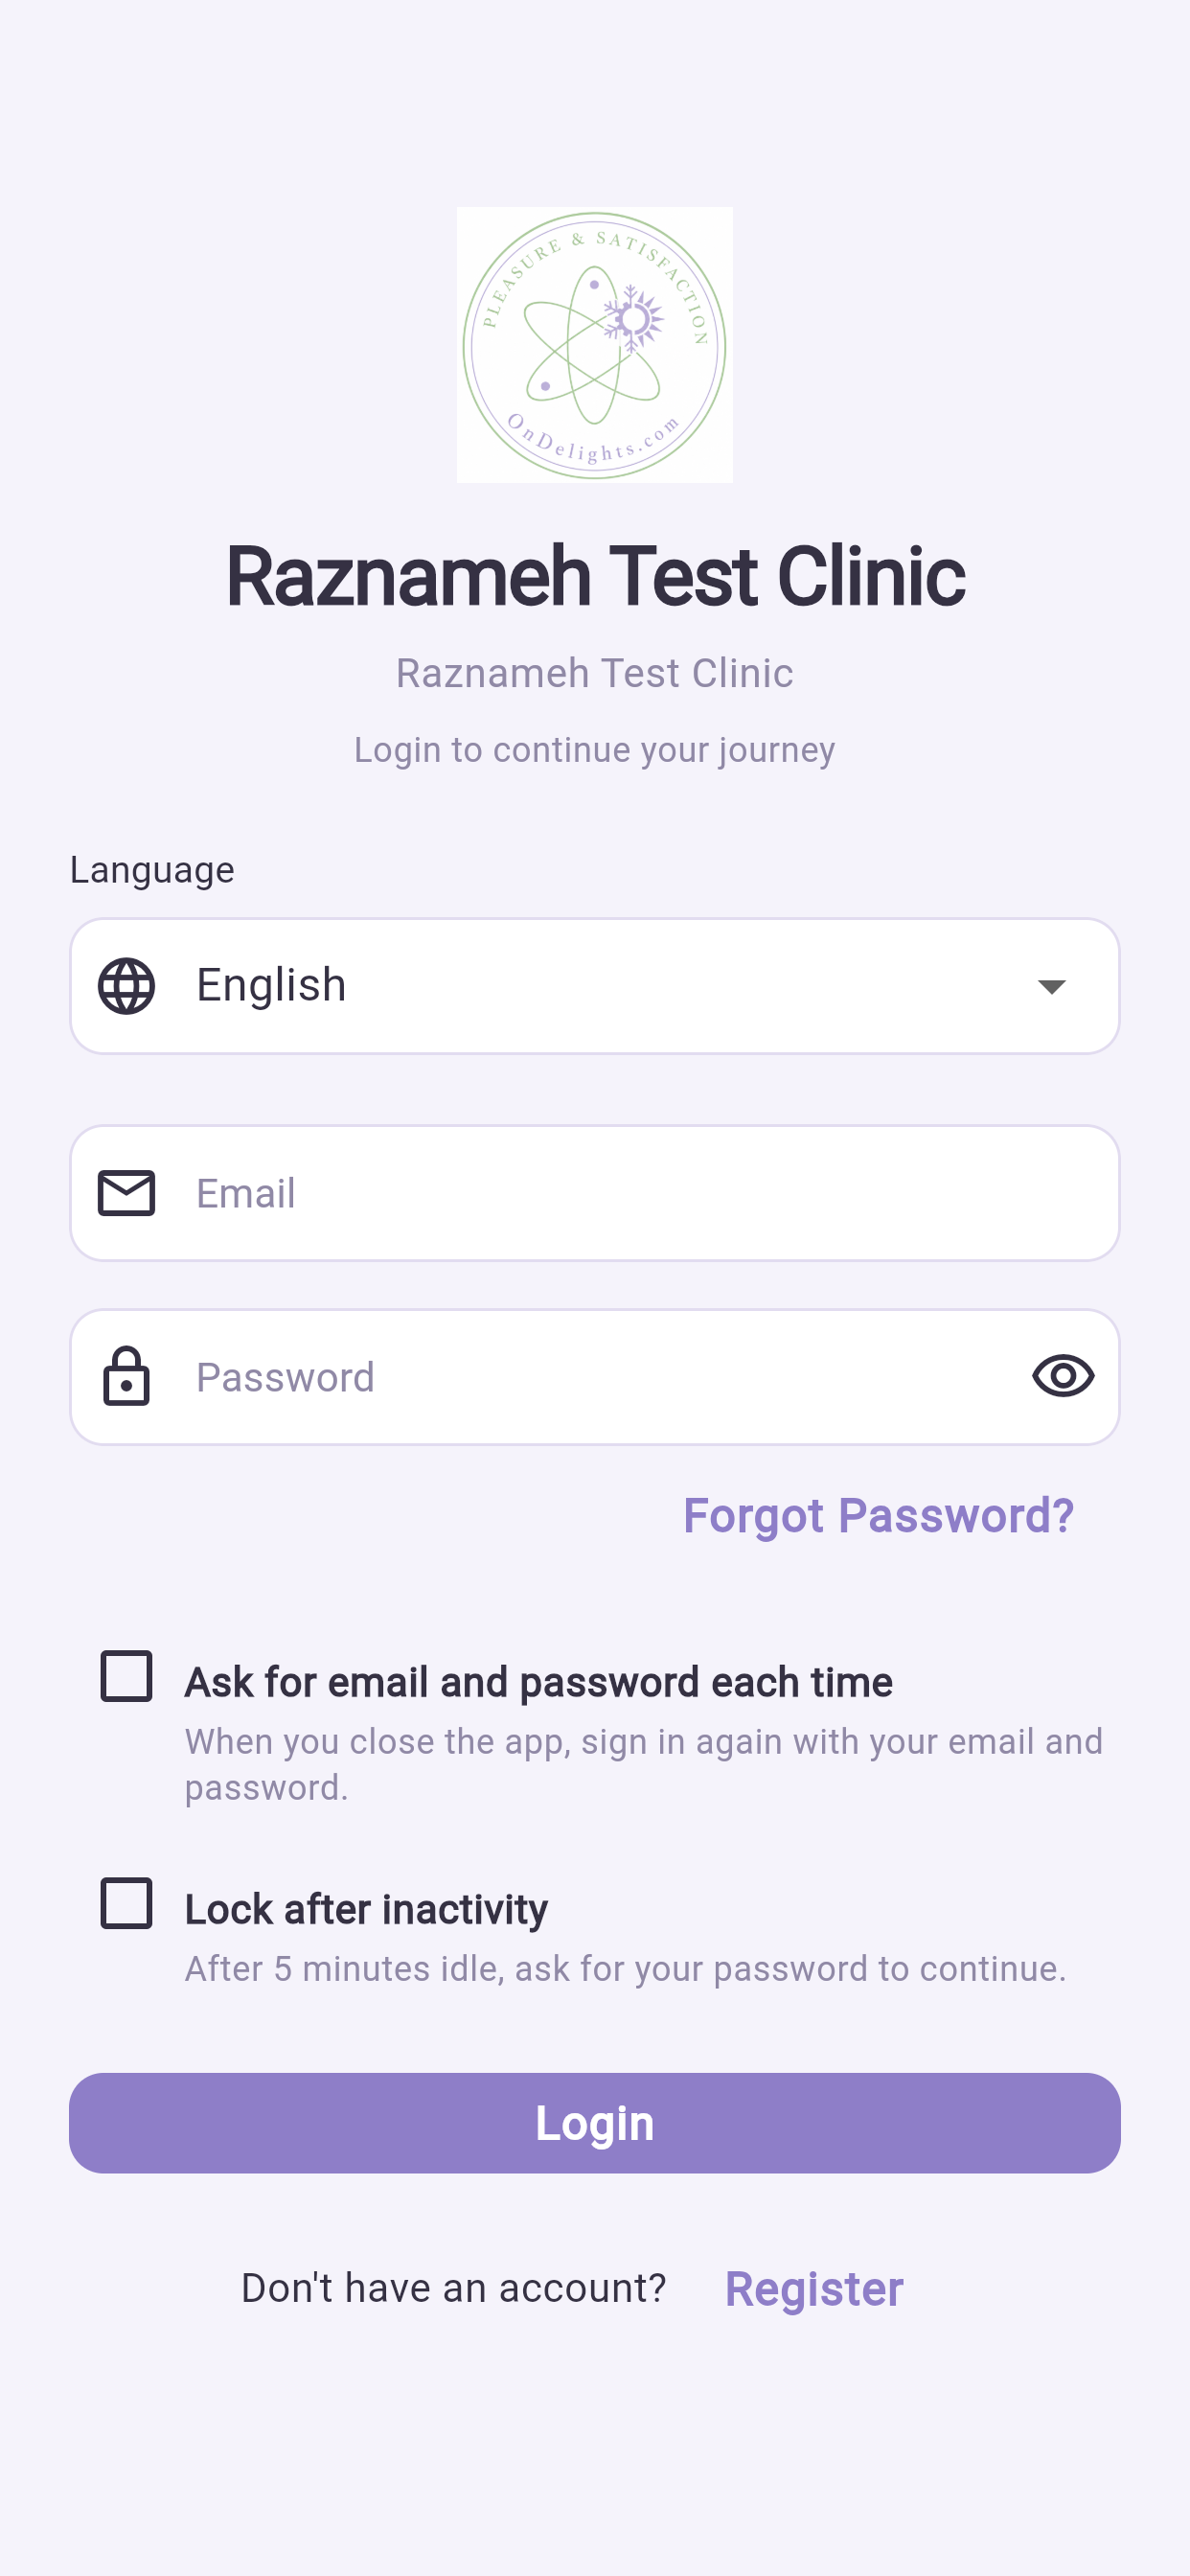
Vul uw e-mailadres en wachtwoord in, of tik op Doorgaan met Google (Continue with Google).
3.3 Snel aanmelden instellen#
Nadat u zich één keer aangemeld hebt, kan de app u binnenlaten met uw vingerafdruk, uw gezicht of een patroon, in plaats van met een getypt wachtwoord.
- Ga naar Profiel (Profile) → Instellingen (Settings) → Beveiliging (Security).
- Zet Aangemeld blijven (Keep me signed in) aan.
- Kies ontgrendelen met vingerafdruk of gezicht, of stel een patroon in.
De volgende keer opent de app meteen op uw ontgrendelvraag.
Een woord over « Aangemeld blijven ». Het bewaart een sessie op dit toestel. Dat is veilig op een telefoon die alleen u gebruikt en die een eigen vergrendelscherm heeft. Op een gedeelde telefoon of een telefoon van het werk kiest u beter Vraag mij elke keer om aan te melden (Ask me to sign in each time).
3.4 Afmelden#
Profiel → Afmelden (Log out), onderaan. Dit meldt u alleen op dit toestel af — uw andere toestellen blijven aangemeld.
4Uw leeftijd en identiteit bevestigen#
Waar dit hoofdstuk over gaat — uw leeftijd of identiteit bevestigen, waar een dienst dat vraagt.
Waarom het uitmaakt — sommige diensten zijn pas te boeken als dit gebeurd is, en een mislukte controle is meestal een kwestie van licht en niet van een echte weigering.
Wat u ziet — de gezichtscontrole en hoe u die in één keer haalt, de documentcontrole als de gezichtscontrole geen uitsluitsel geeft, wat « in beoordeling » betekent, en wat er daarna precies met uw documenten gebeurt.
Sommige diensten hebben uw leeftijd bevestigd nodig voordat u kunt boeken. De app vraagt het u de eerste keer dat het nodig is.
4.1 De gezichtscontrole — de snelste#
- Tik op Verificatie starten (Start verification).
- Geef toegang tot de camera.
- Houd de telefoon op ooghoogte bij redelijk licht, met uw hele gezicht in beeld.
- Volg de aanwijzingen en blijf stil.
De meeste mensen worden meteen goedgekeurd.
Om het in één keer te halen: ga met uw gezicht naar een raam of een lamp toe in plaats van er met uw rug naartoe, zet een zonnebril of hoed af, en houd de telefoon stil op armlengte.
4.2 Als de gezichtscontrole geen uitsluitsel geeft#
De app brengt u naar een documentcontrole.
- Tik op Doorgaan met document (Continue with document).
- Fotografeer uw paspoort, rijbewijs of identiteitskaart, en volg daarbij de aanwijzingen op het scherm.
- Neem het korte selfievideootje op.
- Tik op Indienen (Submit).
Om het in één keer te halen: leg het document op een donkere, vlakke ondergrond, vermijd weerschijn van lampen boven u, breng alle vier de hoeken binnen het kader, en dek geen enkel deel af met uw vingers.
4.3 In beoordeling#
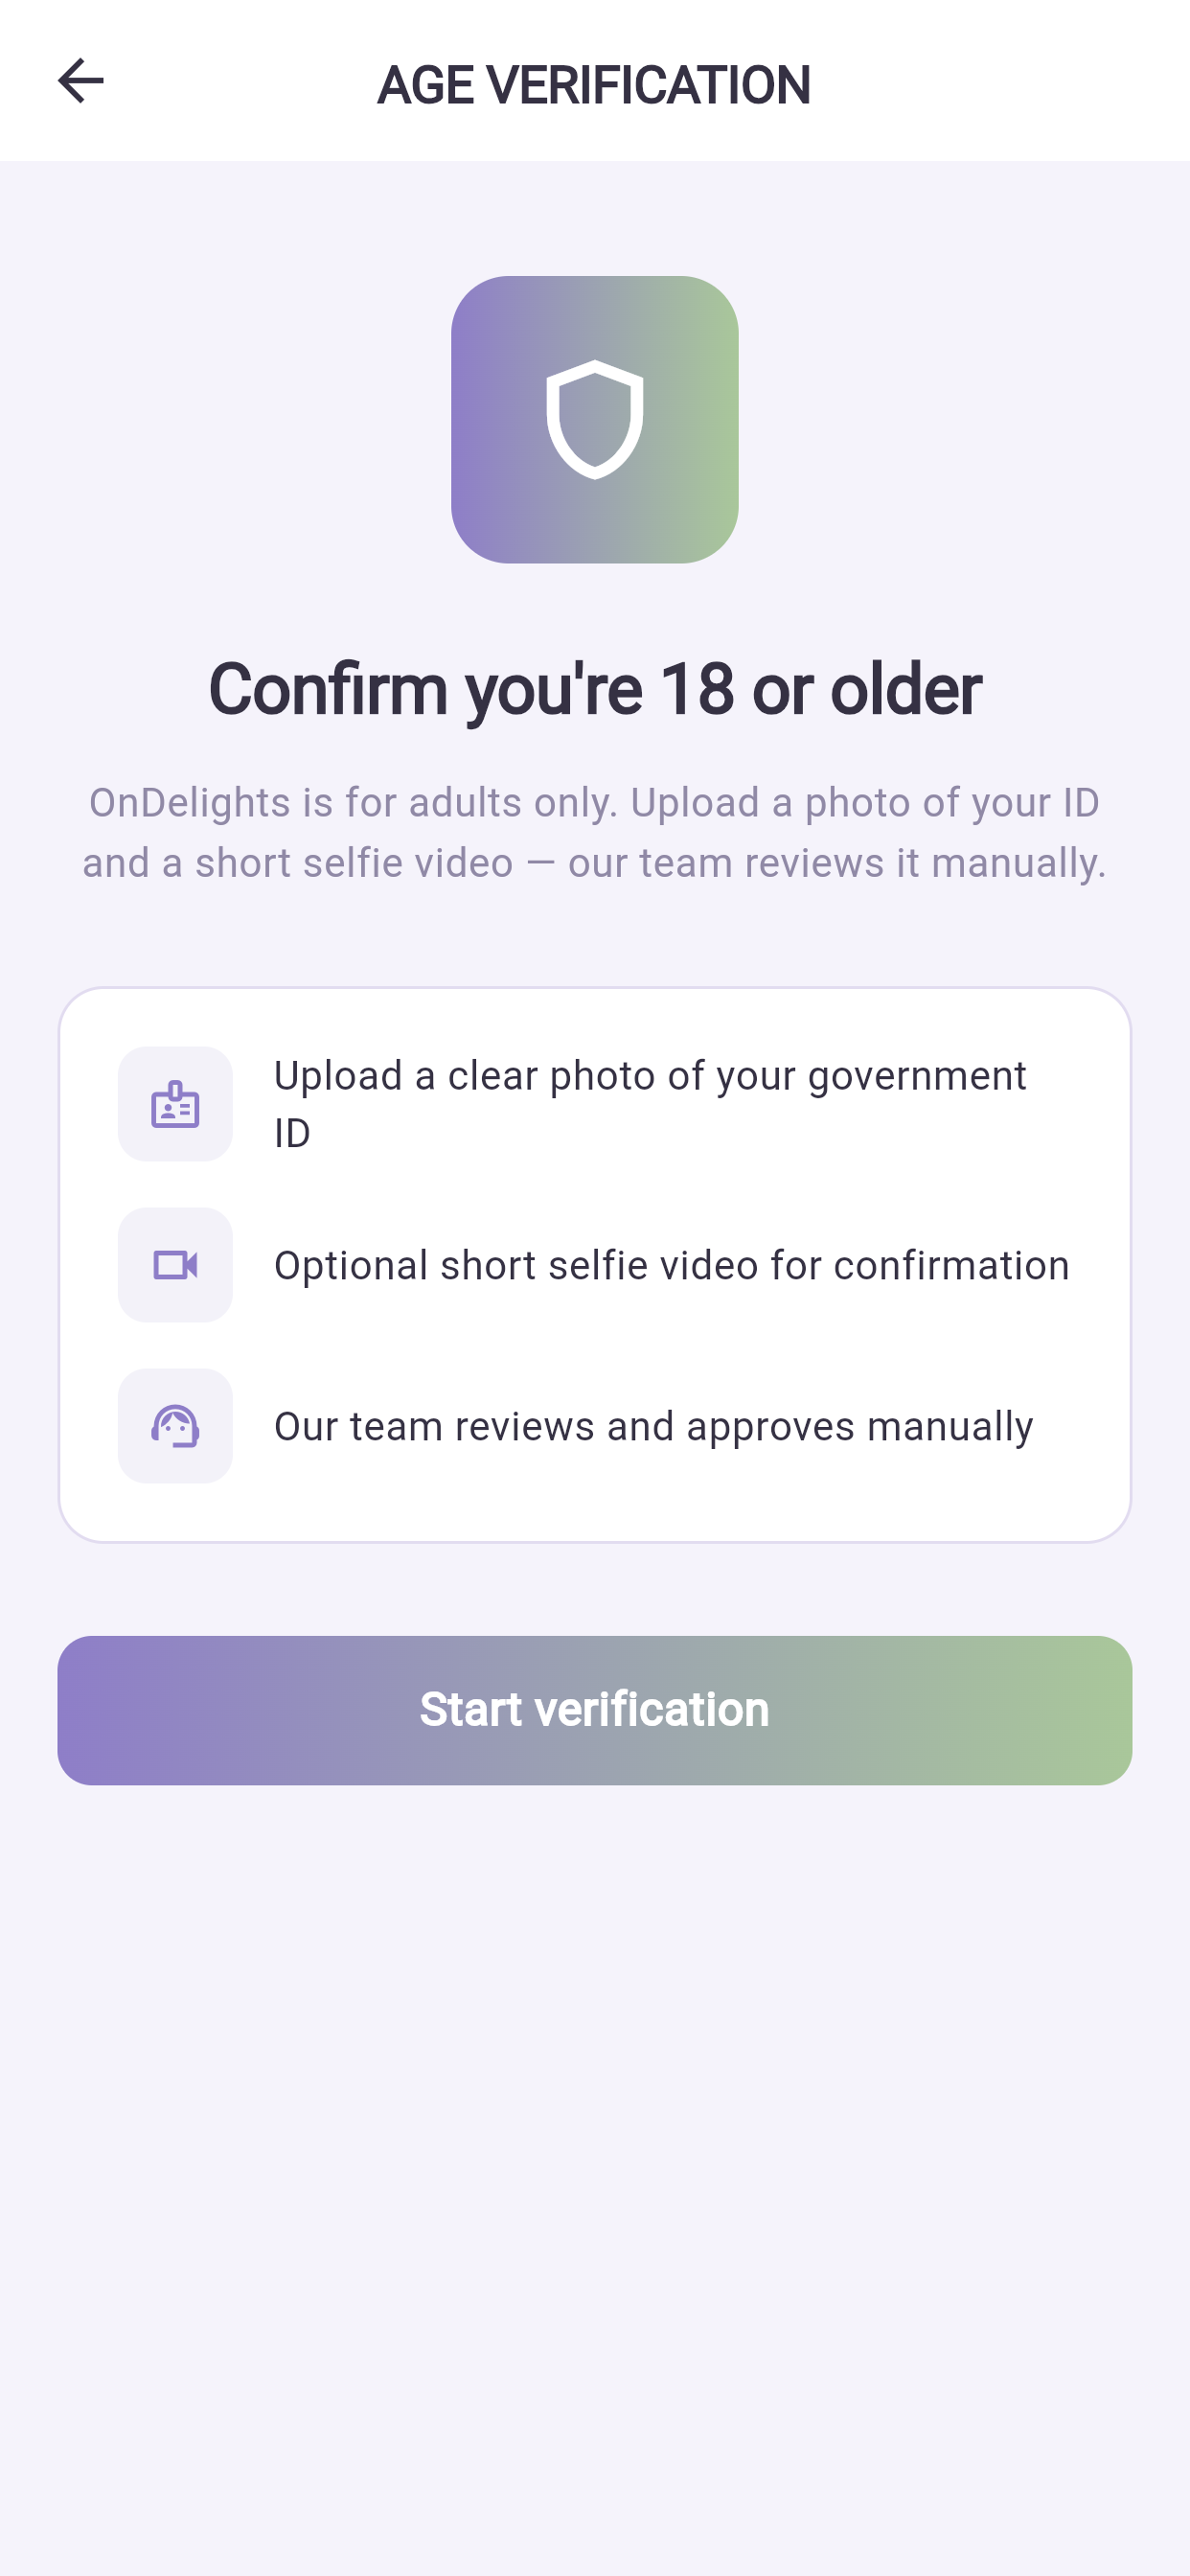
Moet er een mens naar kijken, dan ziet u In beoordeling (Under review). Medewerkers beslissen meestal binnen één werkdag, en u krijgt hoe dan ook een melding. Wijzen zij het af, dan tonen het alarm en Leeftijd en identiteit (Age & Identity) op Profiel hun reden, zodat u weet wat u opnieuw moet fotograferen. U kunt alles wat geen verificatie nodig heeft ondertussen gewoon blijven gebruiken.
4.4 Wat er met uw documenten gebeurt#
Ze worden versleuteld, zijn alleen zichtbaar voor het kleine aantal medewerkers dat ze beoordeelt, en worden automatisch verwijderd zodra de bewaartermijn verstrijkt. Elke keer dat een medewerker er een opent, wordt dat vastgelegd.
U kunt vragen om ze eerder te verwijderen: Profiel → Instellingen → Privacy → verzoek om wissing.
5Uw weg vinden in de app#
Waar dit hoofdstuk over gaat — een plattegrond van de app: de tabbladen, de gebaren en de taalinstellingen.
Waarom het uitmaakt — vijf minuten hier bespaart u later zoeken naar schermen, en één gebaar (omlaag trekken om te verversen) lost verrassend veel « het staat er niet » -momenten op.
Wat u ziet — waar elk tabblad voor dient, de vier gebaren die het kennen waard zijn, en hoe u van taal wisselt, ook naar de talen die van rechts naar links lopen.
5.1 De tabbladen#
| Tabblad | Waar het voor dient |
|---|---|
| Start (Home) | Uw inhoudsstroom |
| Diensten (Services) | Behandelaren vinden en boeken |
| Profiel (Profile) | Sessies, facturatie, berichten, instellingen |
Uw app toont er misschien minder dan dit, of juist eentje meer — uw praktijk kiest welke functies meegaan. Deze handleiding behandelt de tabbladen die elke app heeft.
5.2 Gebaren die het kennen waard zijn#
| Gebaar | Wat het doet |
|---|---|
| Omlaag trekken in een lijst | Ververst hem vanaf de server |
| Terug vegen vanaf de linkerrand | Gaat een scherm terug (iPhone) |
| Op het hartje tikken | Bewaart een behandelaar, dienst of artikel |
| Lang drukken op een bericht | Kopiëren of verwijderen |
Ziet een scherm er verouderd uit — een sessie die ontbreekt, een betaling die niet verschijnt — trek het dan eerst omlaag om te verversen, voordat u aanneemt dat er iets mis is.
5.3 Taal en leesrichting#
Profiel → Instellingen → Taal (Language). Er zijn 23 talen beschikbaar.
Kiest u Arabisch, Perzisch, Hebreeuws of Urdu, dan gaat de hele app van rechts naar links: de tabbladen, de terugpijlen en de tekst kantelen allemaal mee. Dat hoort zo, het is geen storing.
6Het tabblad Start#
Waar dit hoofdstuk over gaat — uw inhoudsstroom.
Waarom het uitmaakt — het is de plek waar artikelen en video's van de behandelaren die u volgt binnenkomen.
Wat u ziet — hoe u een item leest, waardeert, becommentarieert, deelt en bewaart, hoe u een auteur volgt, en waar wat u gewaardeerd hebt bewaard blijft.
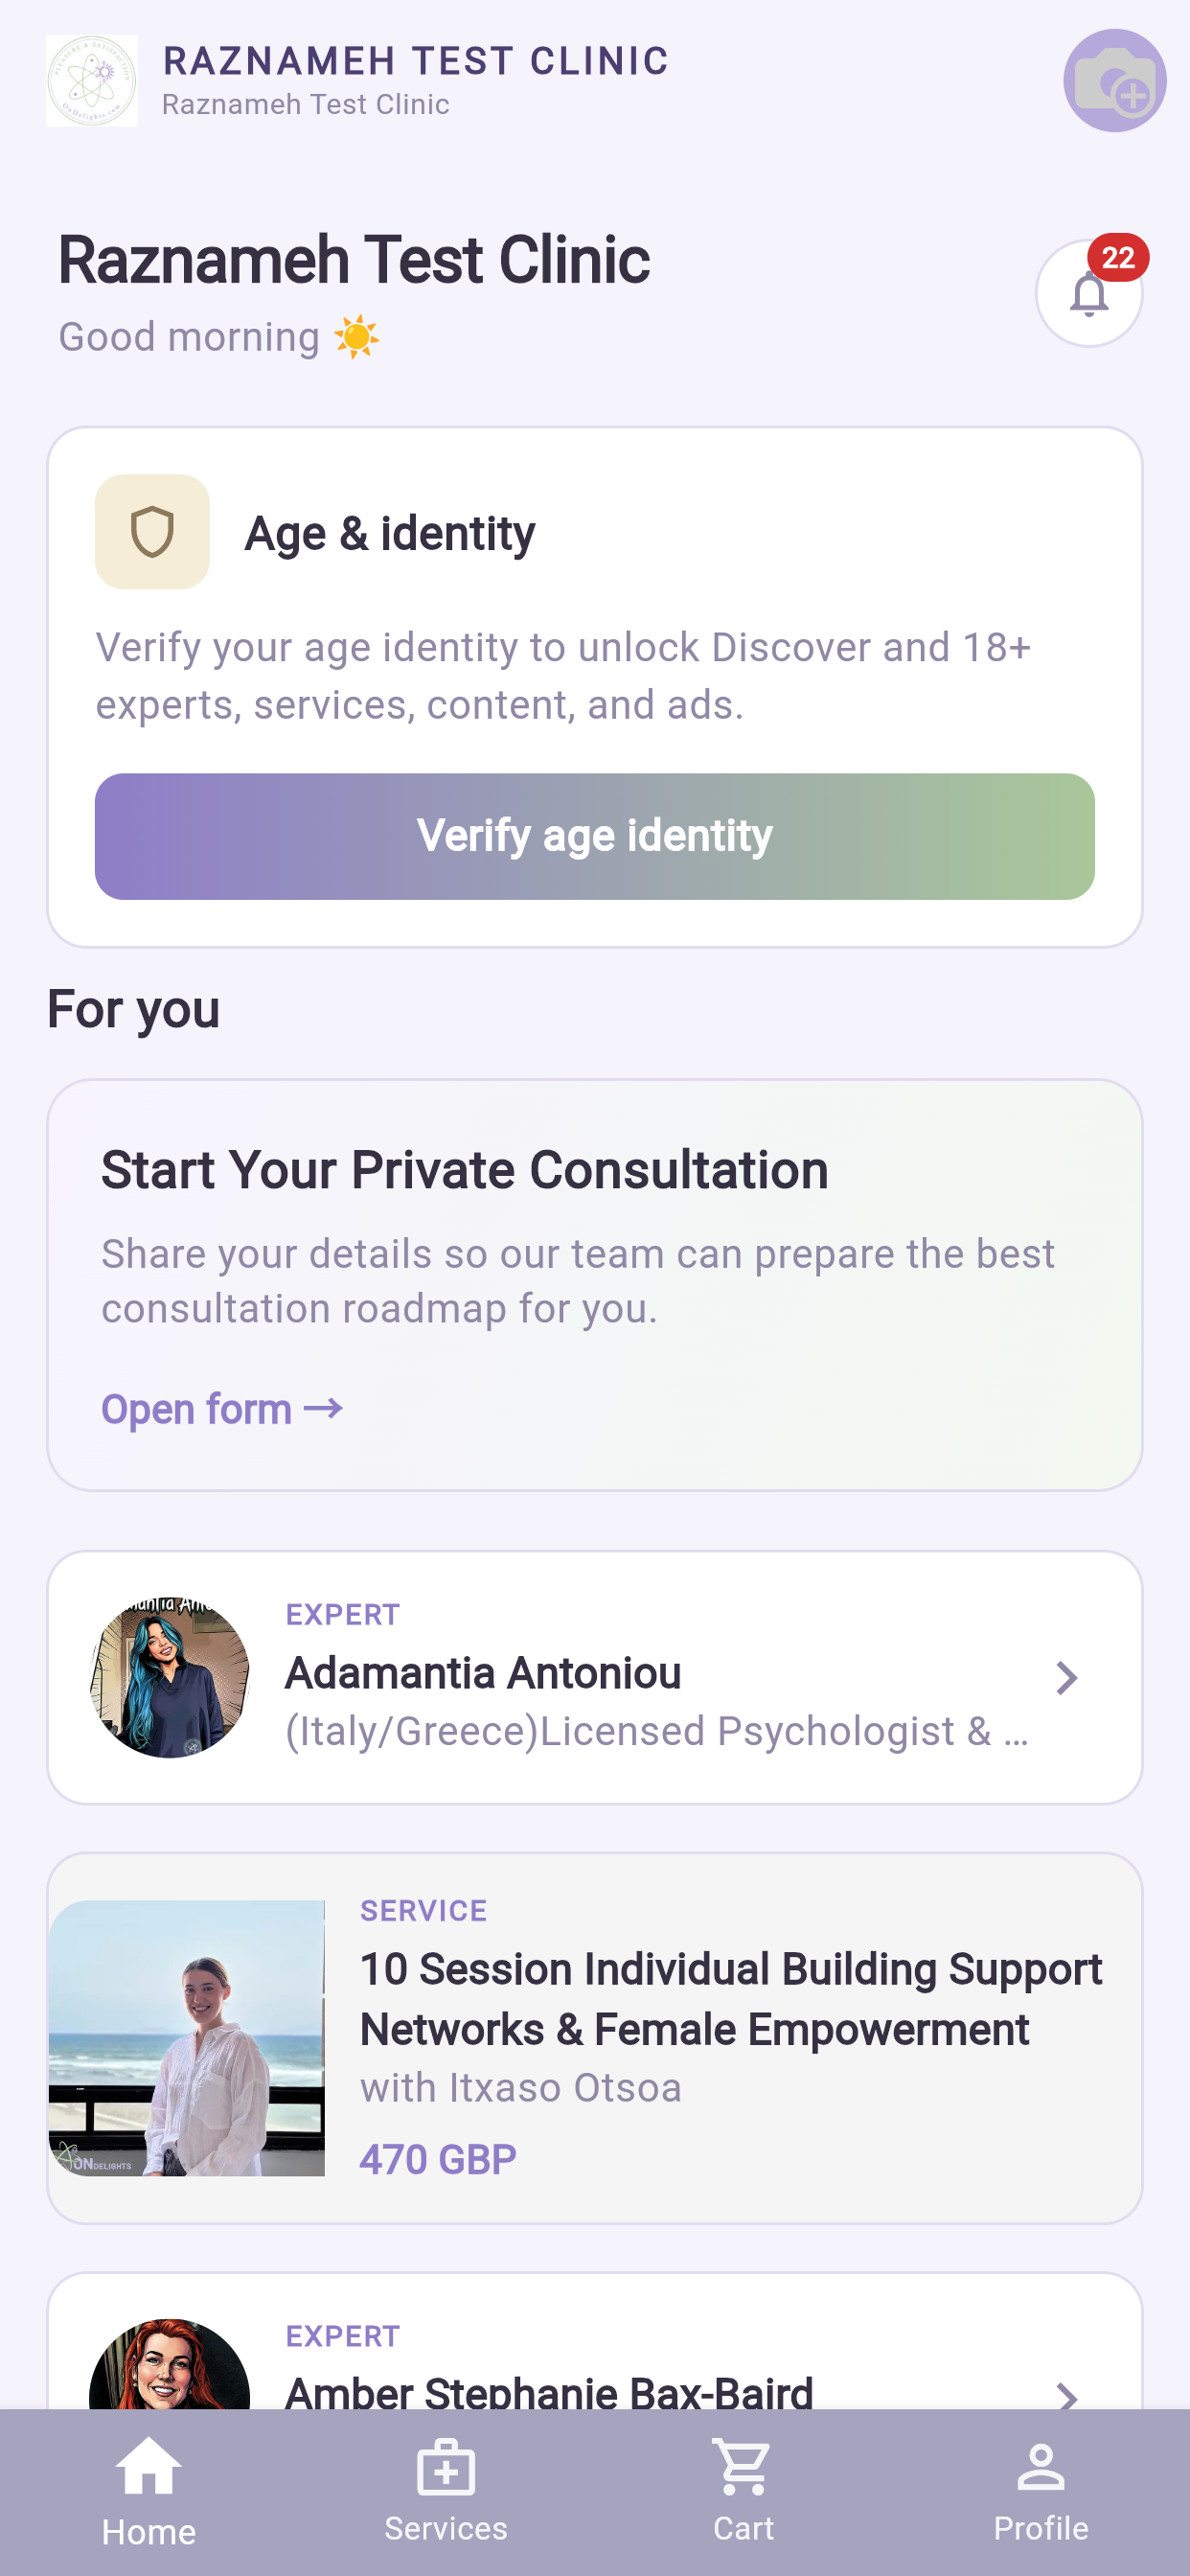
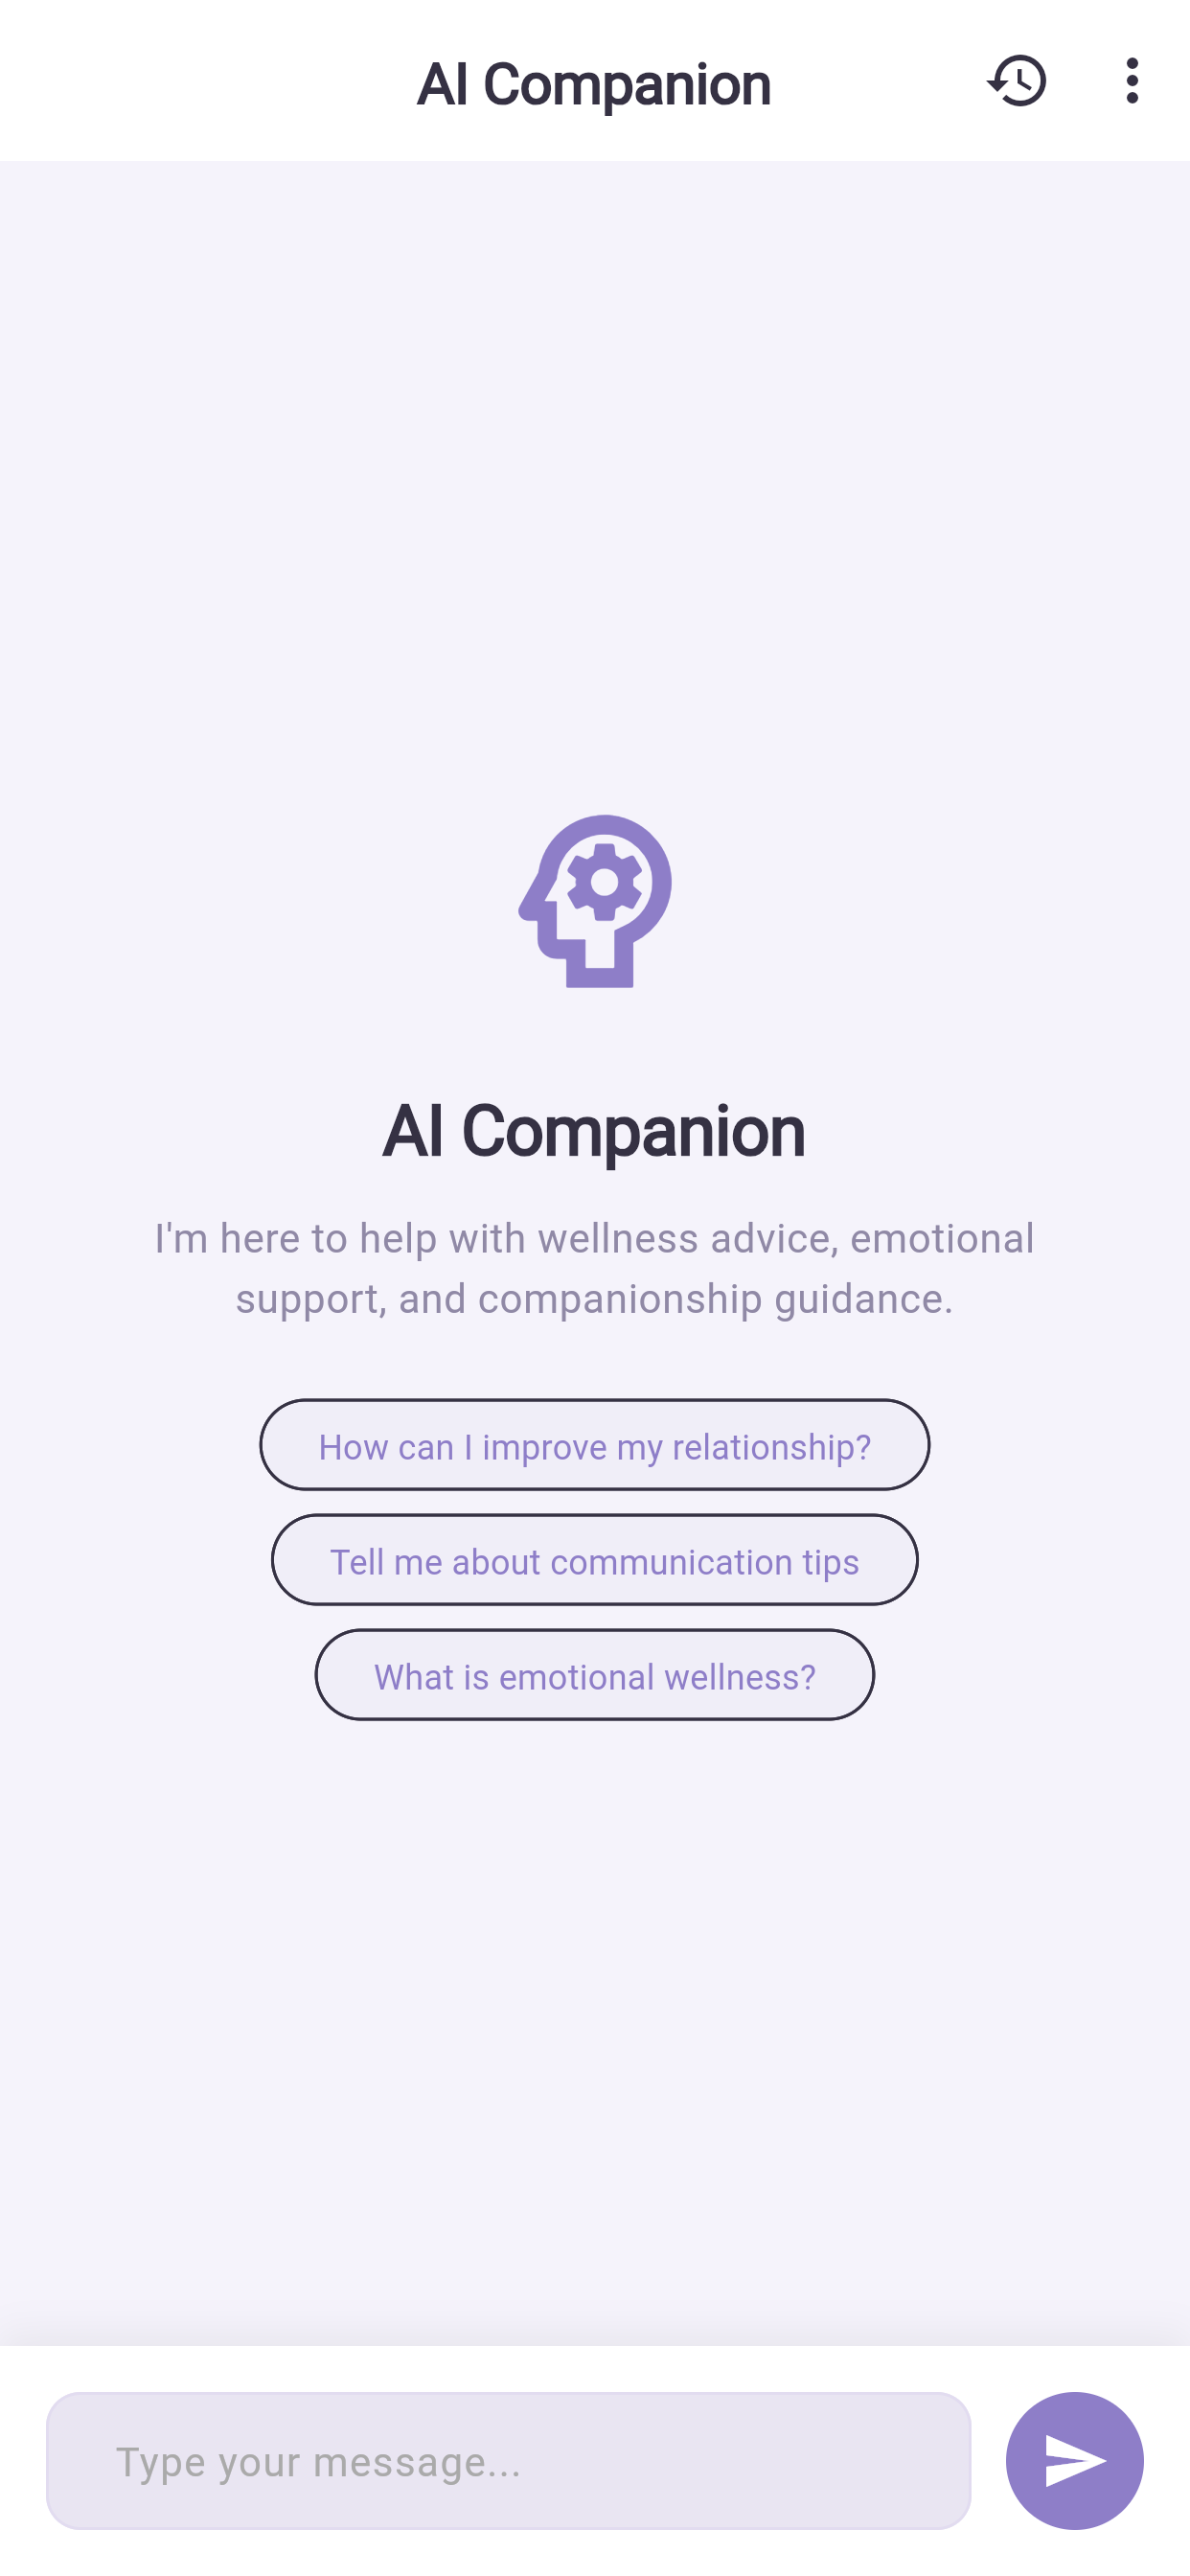
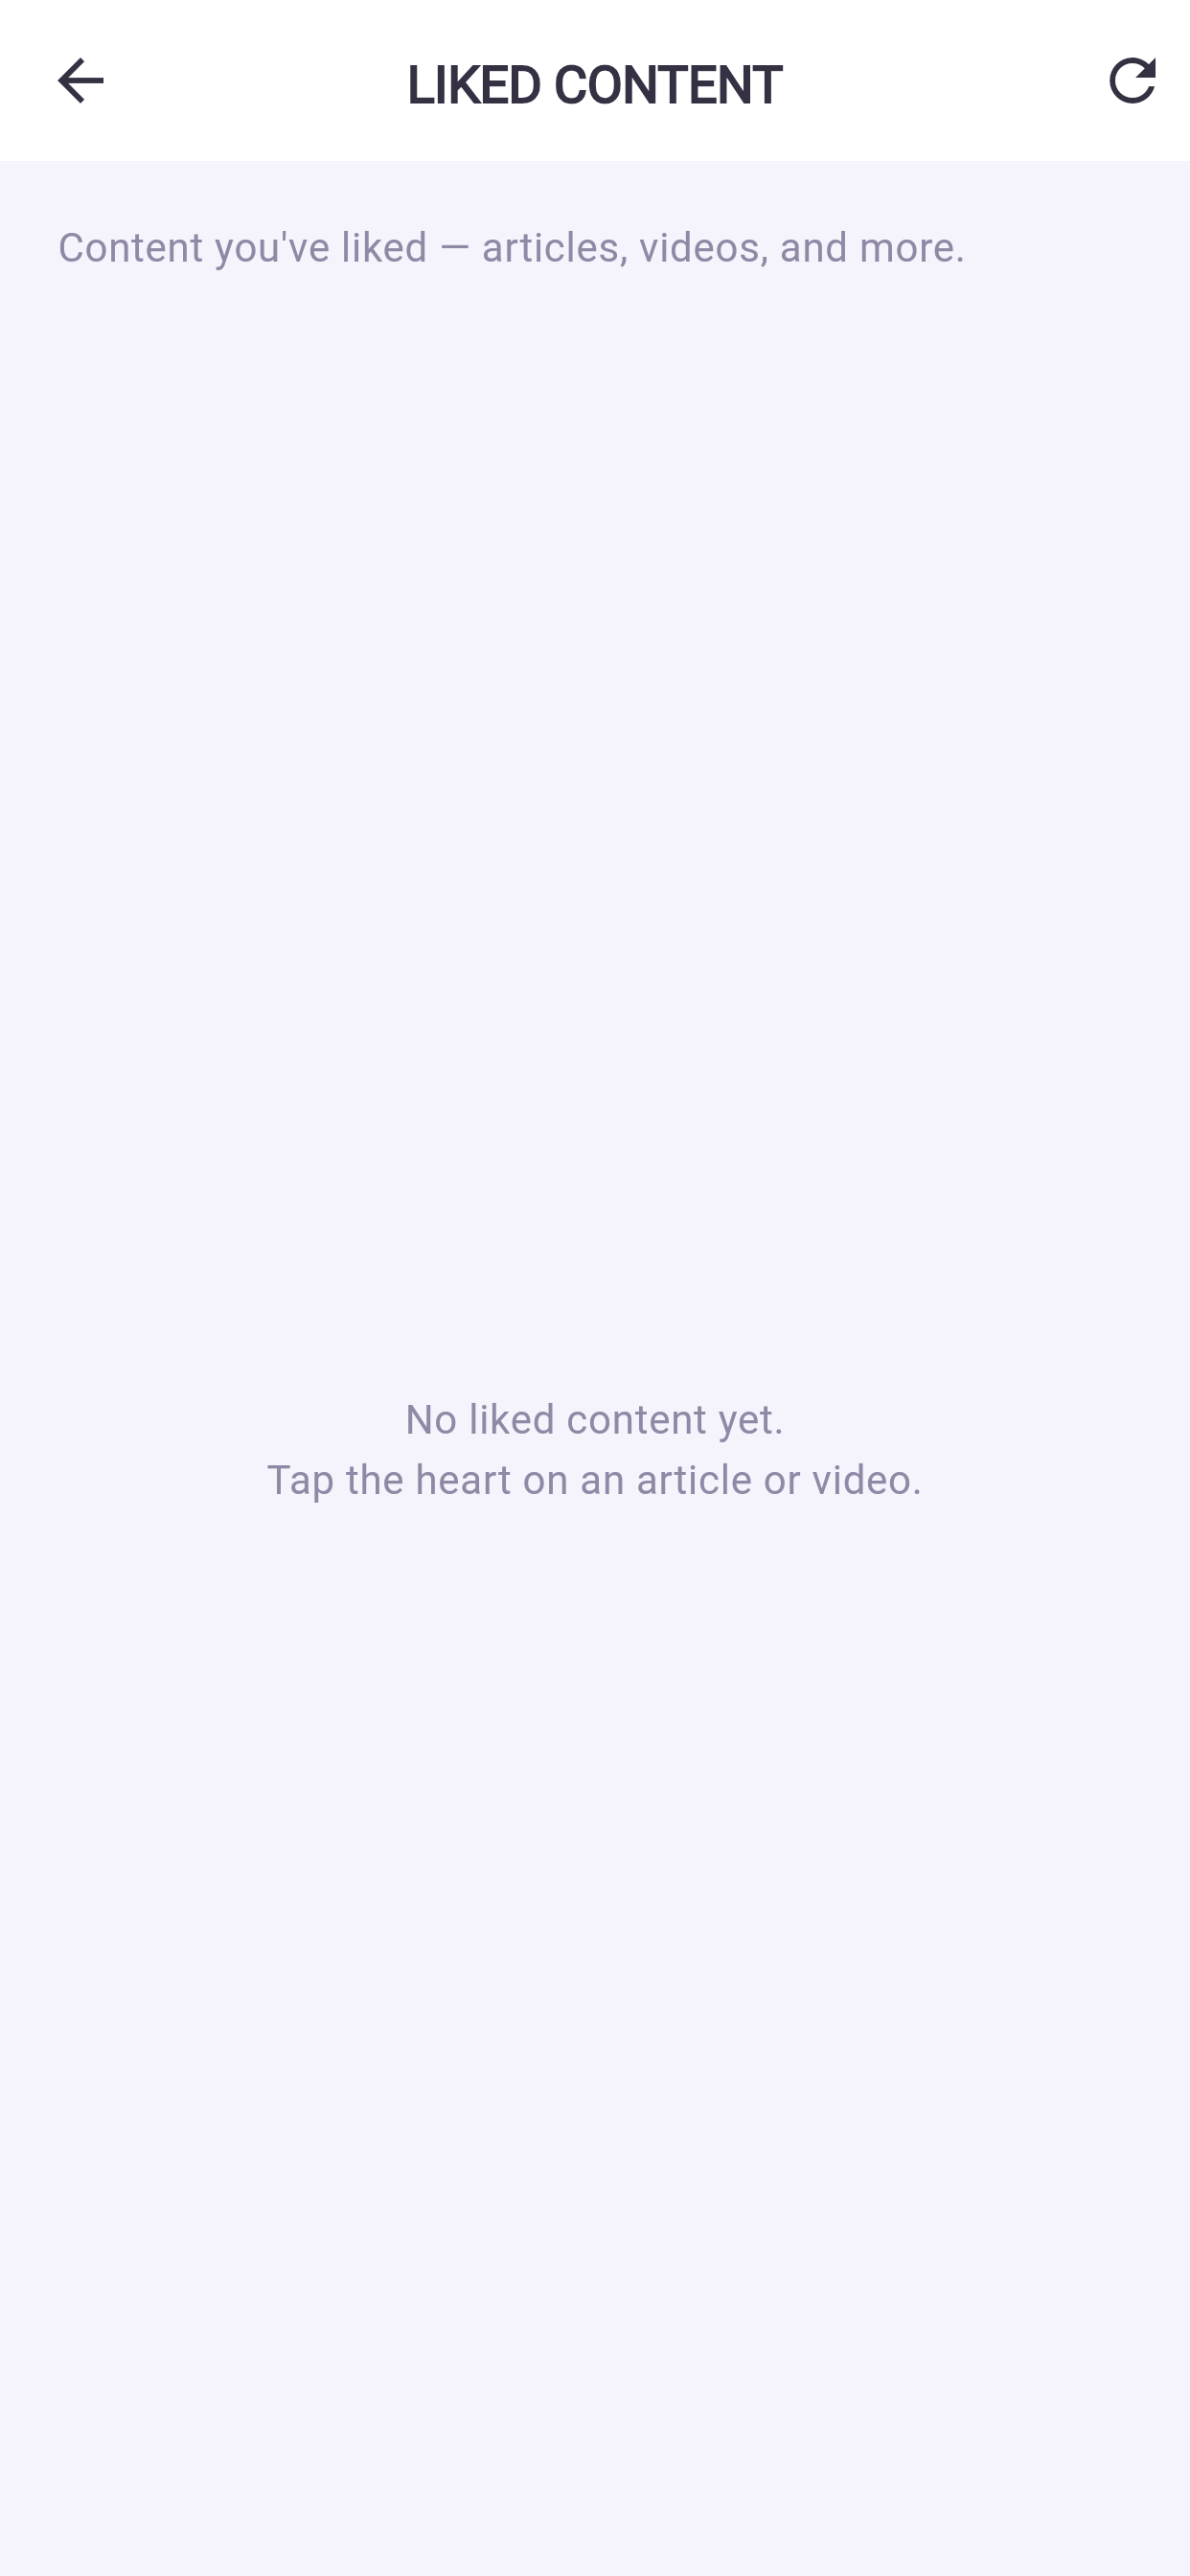
Uw stroom van artikelen en video's.
- Tik op een item om het te lezen.
- Binnenin kunt u het waarderen, er een reactie bij plaatsen, het delen of het bewaren.
- Tik op de naam van een auteur om alles te zien wat die gepubliceerd heeft, en om die te volgen.
- Trek omlaag om te verversen.
Wat u gewaardeerd hebt verschijnt onder Profiel → Gewaardeerd (Liked) → Gewaardeerde inhoud (Liked content).
7Het tabblad Diensten — vinden en boeken#
Waar dit hoofdstuk over gaat — een behandelaar vinden, sessies kopen, en een tijd boeken.
Waarom het uitmaakt — dit is de kern van de app — en kopen en boeken zijn bewust twee aparte stappen, wat mensen verrast.
Wat u ziet — hoe u zoekt en filtert, wat er op het profiel van een behandelaar staat, hoe u veilig afrekent, hoe u een tijd boekt, wat u doet als er niets vrij is, en hoe u de sessie in uw eigen agenda zet.
7.1 Iemand vinden#
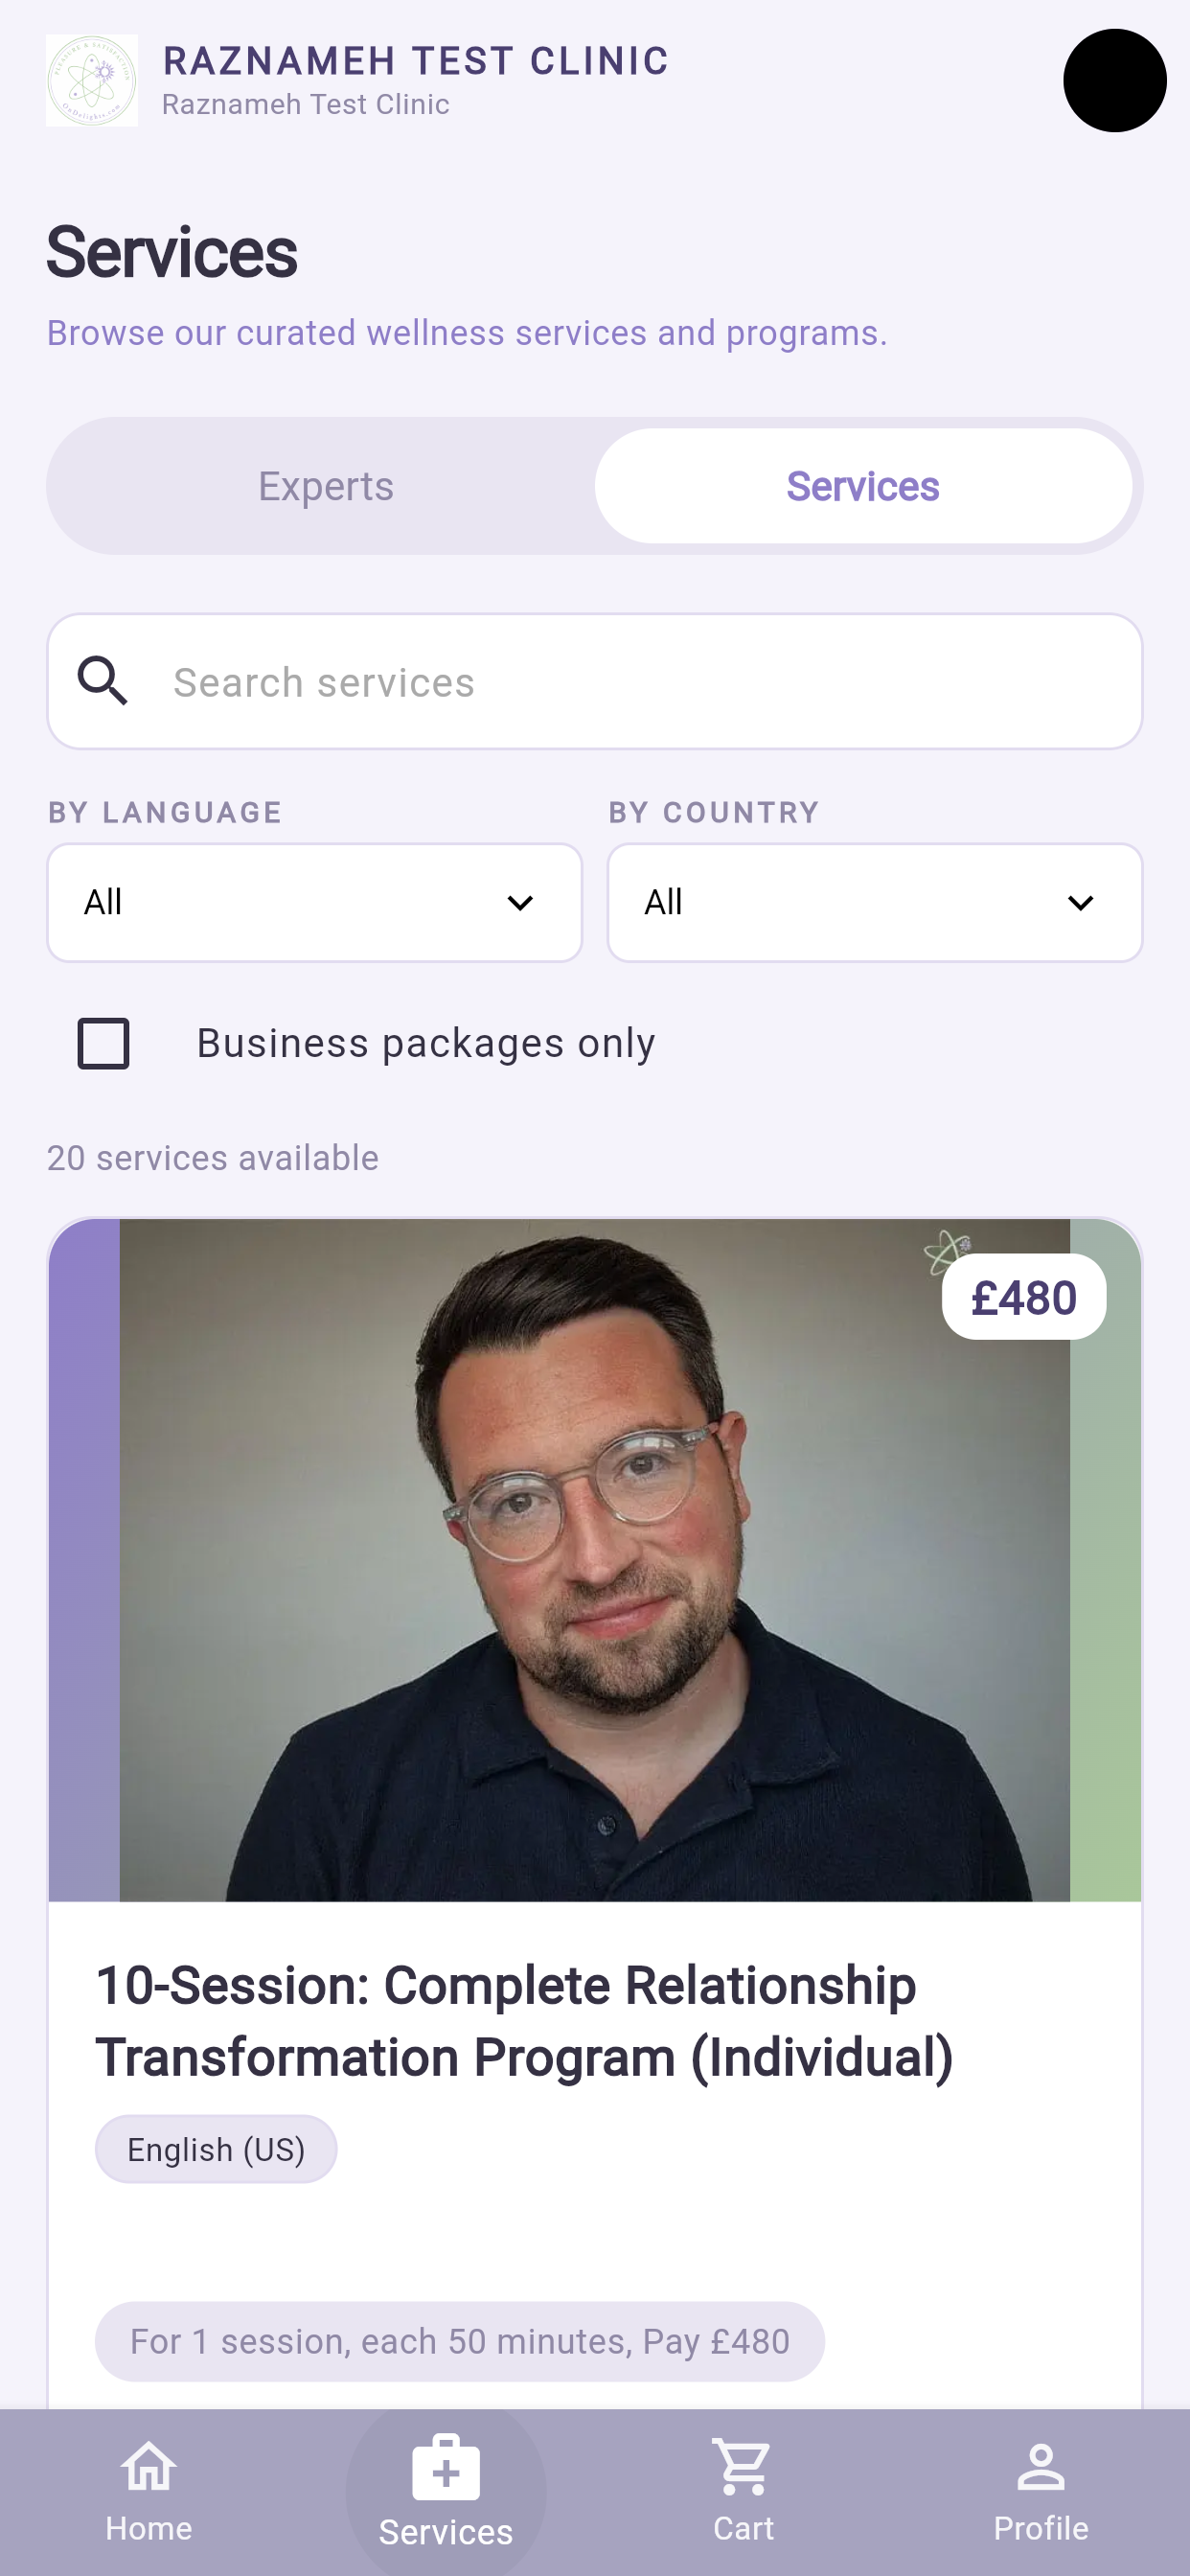
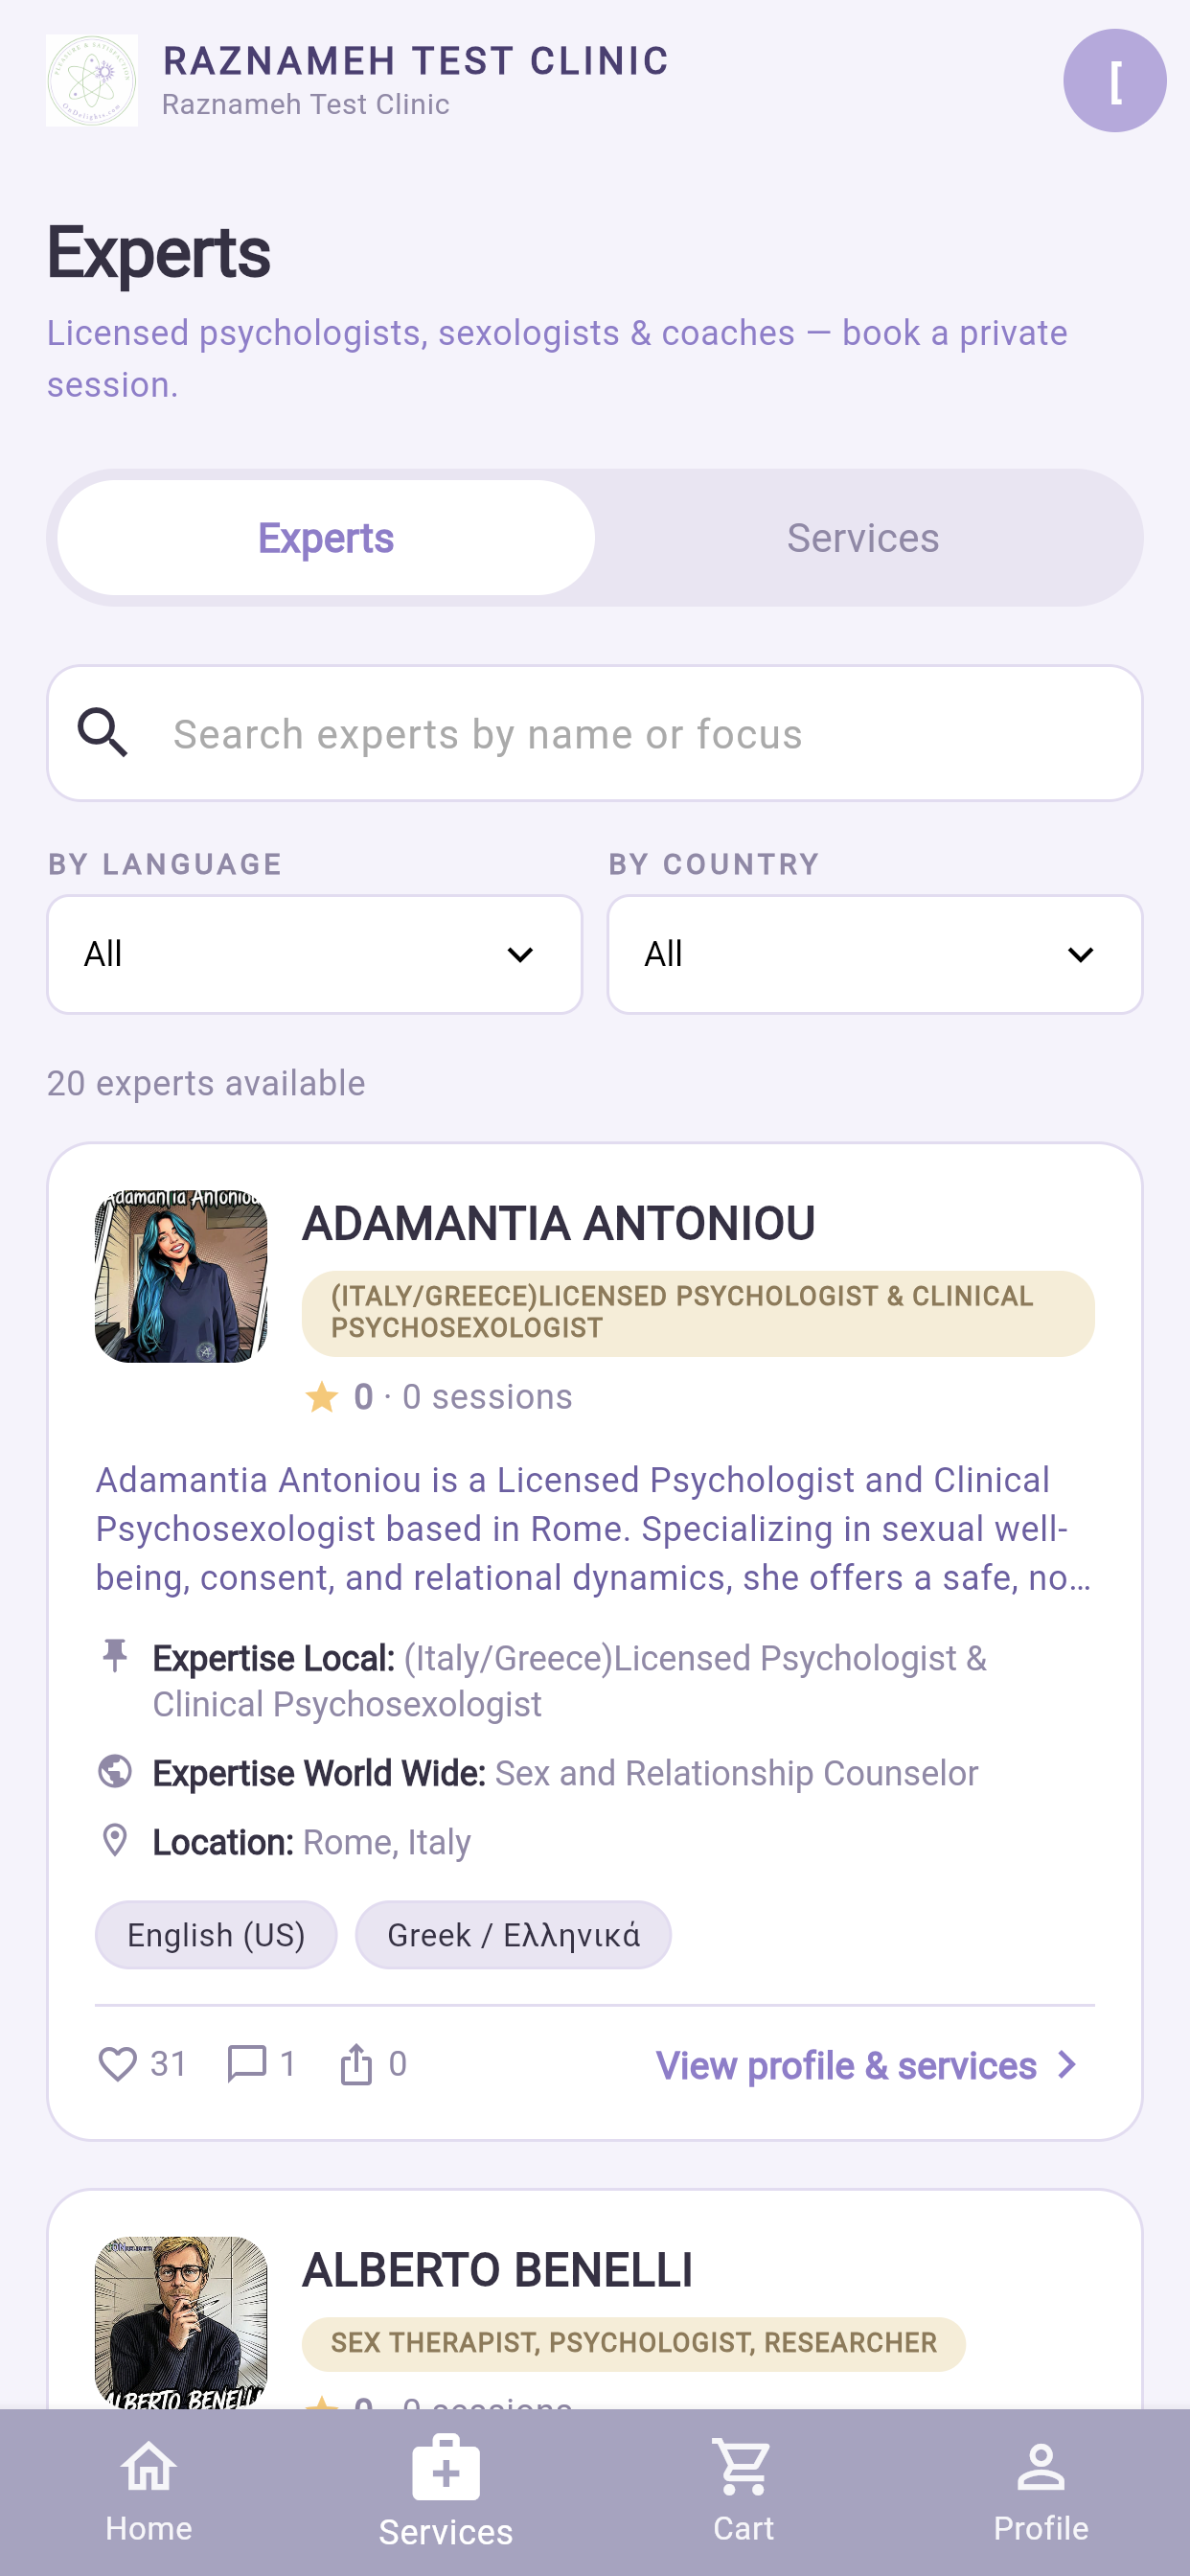
- Open Diensten.
- Zoek, of gebruik de filters — categorie, specialisatie, beoordeling, prijs.
- Tik op een behandelaar om diens profiel te openen.
Op dat profiel: video en foto's, specialisaties, beoordelingen en deelbeoordelingen, diensten met hun duur en prijs, en recensies van mensen die er werkelijk een sessie hadden.
Tik op het hartje om de behandelaar voor later te bewaren.
7.2 Sessies kopen#
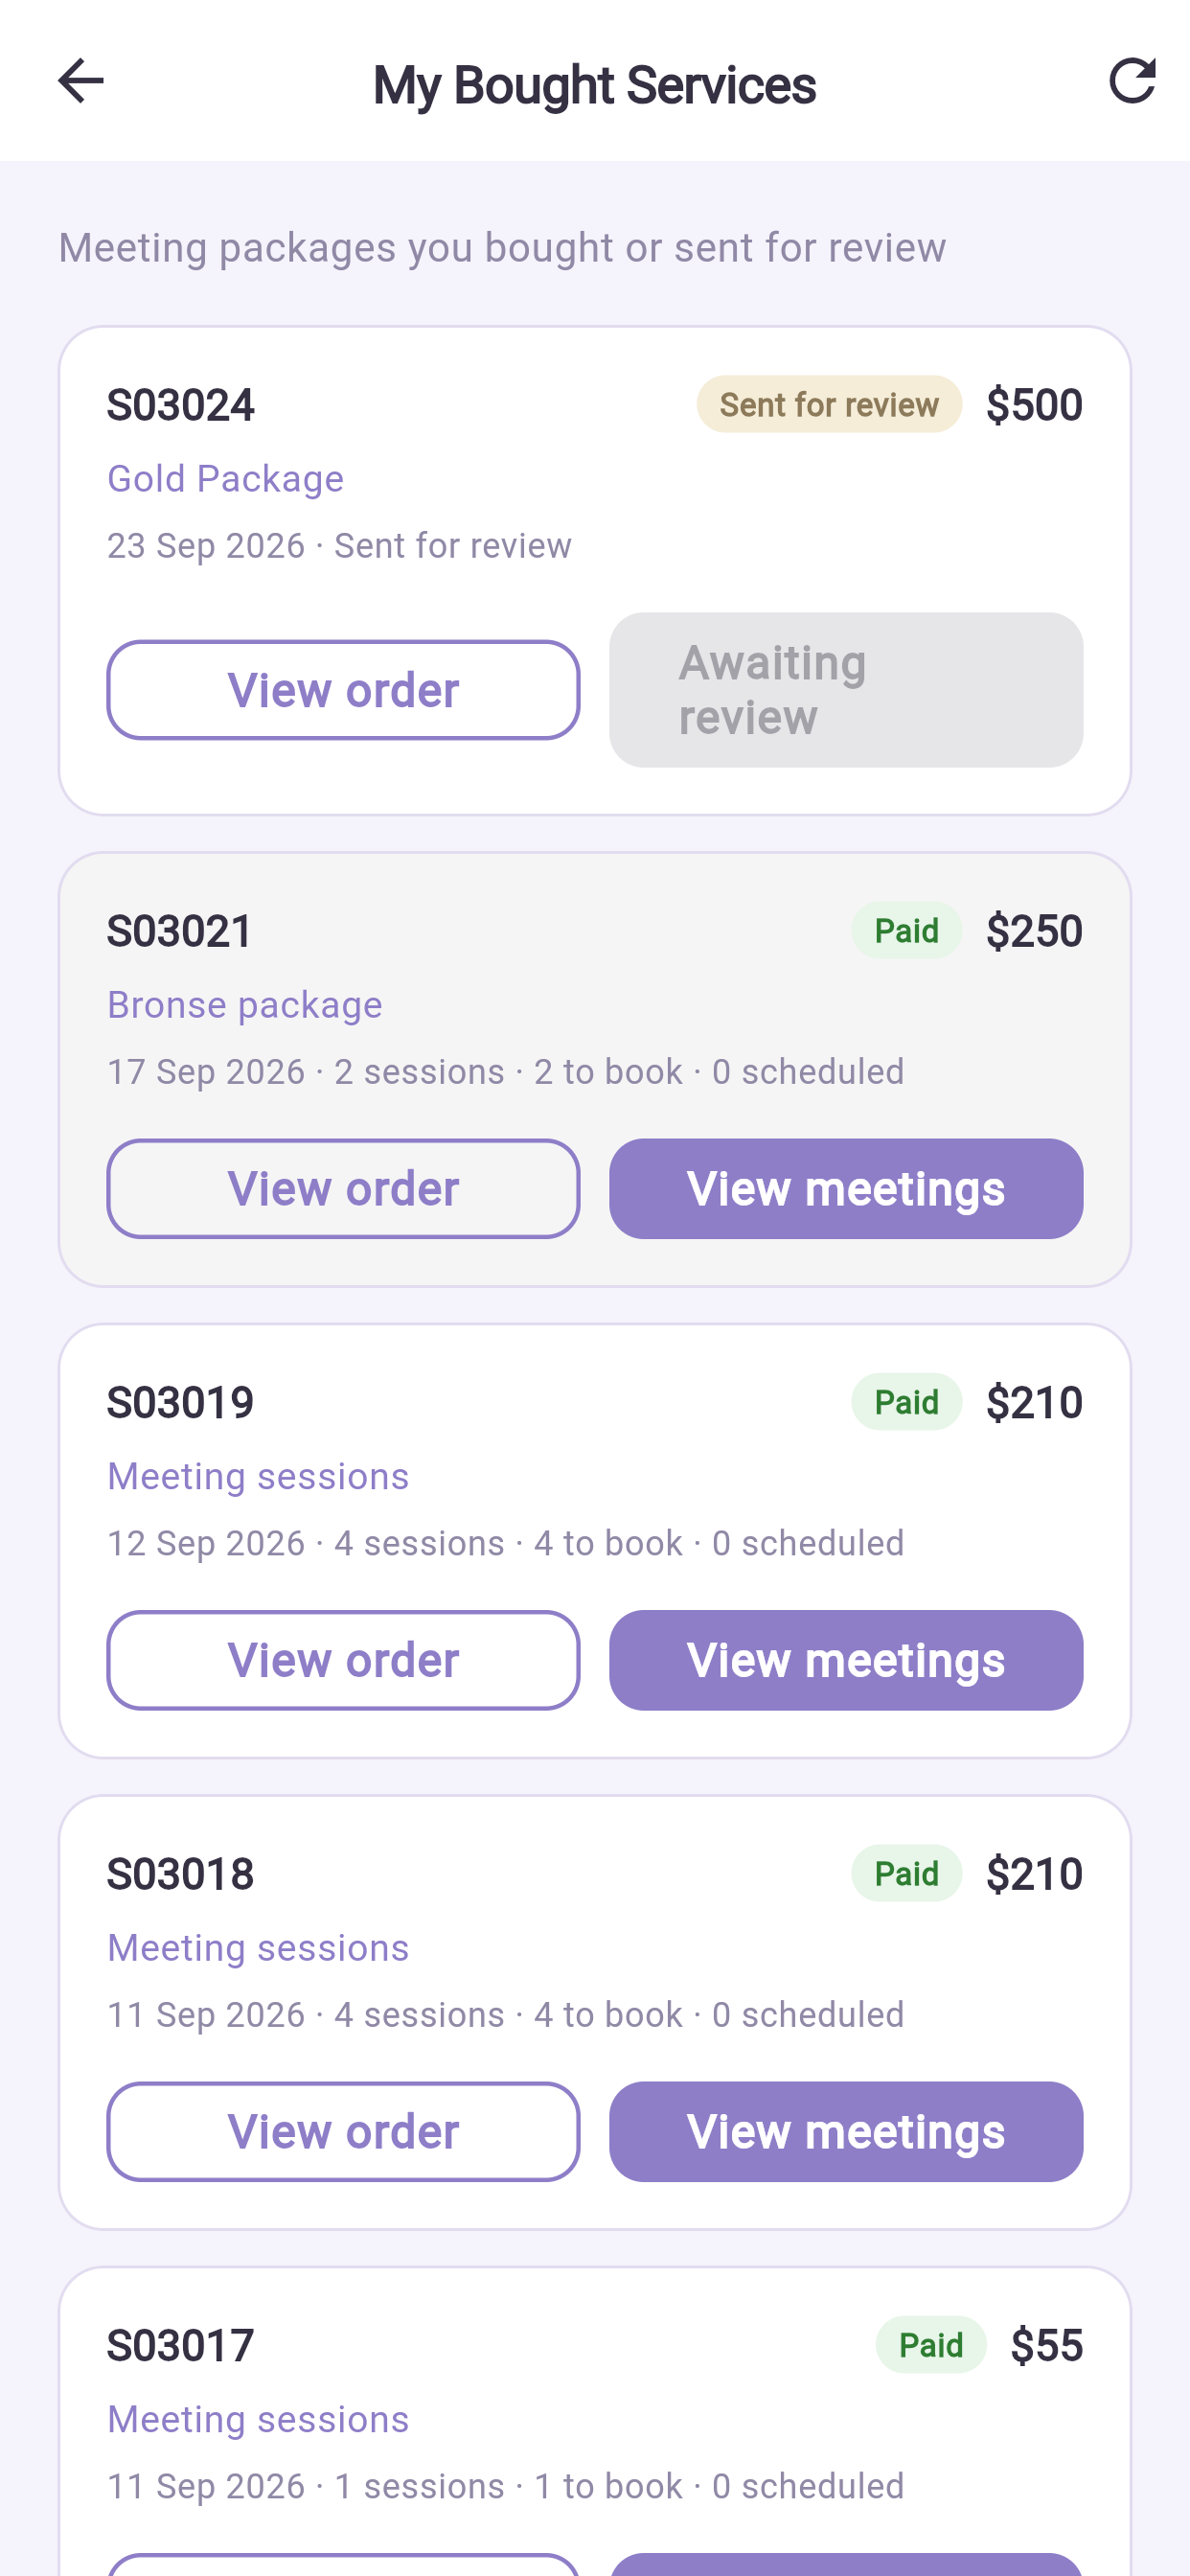
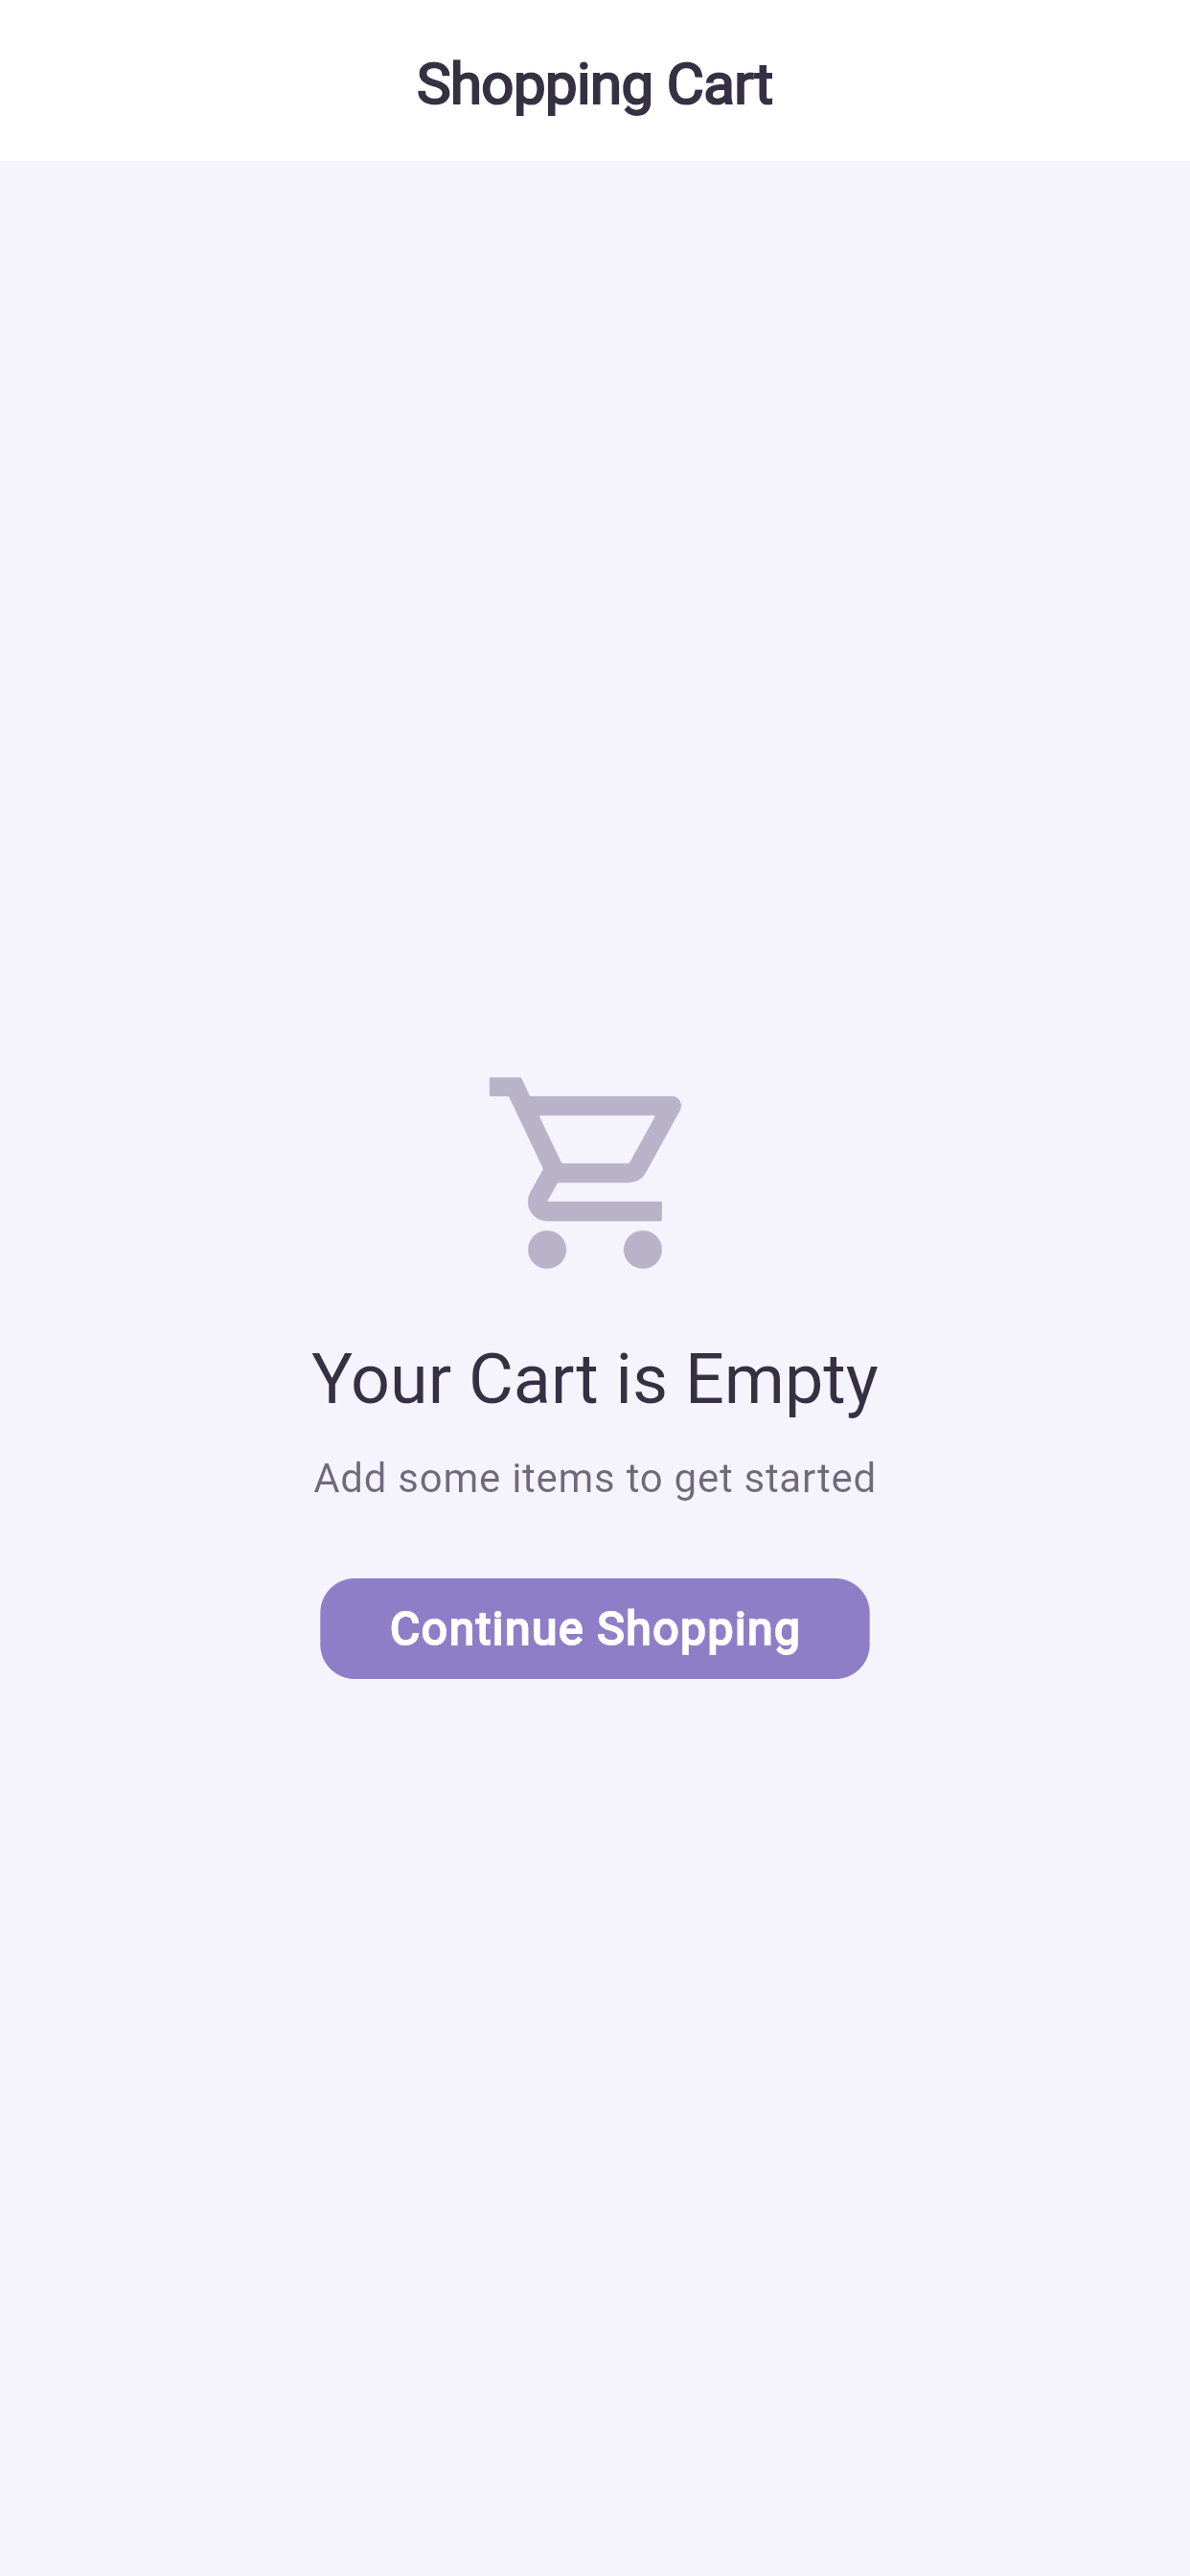
- Kies een dienst en tik op In de mand (Add to basket), of tik op Sessie boeken (Book Meeting) om de mand over te slaan en meteen naar het afrekenen te gaan.
- Deed u het in de mand, open die dan en tik op Afrekenen (Checkout).
- Vul het factuuradres in. Verschijnt er een pakketovereenkomst (Package Service Agreement), lees die dan en vink Ik heb deze pakketovereenkomst gelezen en aanvaard deze aan.
- Tik op Ter beoordeling versturen (Send for review) — er is in de app geen stap met Nu betalen, kaart of PayPal. Medewerkers beoordelen de offerte en mailen daarna een betaallink. Nadat u betaald hebt en het bewijs geüpload is, bevestigen zij en verschijnen uw sessietegoeden.
Kopen en een tijd boeken blijven apart: zodra de bestelling betaald is, plant u in vanaf Profiel → Geboekte sessies.
7.3 Een tijd boeken#
Kopen en boeken zijn aparte stappen, zodat u nu een pakket kunt kopen en later kunt inplannen.
- Profiel → Geboekte sessies (Booked meetings) → tabblad Te boeken (To book).
- Tik op de sessie → Een tijd boeken (Book a time).
- Controleer de tijdzone bovenaan de boekingspagina. Wijzig die als u op reis bent.
- Kies een datum en daarna een tijd.
- Vul het boekingsformulier in, met de intakevragen die erbij staan — de behandelaar leest die vóór uw sessie.
- Tik op Boeking bevestigen (Confirm booking).
7.4 Als er niets vrij is#
Tik op Op de wachtlijst (Join the waitlist) en kies de dagen of tijden die u zouden schikken. Annuleert iemand, dan wordt het tijdvak u automatisch aangeboden. Zo'n aanbod verloopt, dus reageer wanneer de melding binnenkomt.
7.5 Zet het in uw eigen agenda#
Tik op de bevestiging op Aan agenda toevoegen (Add to calendar). Dat zet de sessie in de agenda-app van uw telefoon, zodat u naast de herinnering van het Platform ook die van uw eigen telefoon krijgt.
8Een sessie bijwonen op uw telefoon#
Waar dit hoofdstuk over gaat — alles rondom het bijwonen van een sessie op uw telefoon.
Waarom het uitmaakt — een videogesprek op een telefoon gaat prima als u zich twee minuten voorbereidt, en is vervelend als u dat niet doet.
Wat u ziet — wat u vooraf doet, hoe u deelneemt, hoe u het gesprek stabiel houdt, en de twee knoppen die er achteraf bij komen.
8.1 Vooraf#
- Kijk of u op een stabiele verbinding zit. Wifi is voor video beter dan mobiele data.
- Hang aan de lader, of begin boven de 50% accu — videogesprekken trekken een telefoon snel leeg.
- Gebruik een koptelefoon. Dat voorkomt echo en houdt het gesprek privé.
- Neem de eerste keer een paar minuten voorsprong, om camera en microfoon na te lopen.
8.2 Deelnemen#
- Profiel → Geboekte sessies → tabblad Ingepland (Scheduled).
- Tik op de sessie → Deelnemen (Join).
Deelnemen wordt kort voor de begintijd actief. Staat de knop grijs, dan bent u vroeg.
Geef toegang tot camera en microfoon wanneer erom gevraagd wordt. Weigerde u dat eerder, dan kan het gesprek niet beginnen — herstel het in de instellingen van uw telefoon (§17).
8.3 Tijdens#
- Houd de app op de voorgrond. Wegschakelen kan uw video laten wegvallen.
- Bevriest uw beeld, zet de video dan uit en weer aan voordat u het gesprek beëindigt.
- Een niet-storen-stand voorkomt dat andere meldingen de sessie onderbreken.
8.4 Achteraf#
Er komen twee knoppen bij de sessie:
- Feedback geven (Give feedback) — een korte vragenlijst die uw praktijk gebruikt om beter te worden.
- Een beoordeling schrijven (Write a review) — openbaar, op het profiel van de behandelaar.
9Vanaf uw telefoon verzetten of annuleren#
Waar dit hoofdstuk over gaat — een geboekte sessie verzetten of annuleren.
Waarom het uitmaakt — of er kosten bij komen hangt af van hoe lang van tevoren u het doet — en het bedrag staat altijd op het scherm voordat u bevestigt.
Wat u ziet — de vijf stappen om te verzetten of te annuleren, waar de kosten verschijnen, en waar u de vastlegging van elke annulering op uw account vindt.
- Profiel → Geboekte sessies → Ingepland.
- Tik op de sessie → Verzetten / annuleren (Reschedule / cancel).
- Kies Verzetten of Annuleren.
- Lees de samenvatting. Ze toont eventuele kosten, en of uw sessietegoed terugkomt.
- Bevestig.
De kosten staan altijd op het scherm voordat u bevestigt. U krijgt nooit annuleringskosten in rekening die u niet eerst gezien hebt.
Een sessie waaraan al kosten hangen, draagt in de lijst het label Kosten van toepassing (Fee applies).
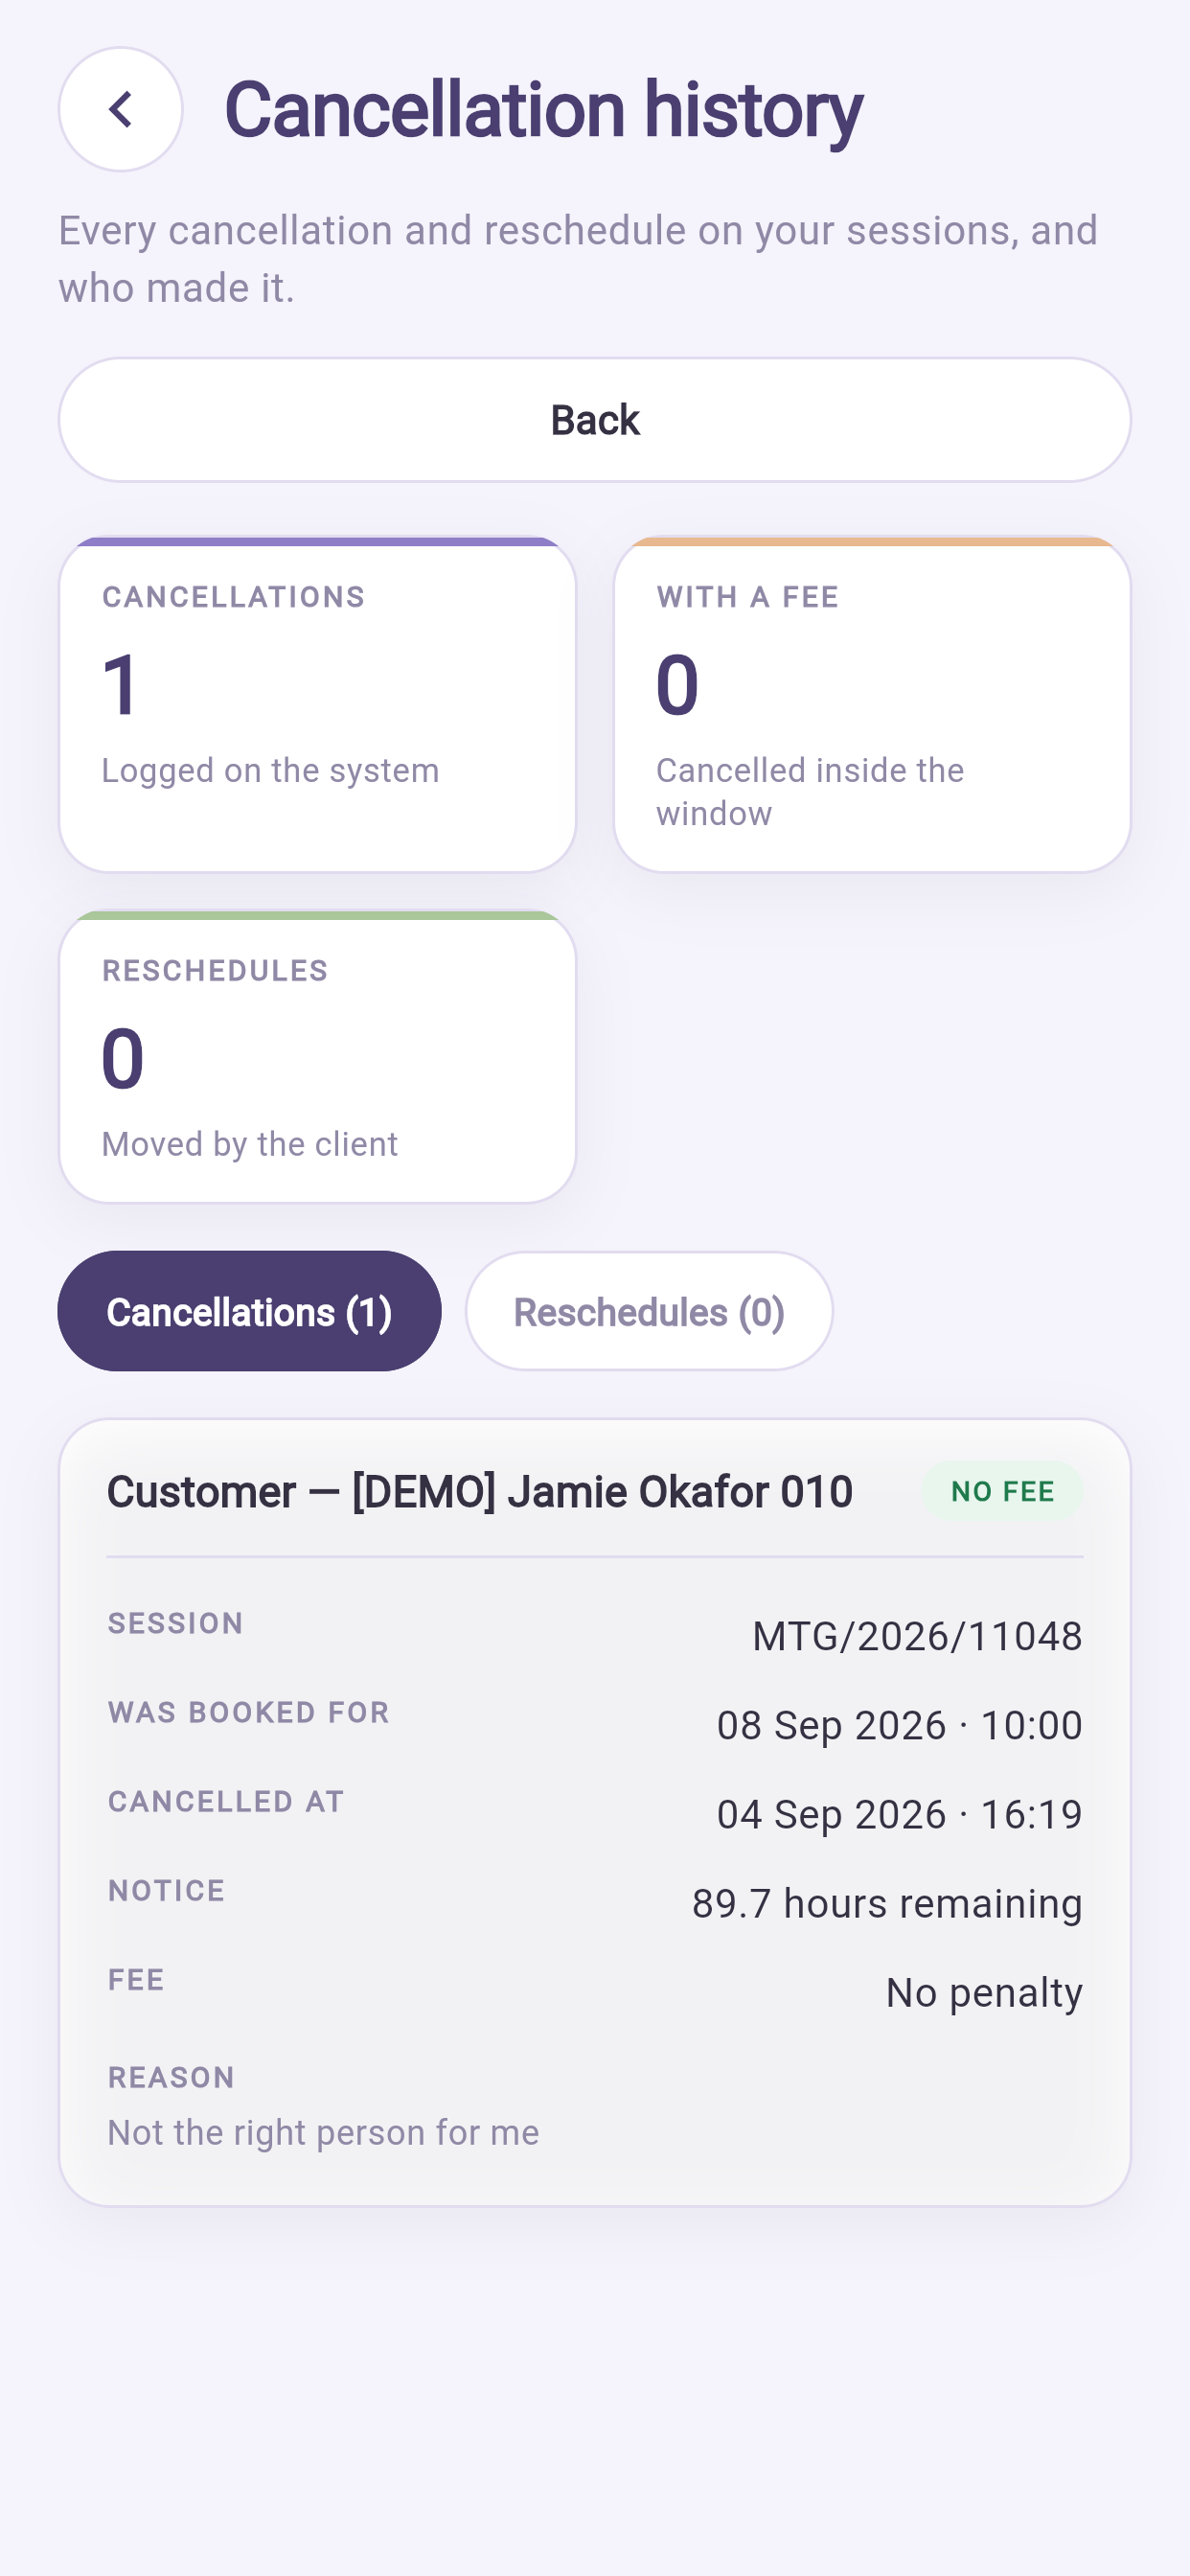
Om elke annulering op uw account te zien, met wie het gedaan heeft, opent u Profiel → Annuleringsgeschiedenis (Cancellation history). Dat is het scherm om te openen voordat u een bedrag aanvecht.
10Het tabblad Profiel#
Waar dit hoofdstuk over gaat — het knooppunt voor alles wat over u gaat.
Waarom het uitmaakt — uw sessies, uw geld, uw berichten en uw instellingen zitten allemaal achter dit ene tabblad.
Wat u ziet — een plattegrond van de zes onderdelen, daarna het scherm dat u het meest gebruikt (Geboekte sessies en de vier totalen), plus facturatie en ondersteuning.
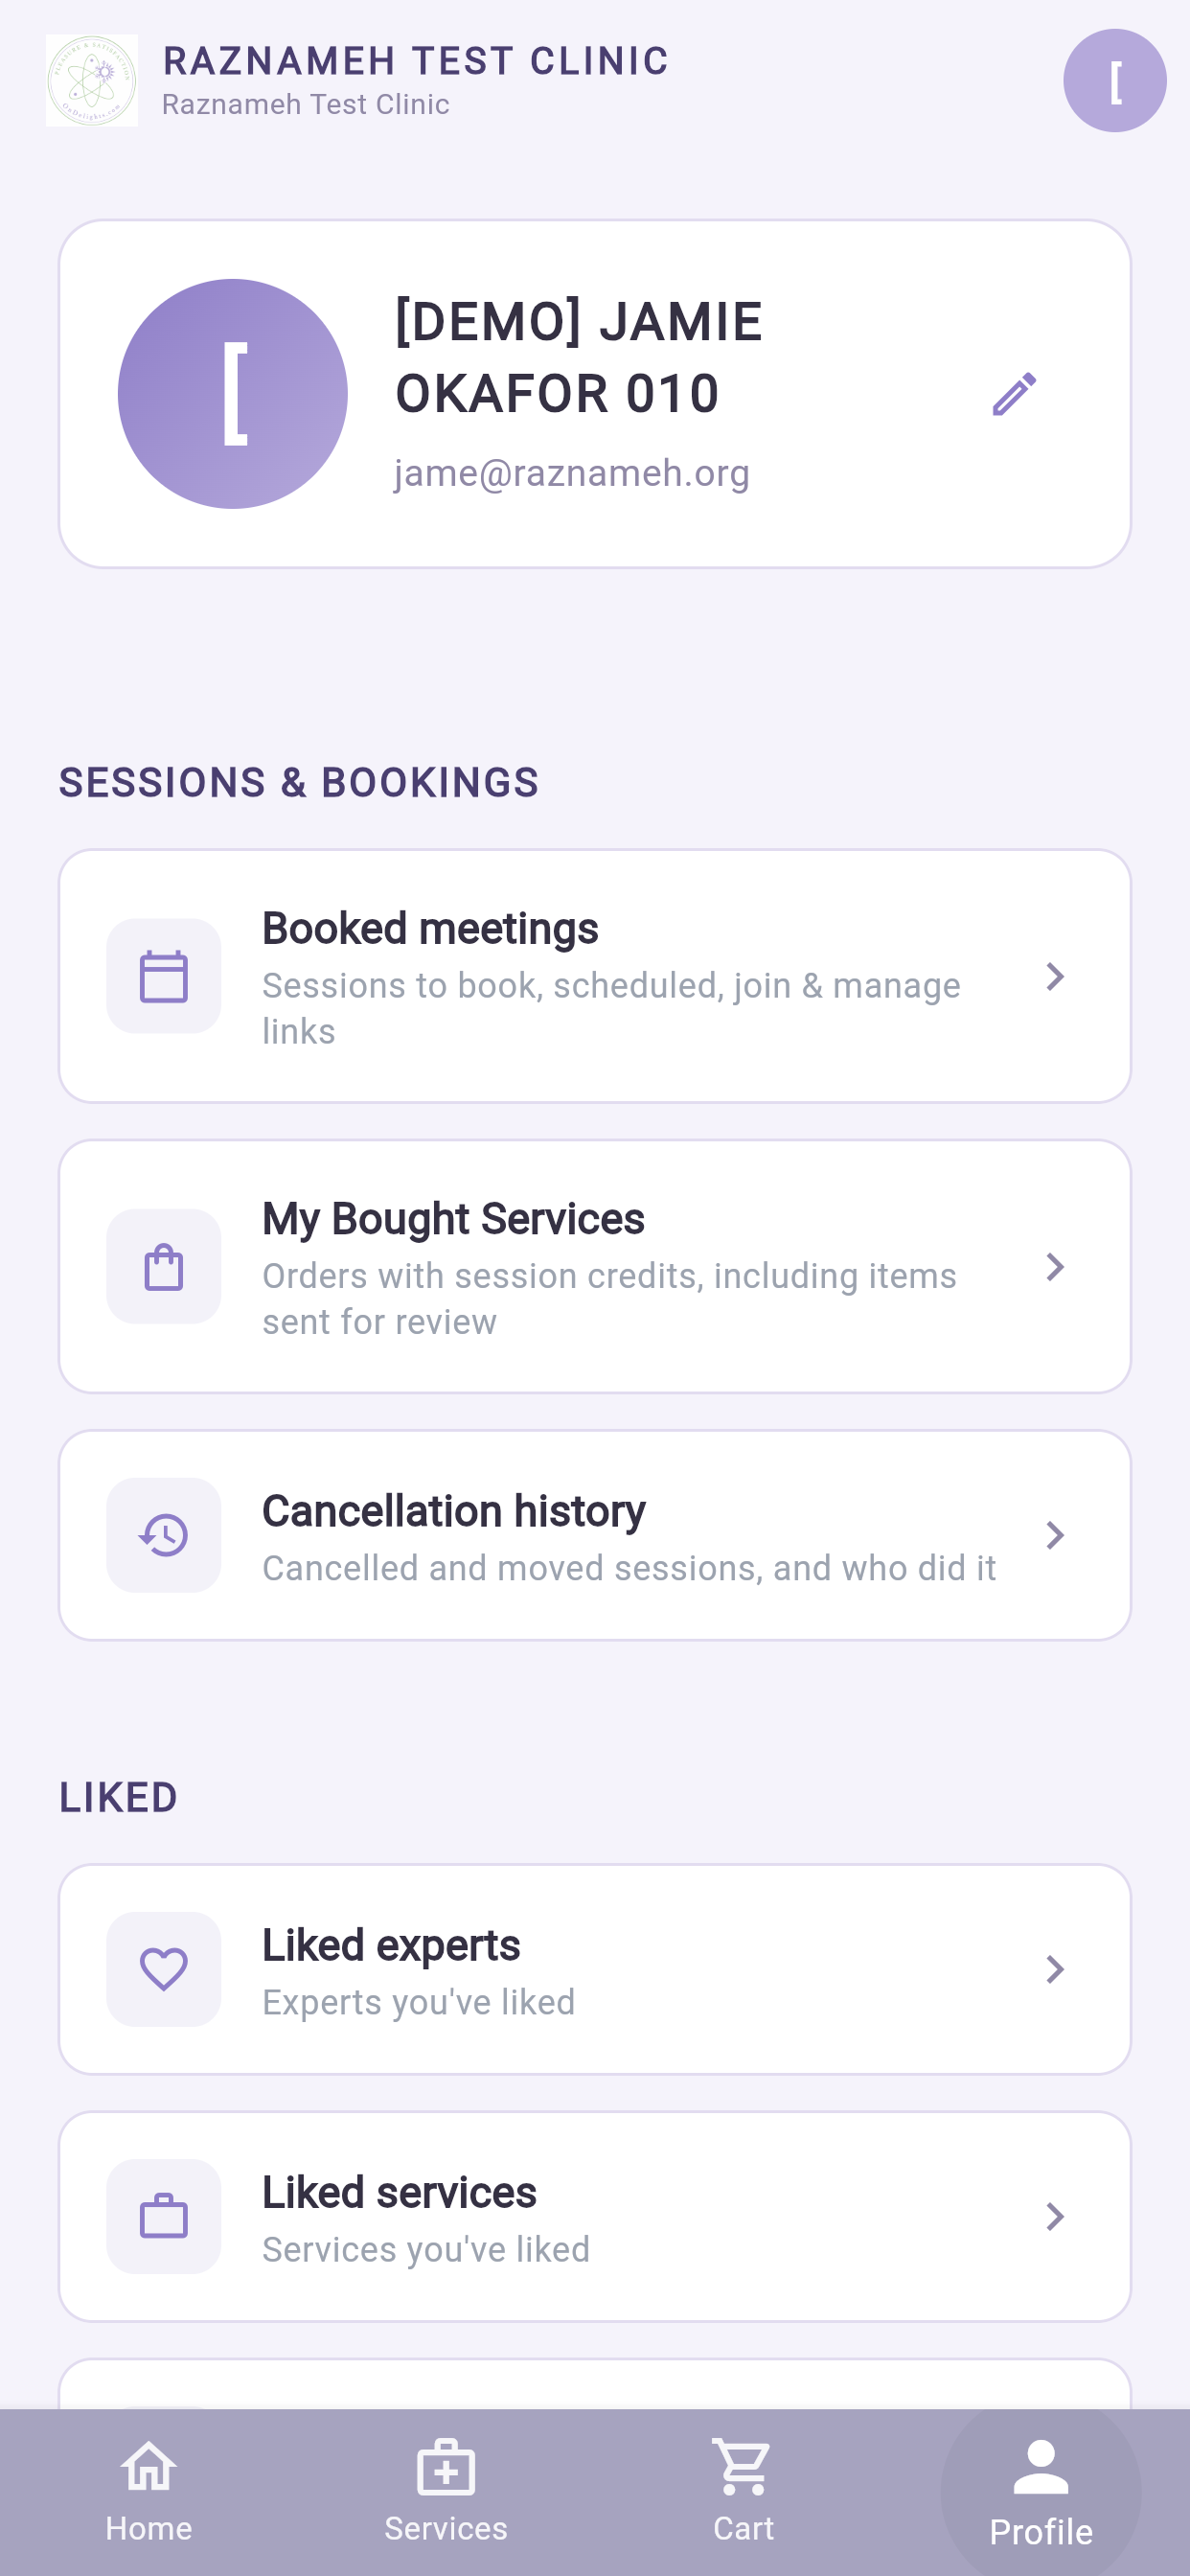
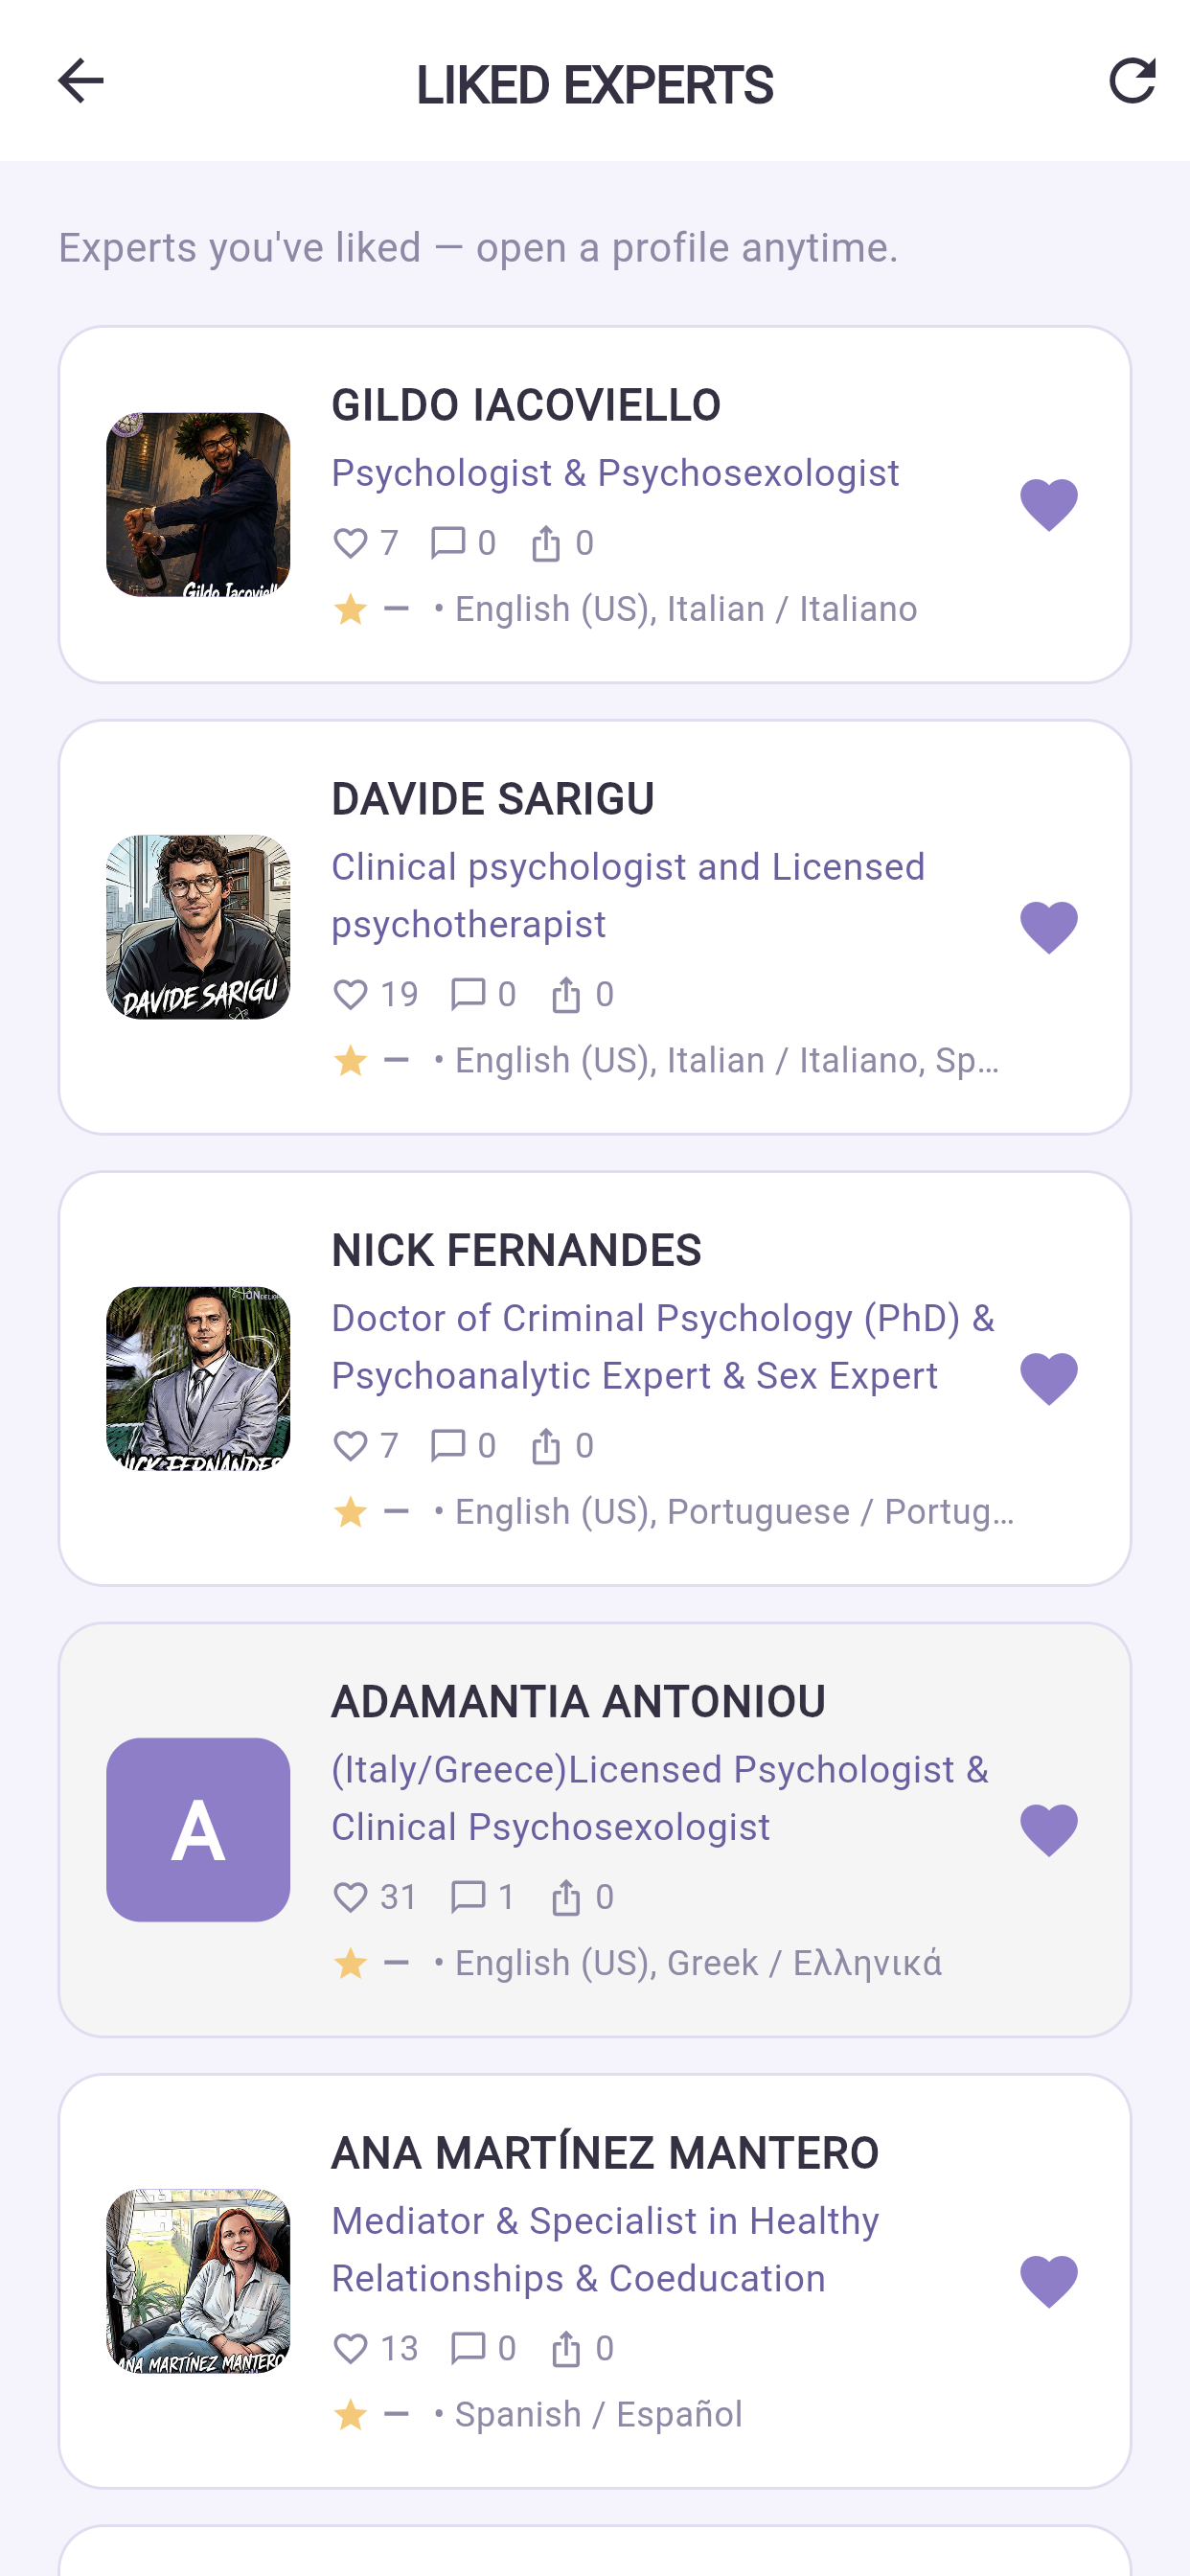
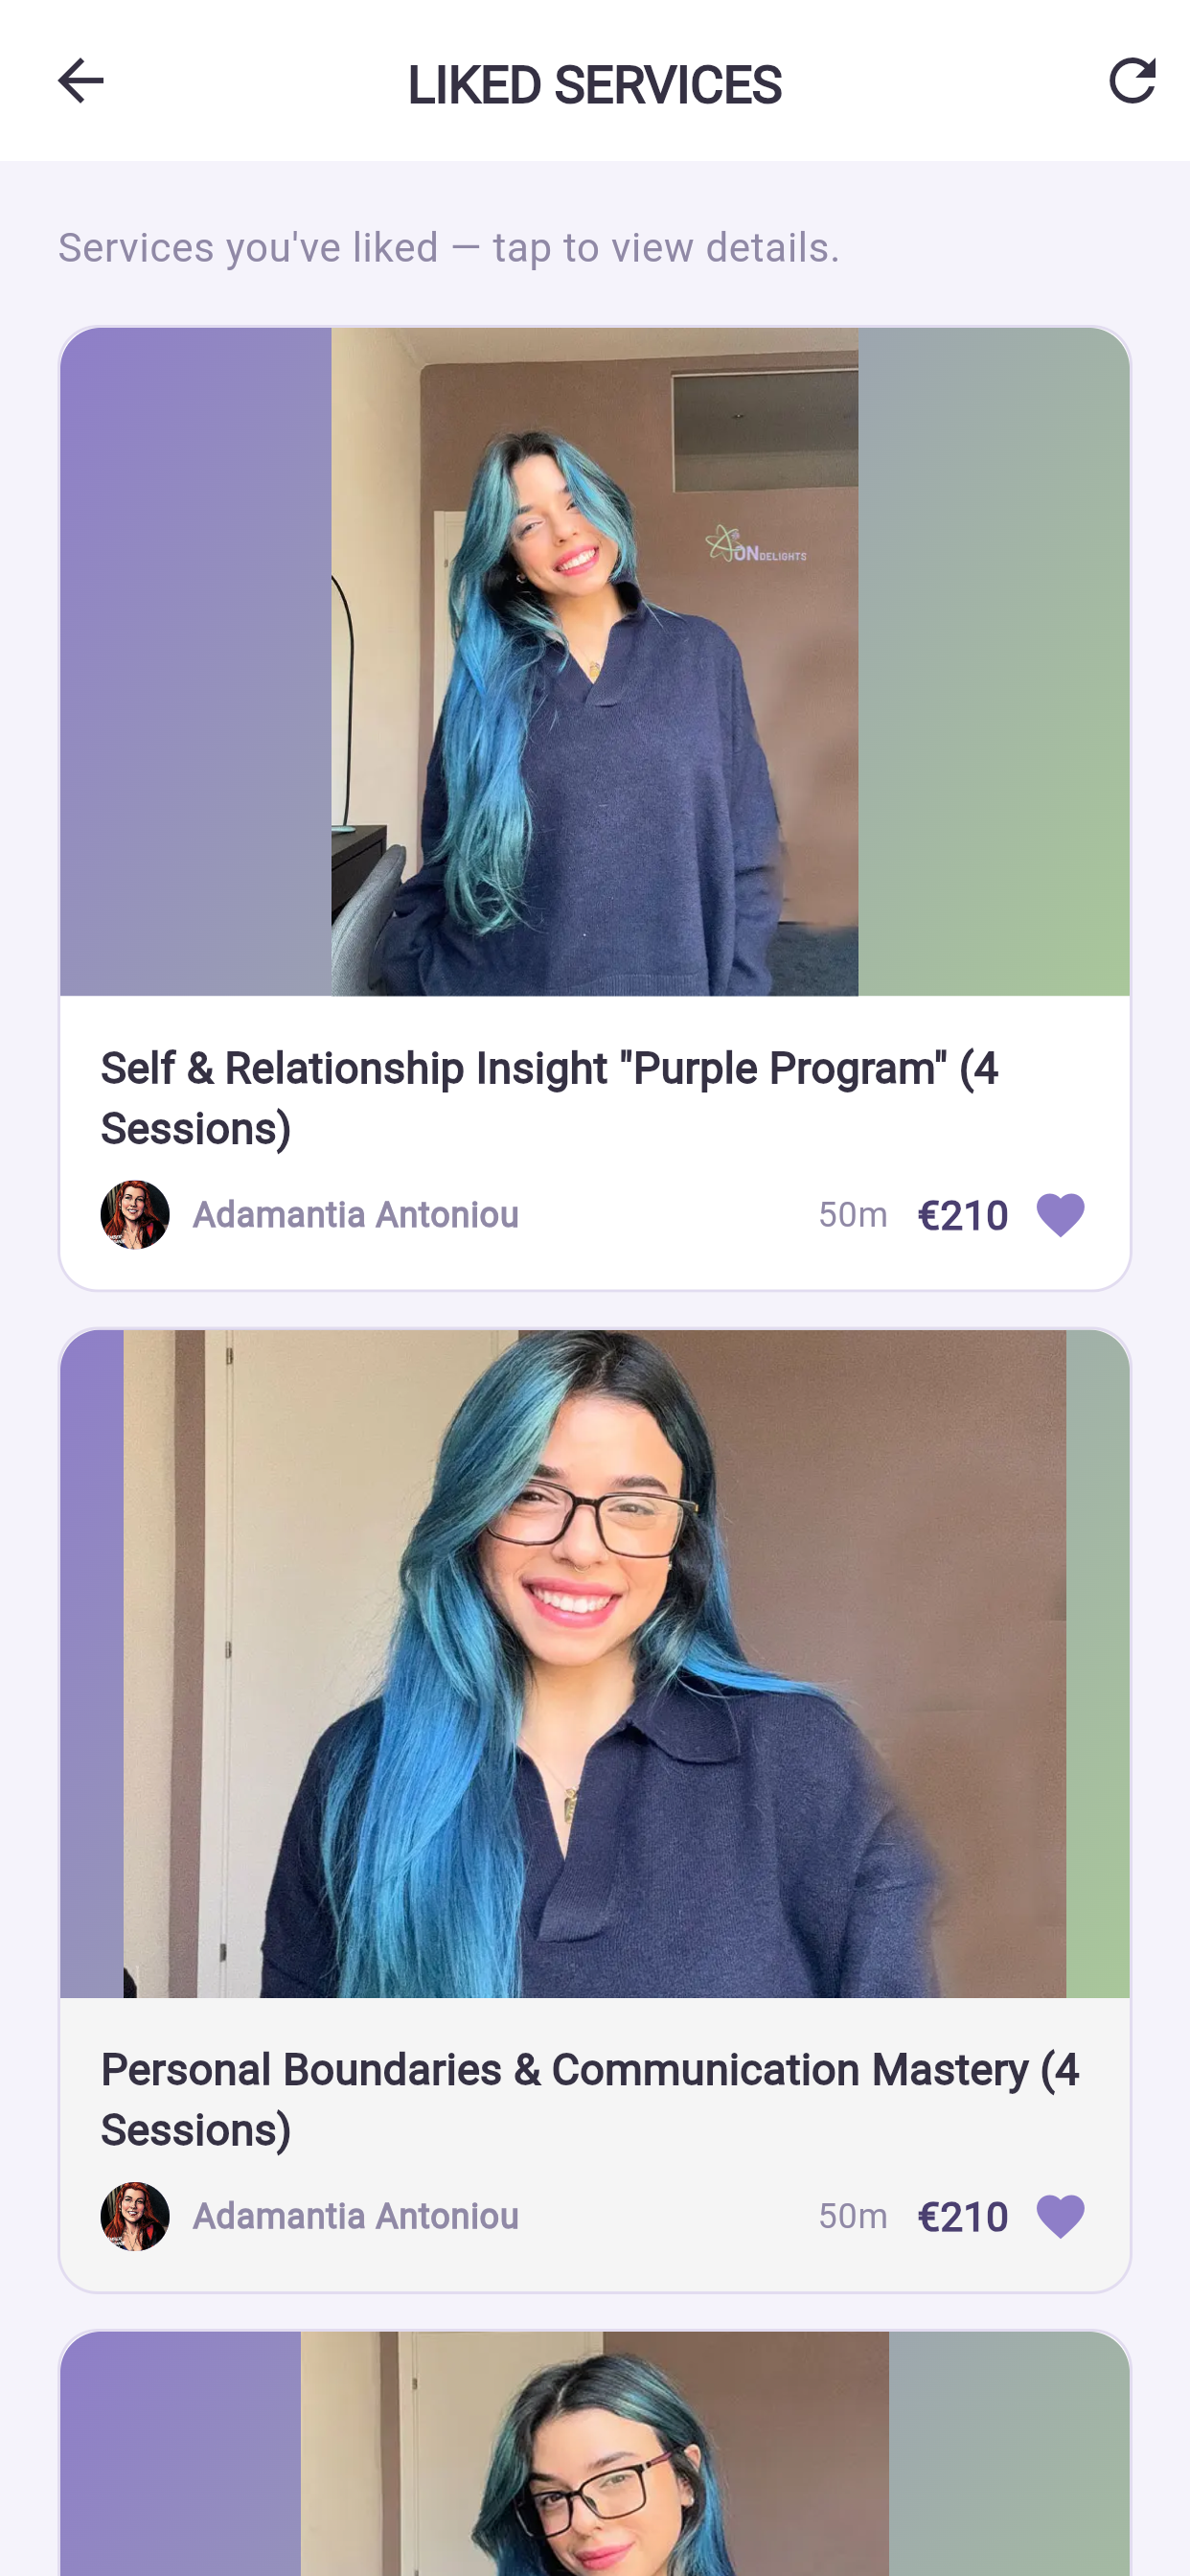
Het knooppunt voor alles wat over u gaat.
| Onderdeel | Wat erin zit |
|---|---|
| Sessies en boekingen (Sessions & Bookings) | Geboekte sessies · Mijn gekochte diensten · Annuleringsgeschiedenis |
| Gewaardeerd (Liked) | Gewaardeerde behandelaren · Gewaardeerde diensten · Gewaardeerde inhoud |
| Berichten en vragen (Messages & Questions) | Meldingen · Chats met behandelaren · Groepschats · Mijn vragen |
| Facturatie (Billing) | Factuuradres · Facturen |
| Vertrouwen en ondersteuning (Trust & Support) | Leeftijd en identiteit · Ondersteuningstickets |
| Account (Account) | Instellingen, beveiliging, privacy, afmelden |
10.1 Geboekte sessies — het scherm dat u het meest gebruikt#
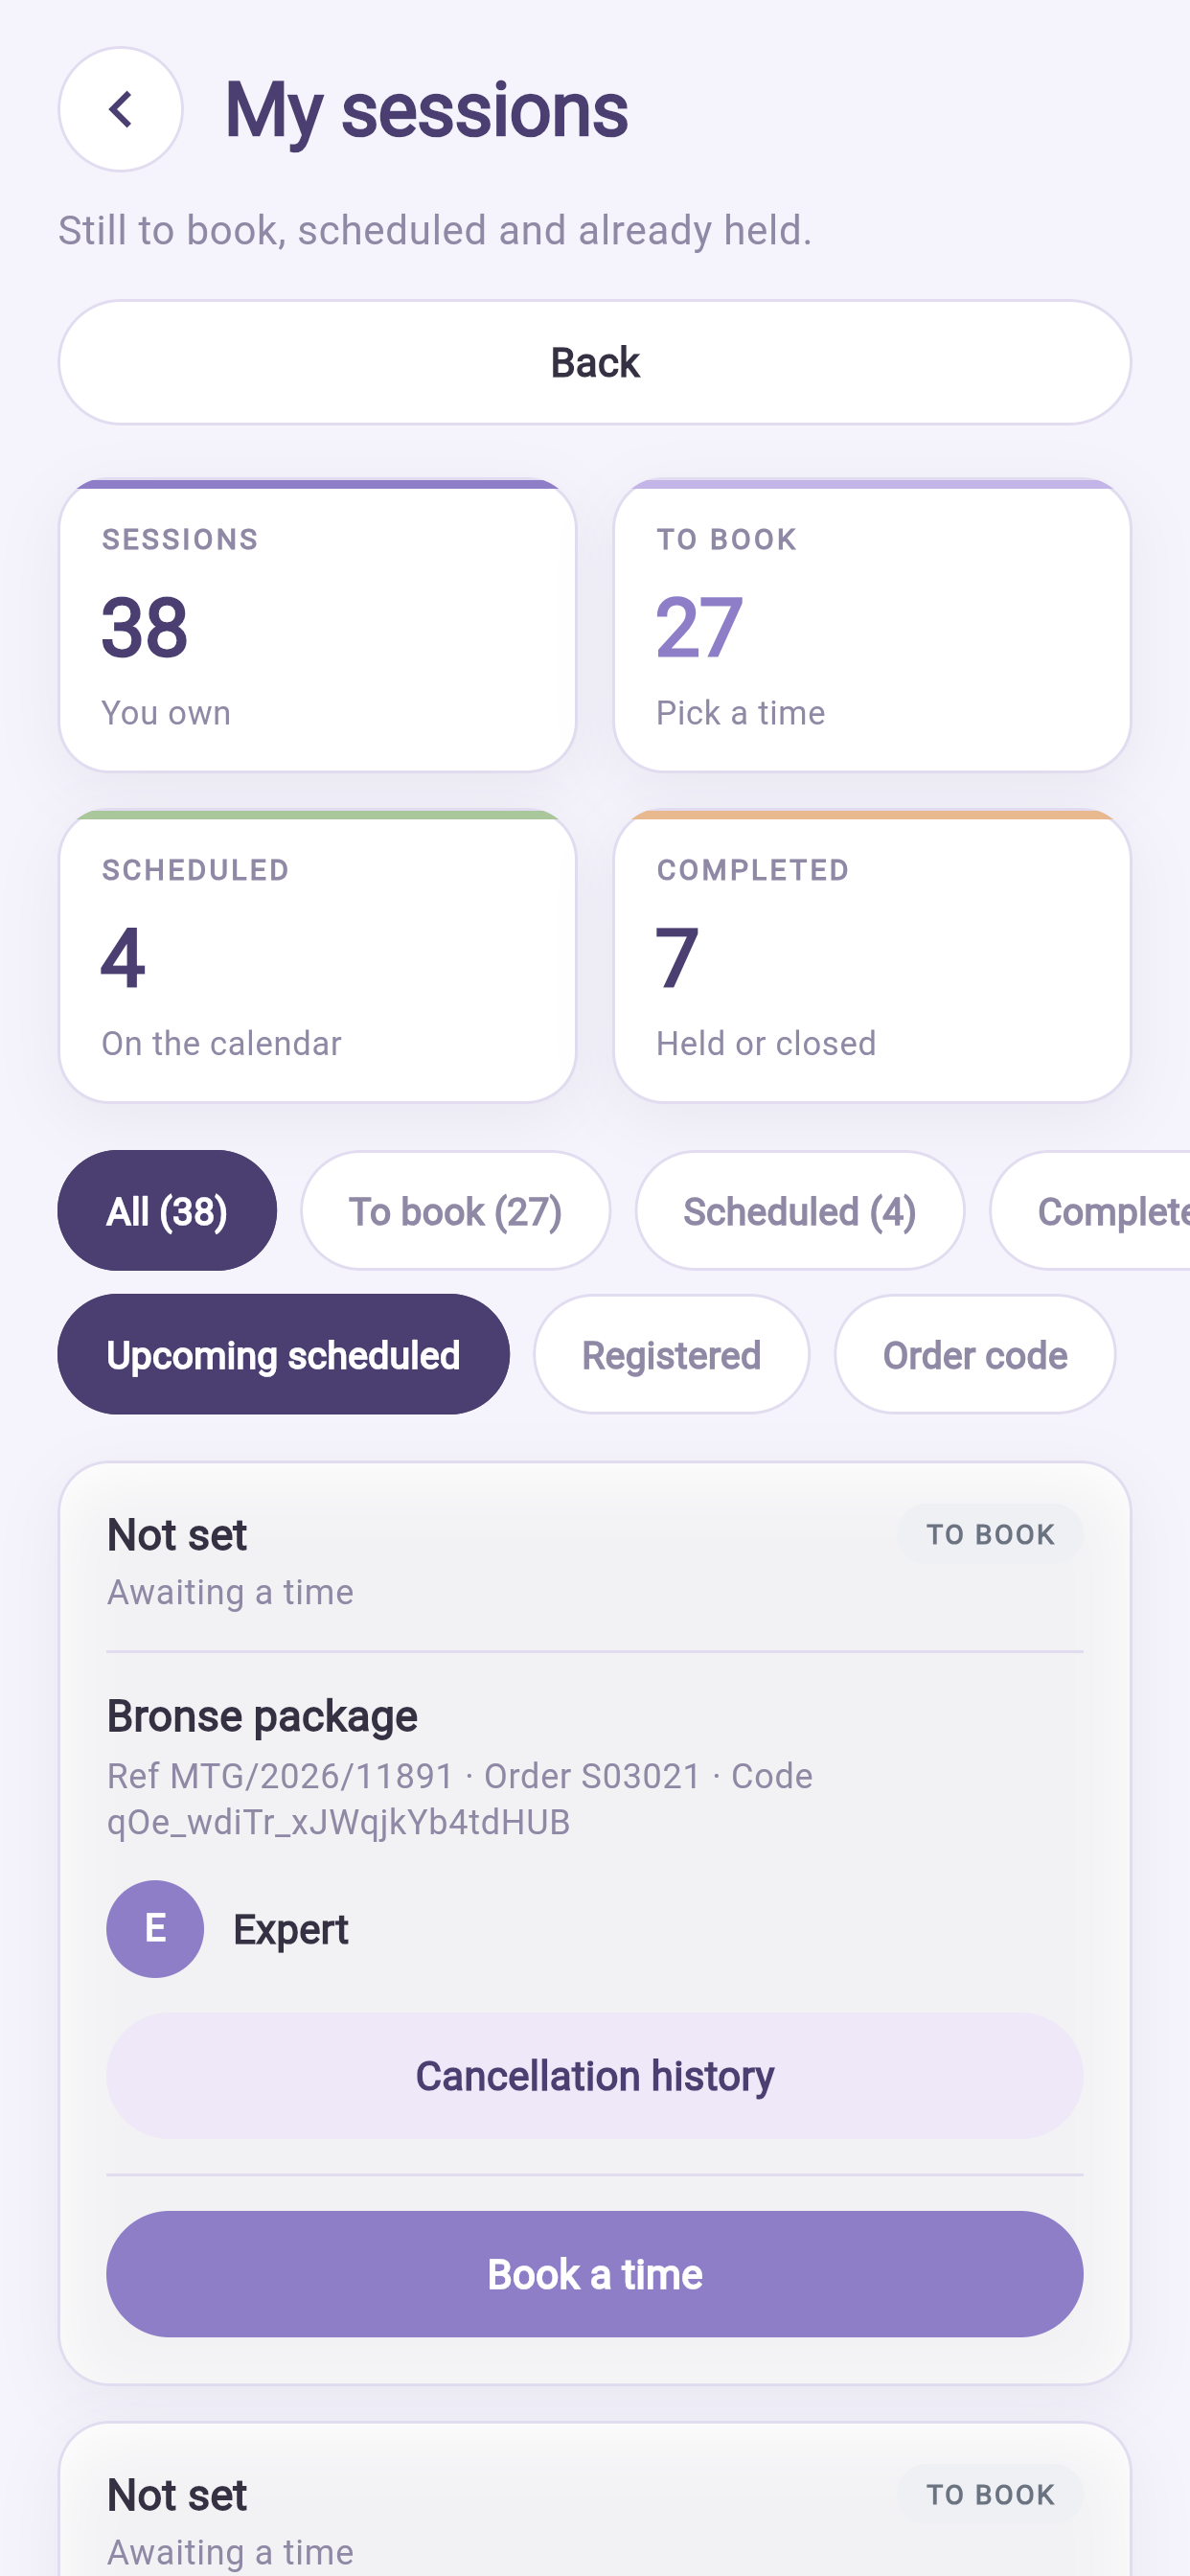
Vier totalen bovenaan, en vier tabbladen die op dezelfde manier filteren:
| Betekenis | |
|---|---|
| Sessies (Sessions) | Alles wat u gekocht hebt |
| Te boeken (To book) | Betaald, nog geen tijd gekozen — uw takenlijst |
| Ingepland (Scheduled) | Geboekt en op komst |
| Afgerond (Completed) | Gehouden |
Kijk bij Te boeken voordat u nog iets koopt. Mensen kopen geregeld opnieuw terwijl ze al een sessie in huis hebben.
10.2 Facturatie#
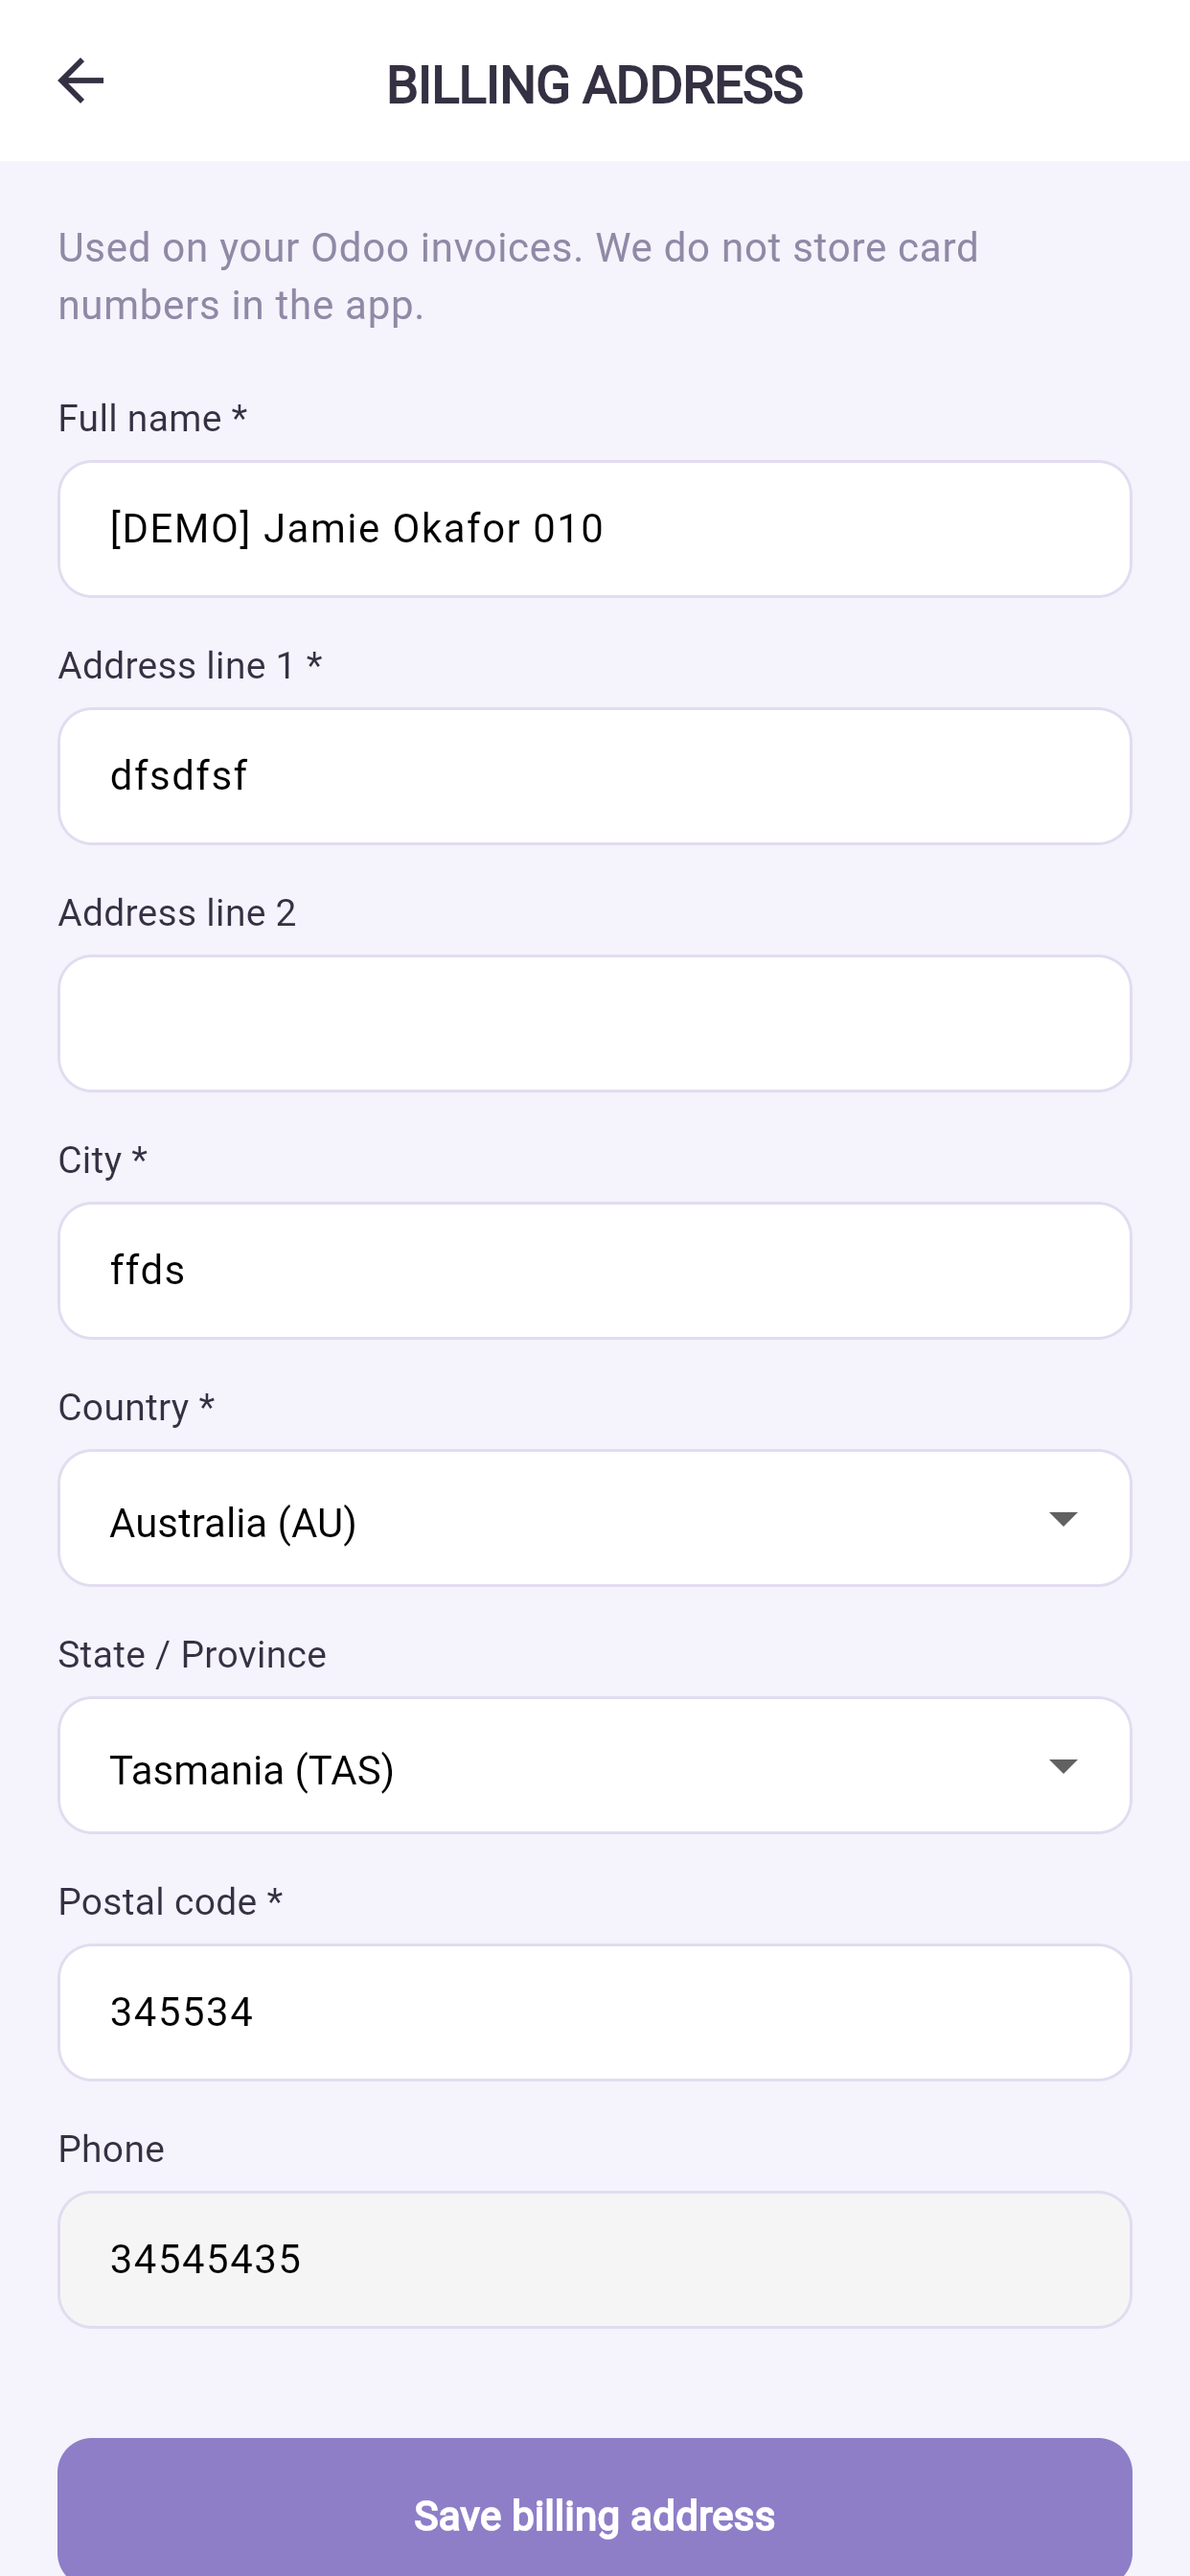
- Facturen — tik op een factuur om die te bekijken en de pdf te downloaden.
- Factuuradres — werk het bij vóór uw volgende aankoop. Een uitgegeven factuur valt achteraf niet meer te wijzigen.
- Betaalmethoden — voeg een kaart toe, haal er een weg, of stel een standaardkaart in. Er wordt alleen een beveiligde sleutelcode bewaard; de praktijk houdt uw kaartnummer nooit zelf.
10.3 Ondersteuning#
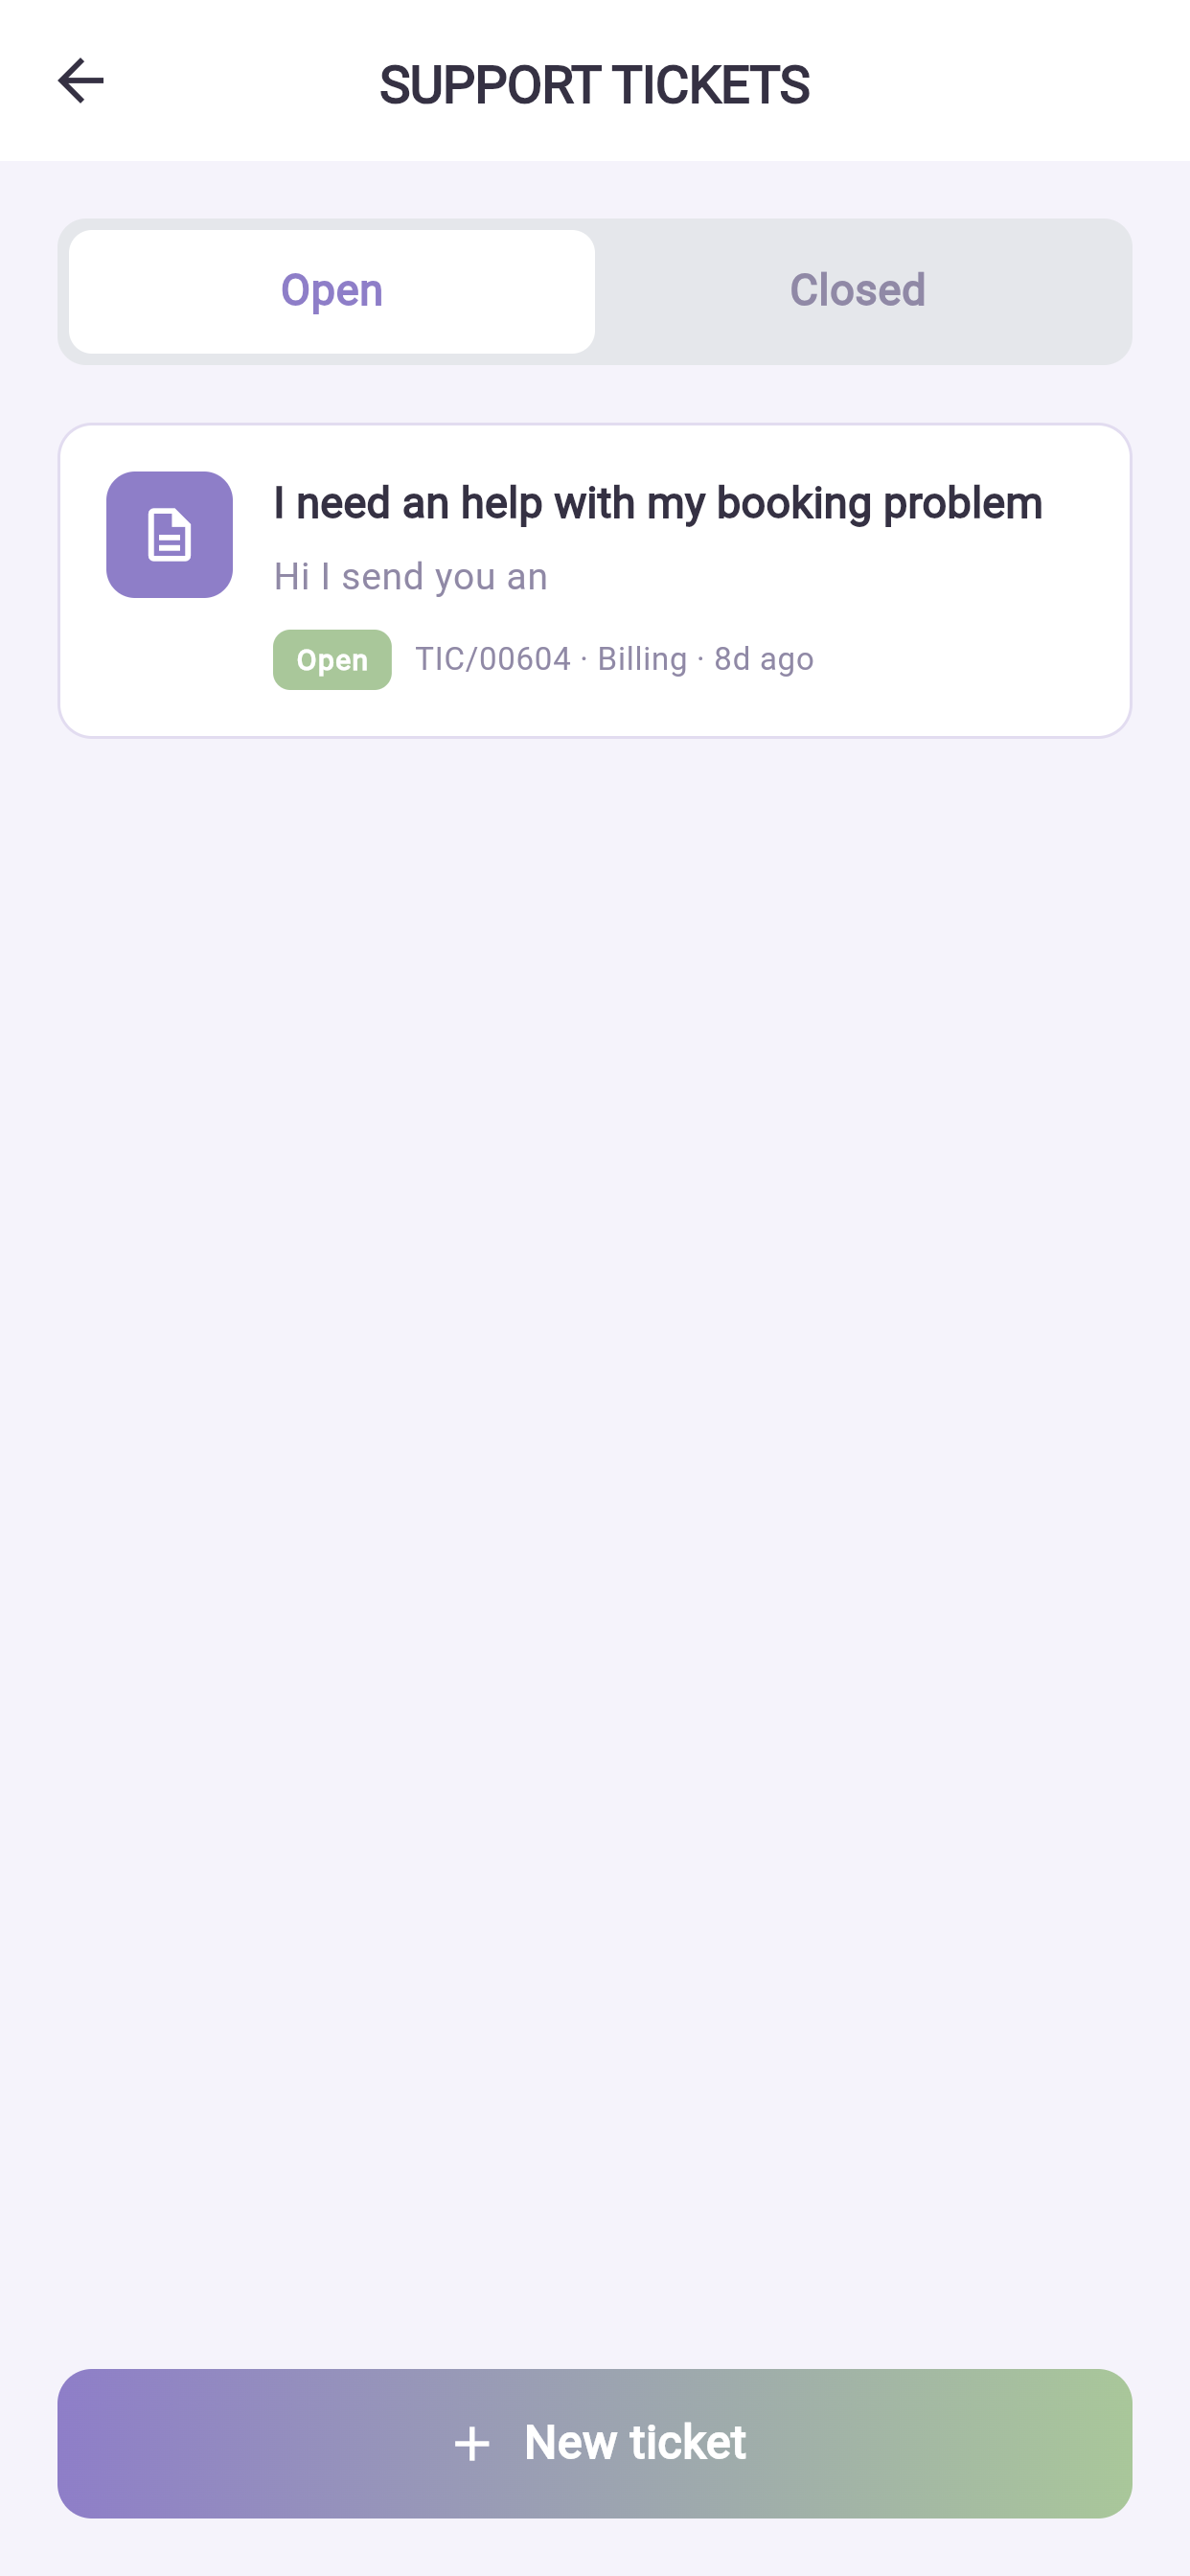
Ondersteuningstickets → Nieuw ticket (New ticket). Kies een onderwerp, beschrijf wat er gebeurd is met datums en bedragen erbij, en voeg een schermafbeelding toe als dat helpt. U krijgt een melding zodra de ondersteuning antwoordt.
11Berichten en gesprekken#
Waar dit hoofdstuk over gaat — met uw behandelaar praten binnen de app.
Waarom het uitmaakt — het gesprek in de app houden betekent dat u het allebei vastgelegd hebt — en dat niemand een persoonlijk telefoonnummer hoeft te delen.
Wat u ziet — gesprekken onder vier ogen, groepsgesprekken, spraak- en videogesprekken, en waar de antwoorden op uw openbare vragen binnenkomen.
11.1 Chats#
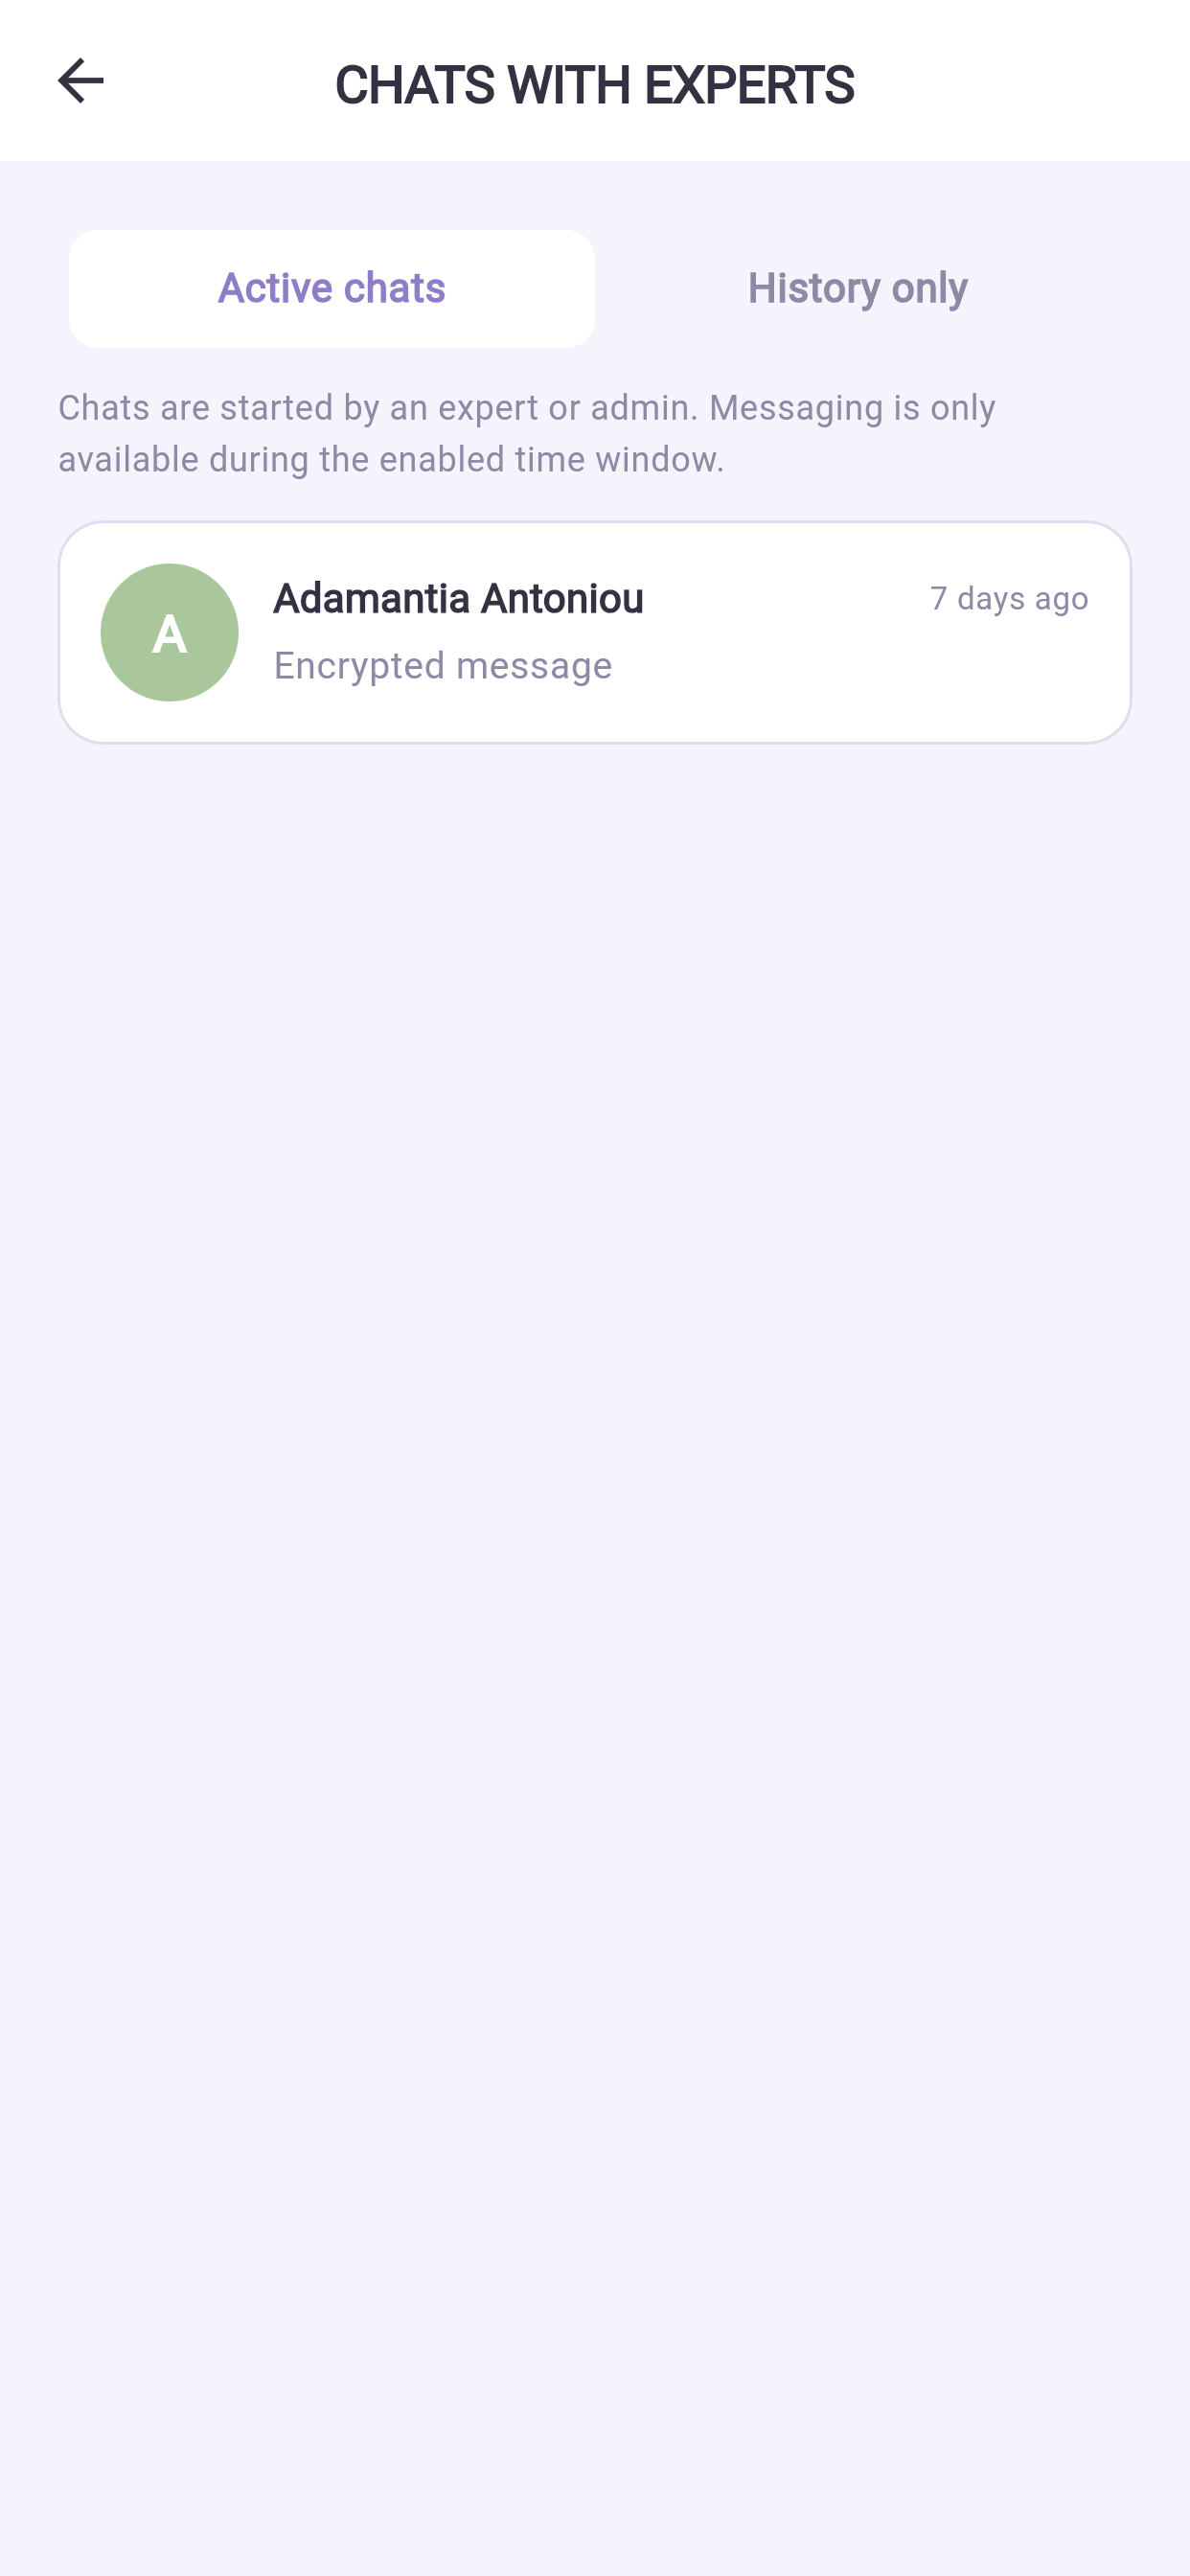
Profiel → Chats met behandelaren (Chats with Experts). Lopende gesprekken bovenaan, afgelopen gesprekken eronder.
Sommige praktijken openen de chat alleen rond de tijd van een geboekte sessie. Kunt u geen bericht sturen, dan is dat meestal de reden en niet een storing.
11.2 Groepsgesprekken#
Hoort u bij een groep, dan vindt u die onder Groepschats (Partner chats). U kunt iedereen tegelijk aanschrijven of één persoon.
11.3 Spraak en video#
Waar uw praktijk het aanzet, heeft een chat een belknop. Gesprekken lopen binnen de app — u hoeft niets extra's te installeren.
11.4 Vragen#
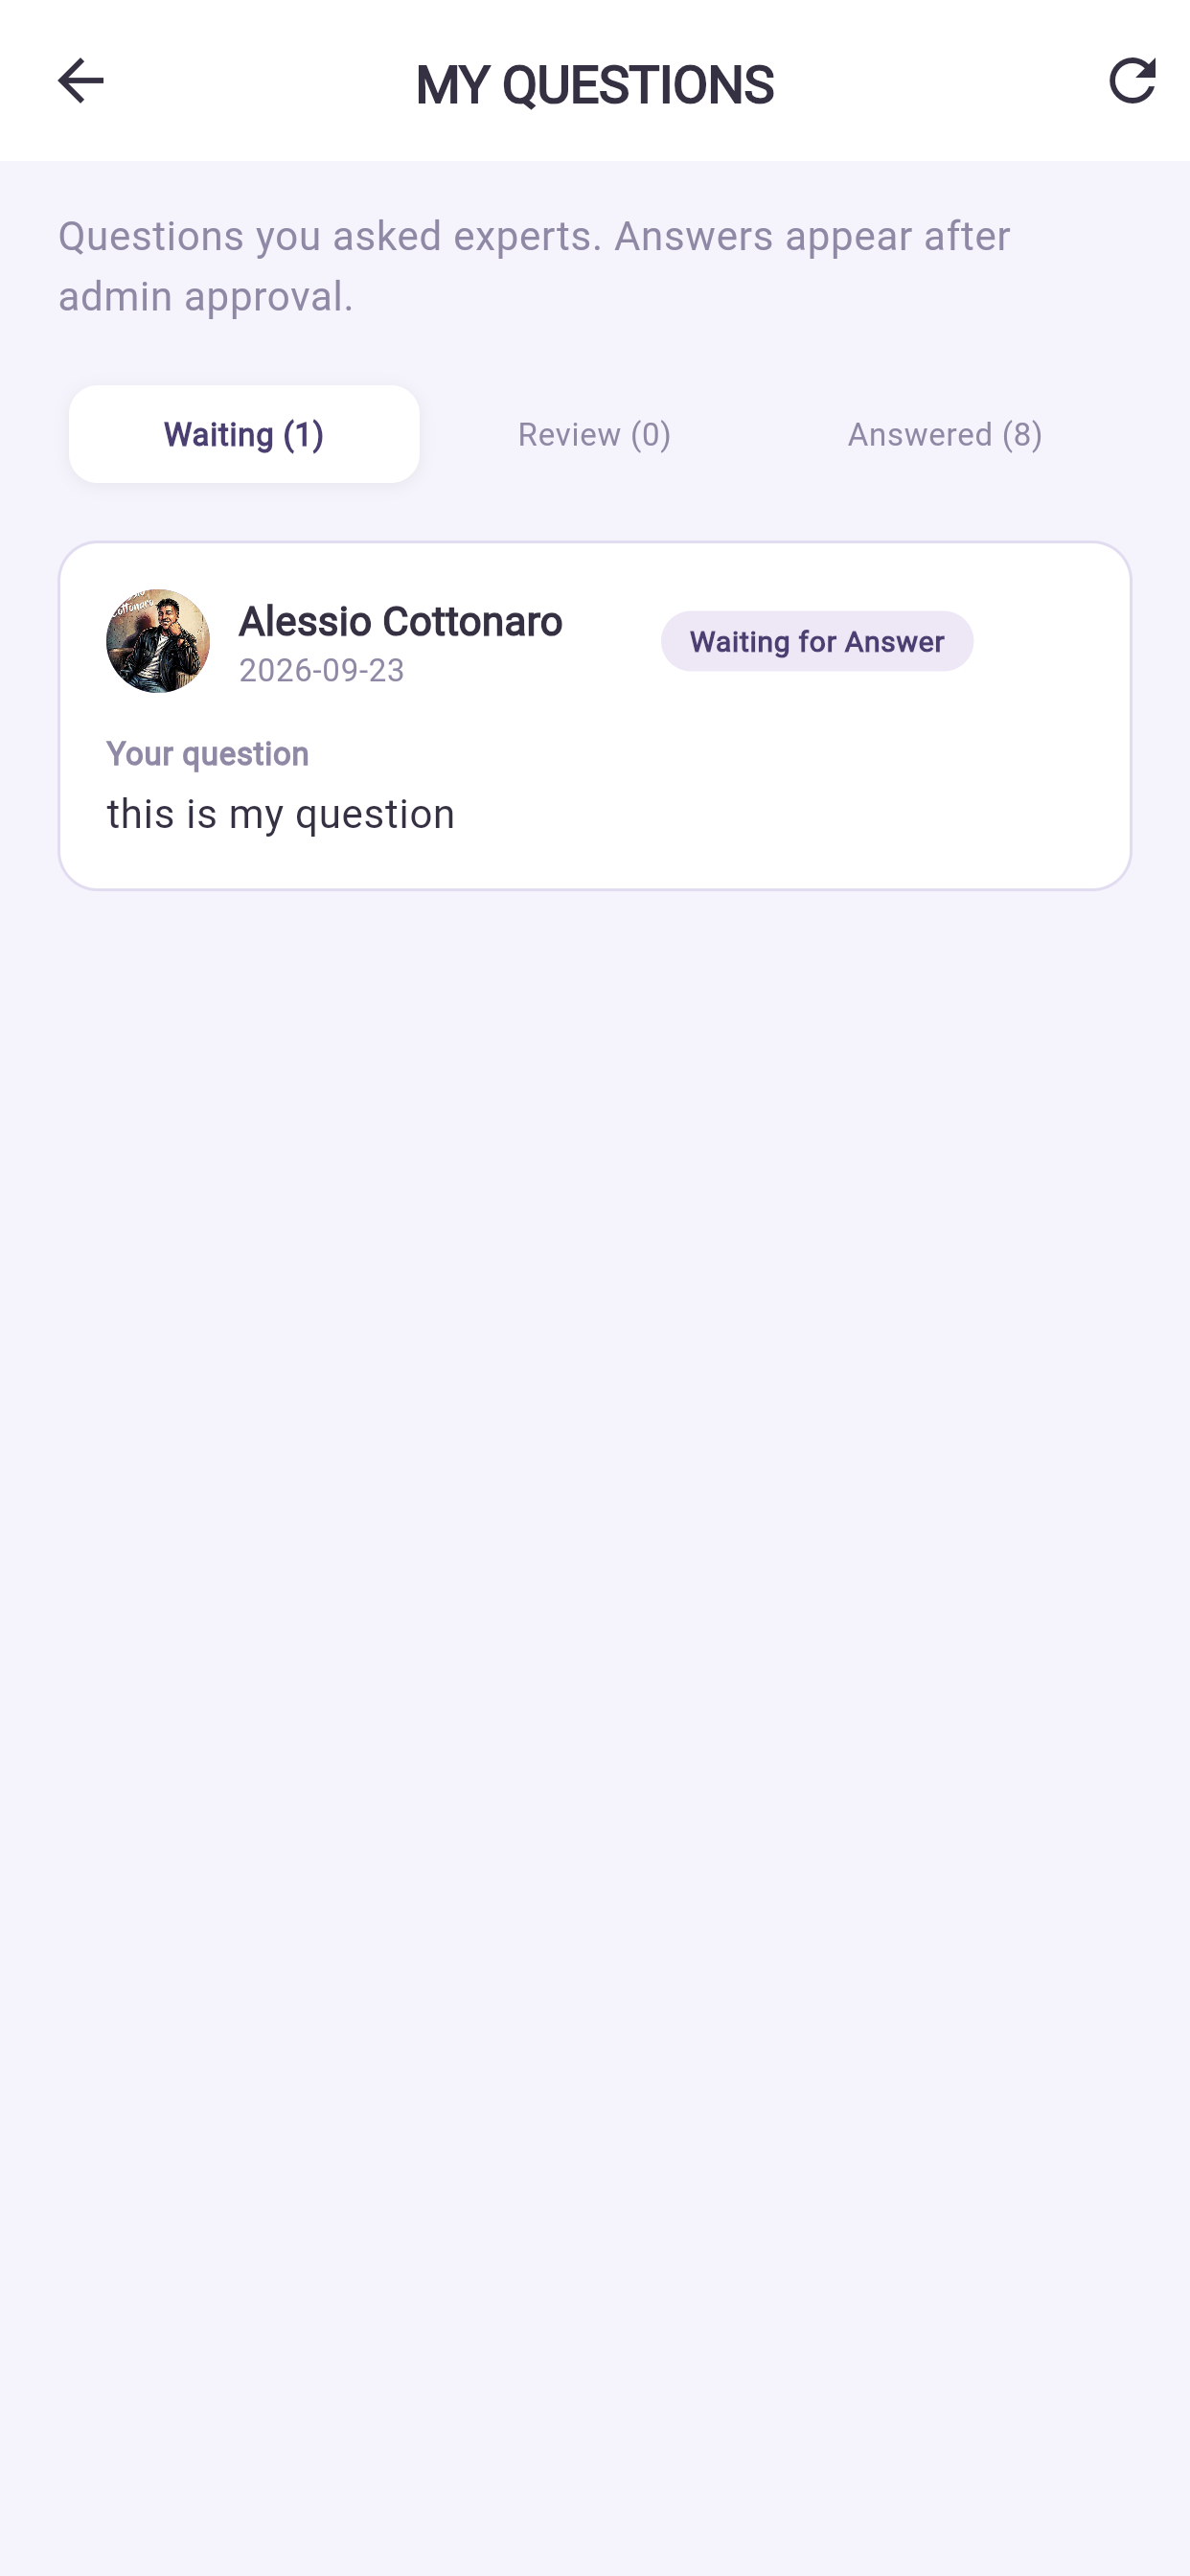
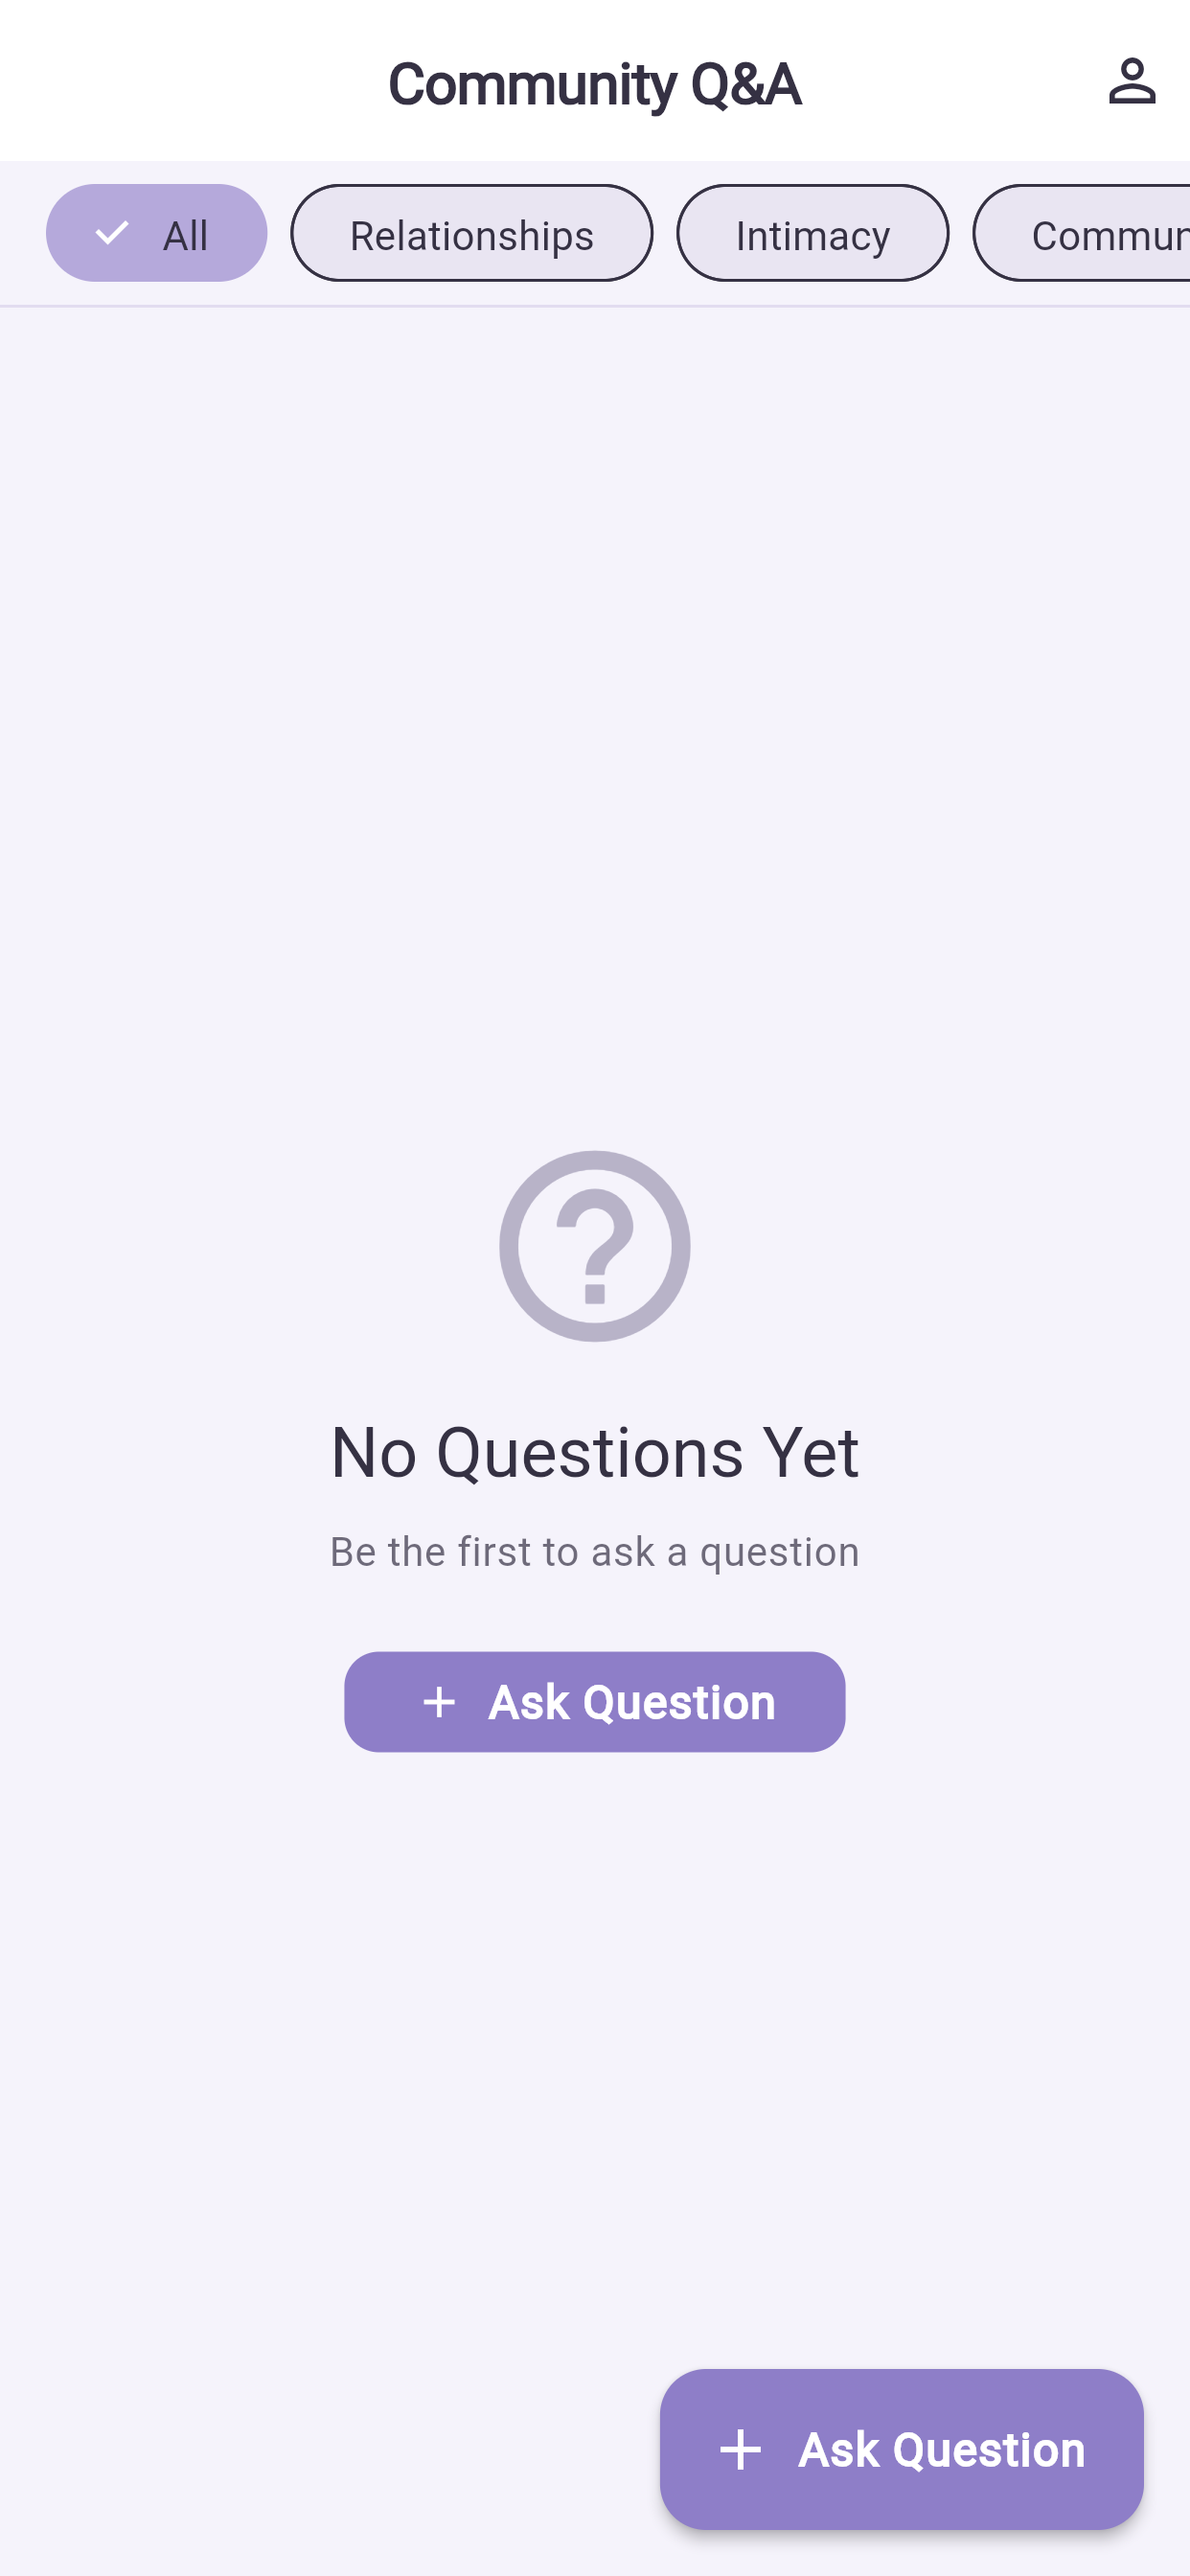
Profiel → Mijn vragen (My Questions) toont alles wat u gevraagd hebt, met de antwoorden erbij. U krijgt een melding wanneer een behandelaar antwoordt.
12Meldingen op uw telefoon#
Waar dit hoofdstuk over gaat — bepalen wat de app u vertelt, en wanneer.
Waarom het uitmaakt — komen herinneringen niet aan, dan ligt de oorzaak bijna altijd buiten de app, in de instellingen van de telefoon zelf.
Wat u ziet — de meldingsinstellingen in de app, de instellingen van uw telefoon voor als er helemaal niets binnenkomt, en het volle alarm dat de app vóór een sessie laat afgaan.
12.1 Instellingen in de app#
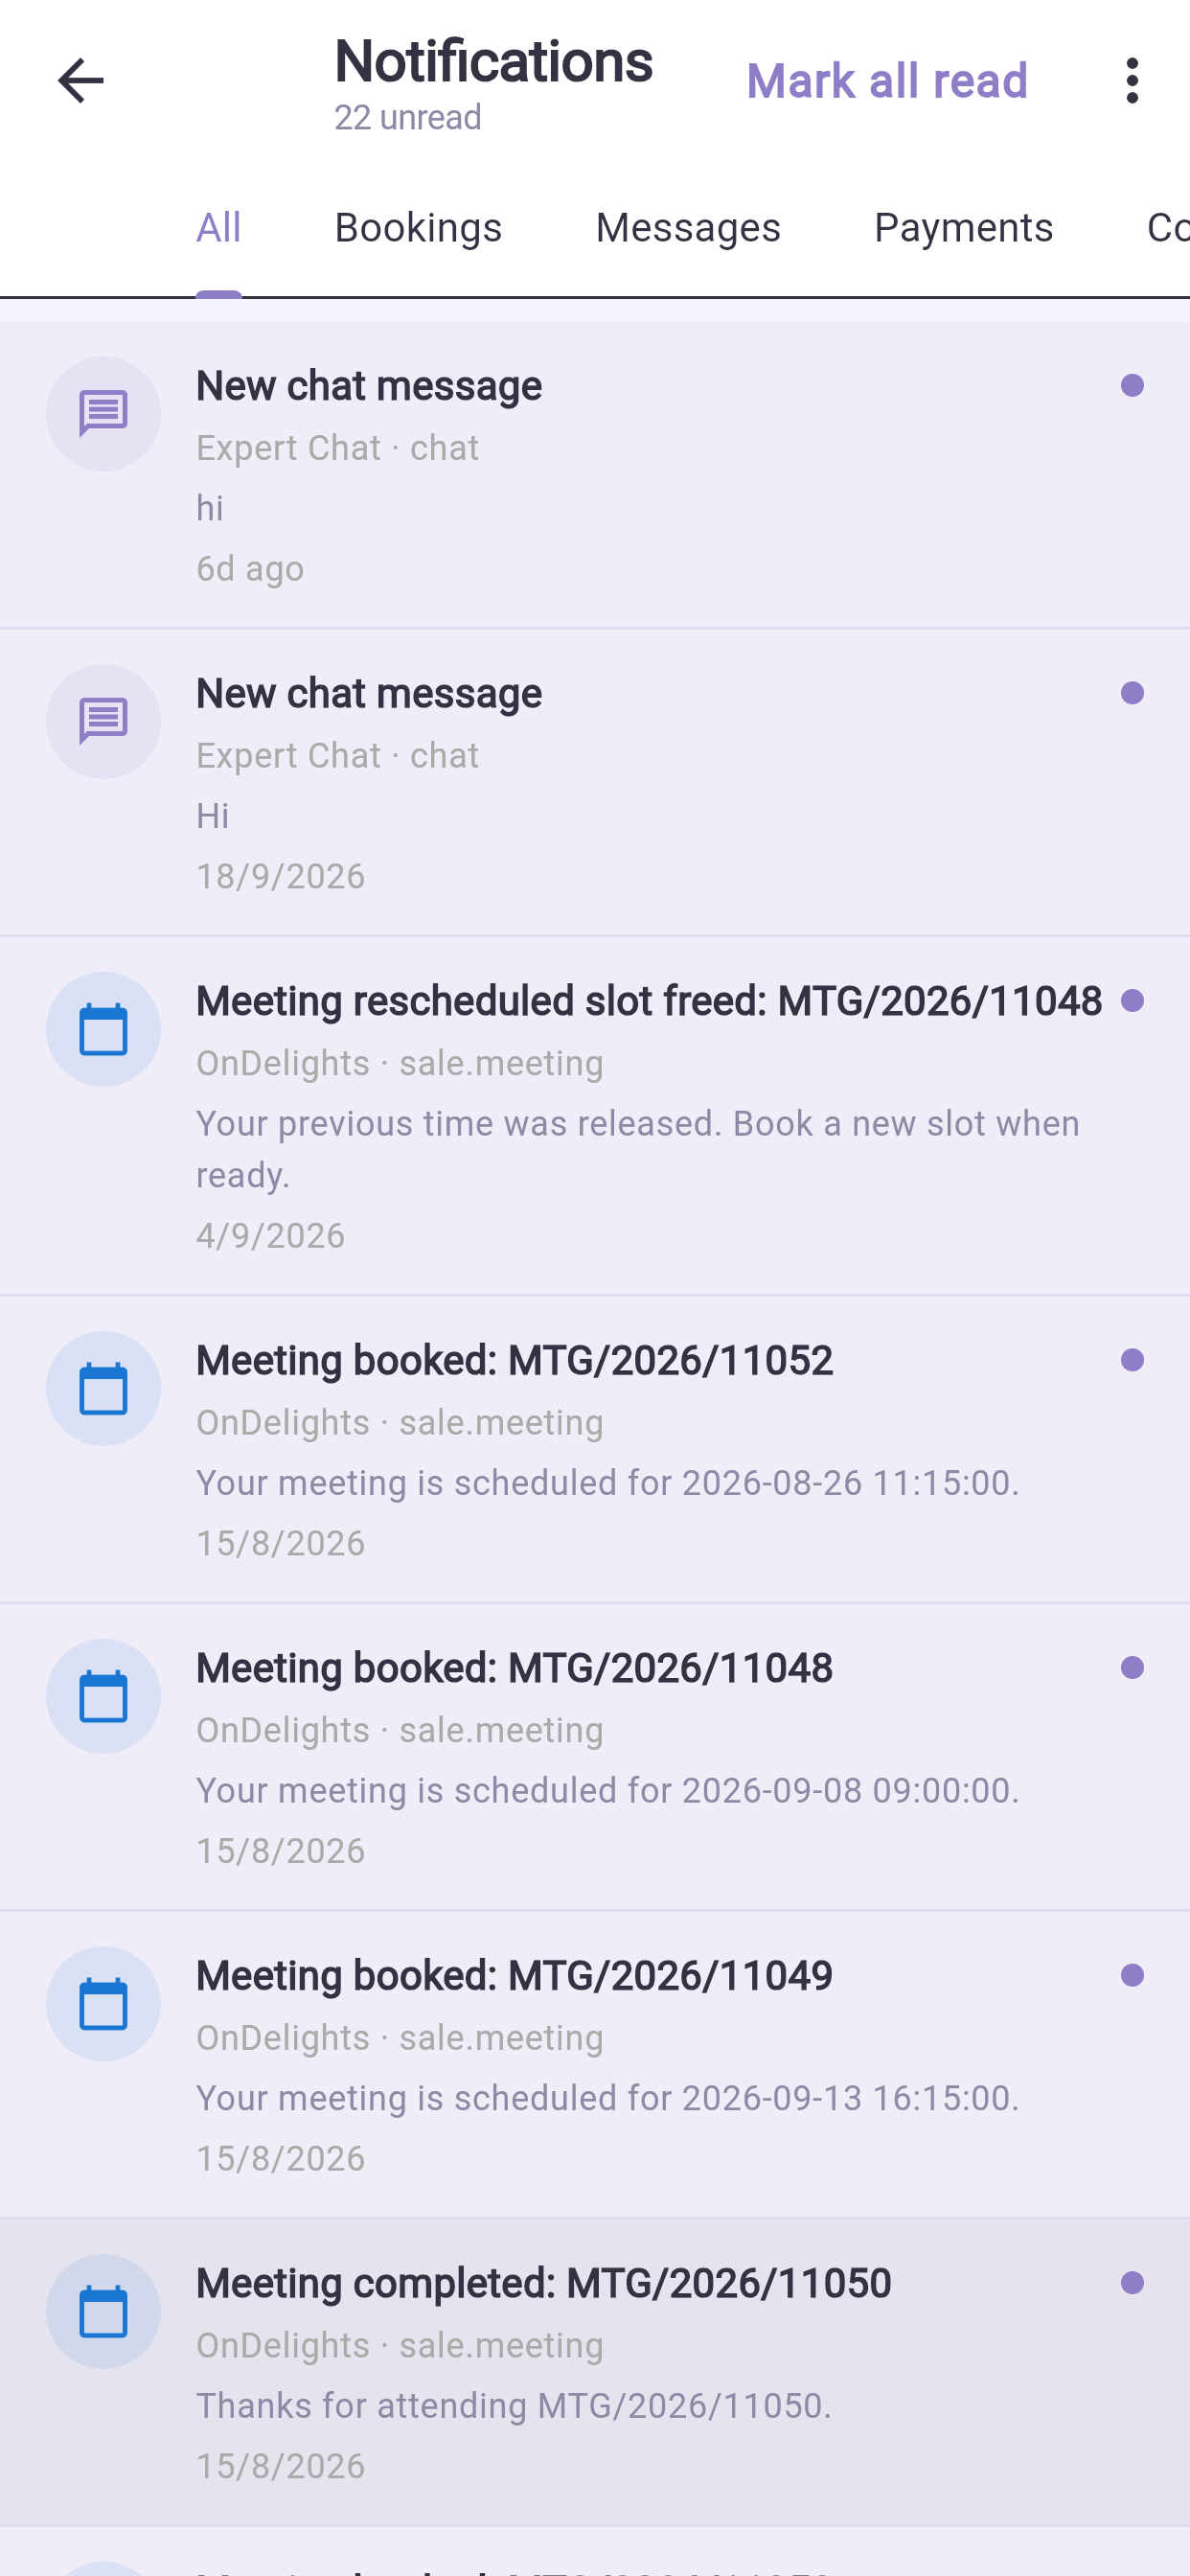
Profiel → Meldingen (Notifications), daarna het instellingenpictogram. Zet categorieën aan of uit en kies de kanalen — push, e-mail, in de app, WhatsApp.
Beveiligingssignalen, betaalbevestigingen en wijzigingen aan boekingen gaan altijd uit, omdat u ze nodig hebt.
12.2 De instellingen van uw telefoon#
Komt er helemaal niets binnen, dan ligt het niet aan de instellingen van de app zelf — uw telefoon houdt ze tegen.
iPhone: Instellingen → Berichtgeving → de app → Sta berichtgeving toe. Android: Instellingen → Apps → de app → Meldingen.
Kijk ook na of accubesparing de app op de achtergrond niet aan banden legt (§15.2).
12.3 Sessiealarmen#
Kort voor een sessie laat de app een vol alarm afgaan in plaats van een stille melding, omdat een gemiste sessie u geld kost. Dit werkt ook met de app gesloten, mits meldingen toegestaan zijn.
13App-instellingen#
Waar dit hoofdstuk over gaat — de voorkeuren van de app zelf.
Waarom het uitmaakt — één middenstand hier houdt u op de hoogte zonder dat de telefoon u de hele dag onderbreekt.
Wat u ziet — een tabel met elke instelling — push, e-mail, WhatsApp, geluid, trillen, thema en taal — en de combinatie waar de meeste mensen op uitkomen.
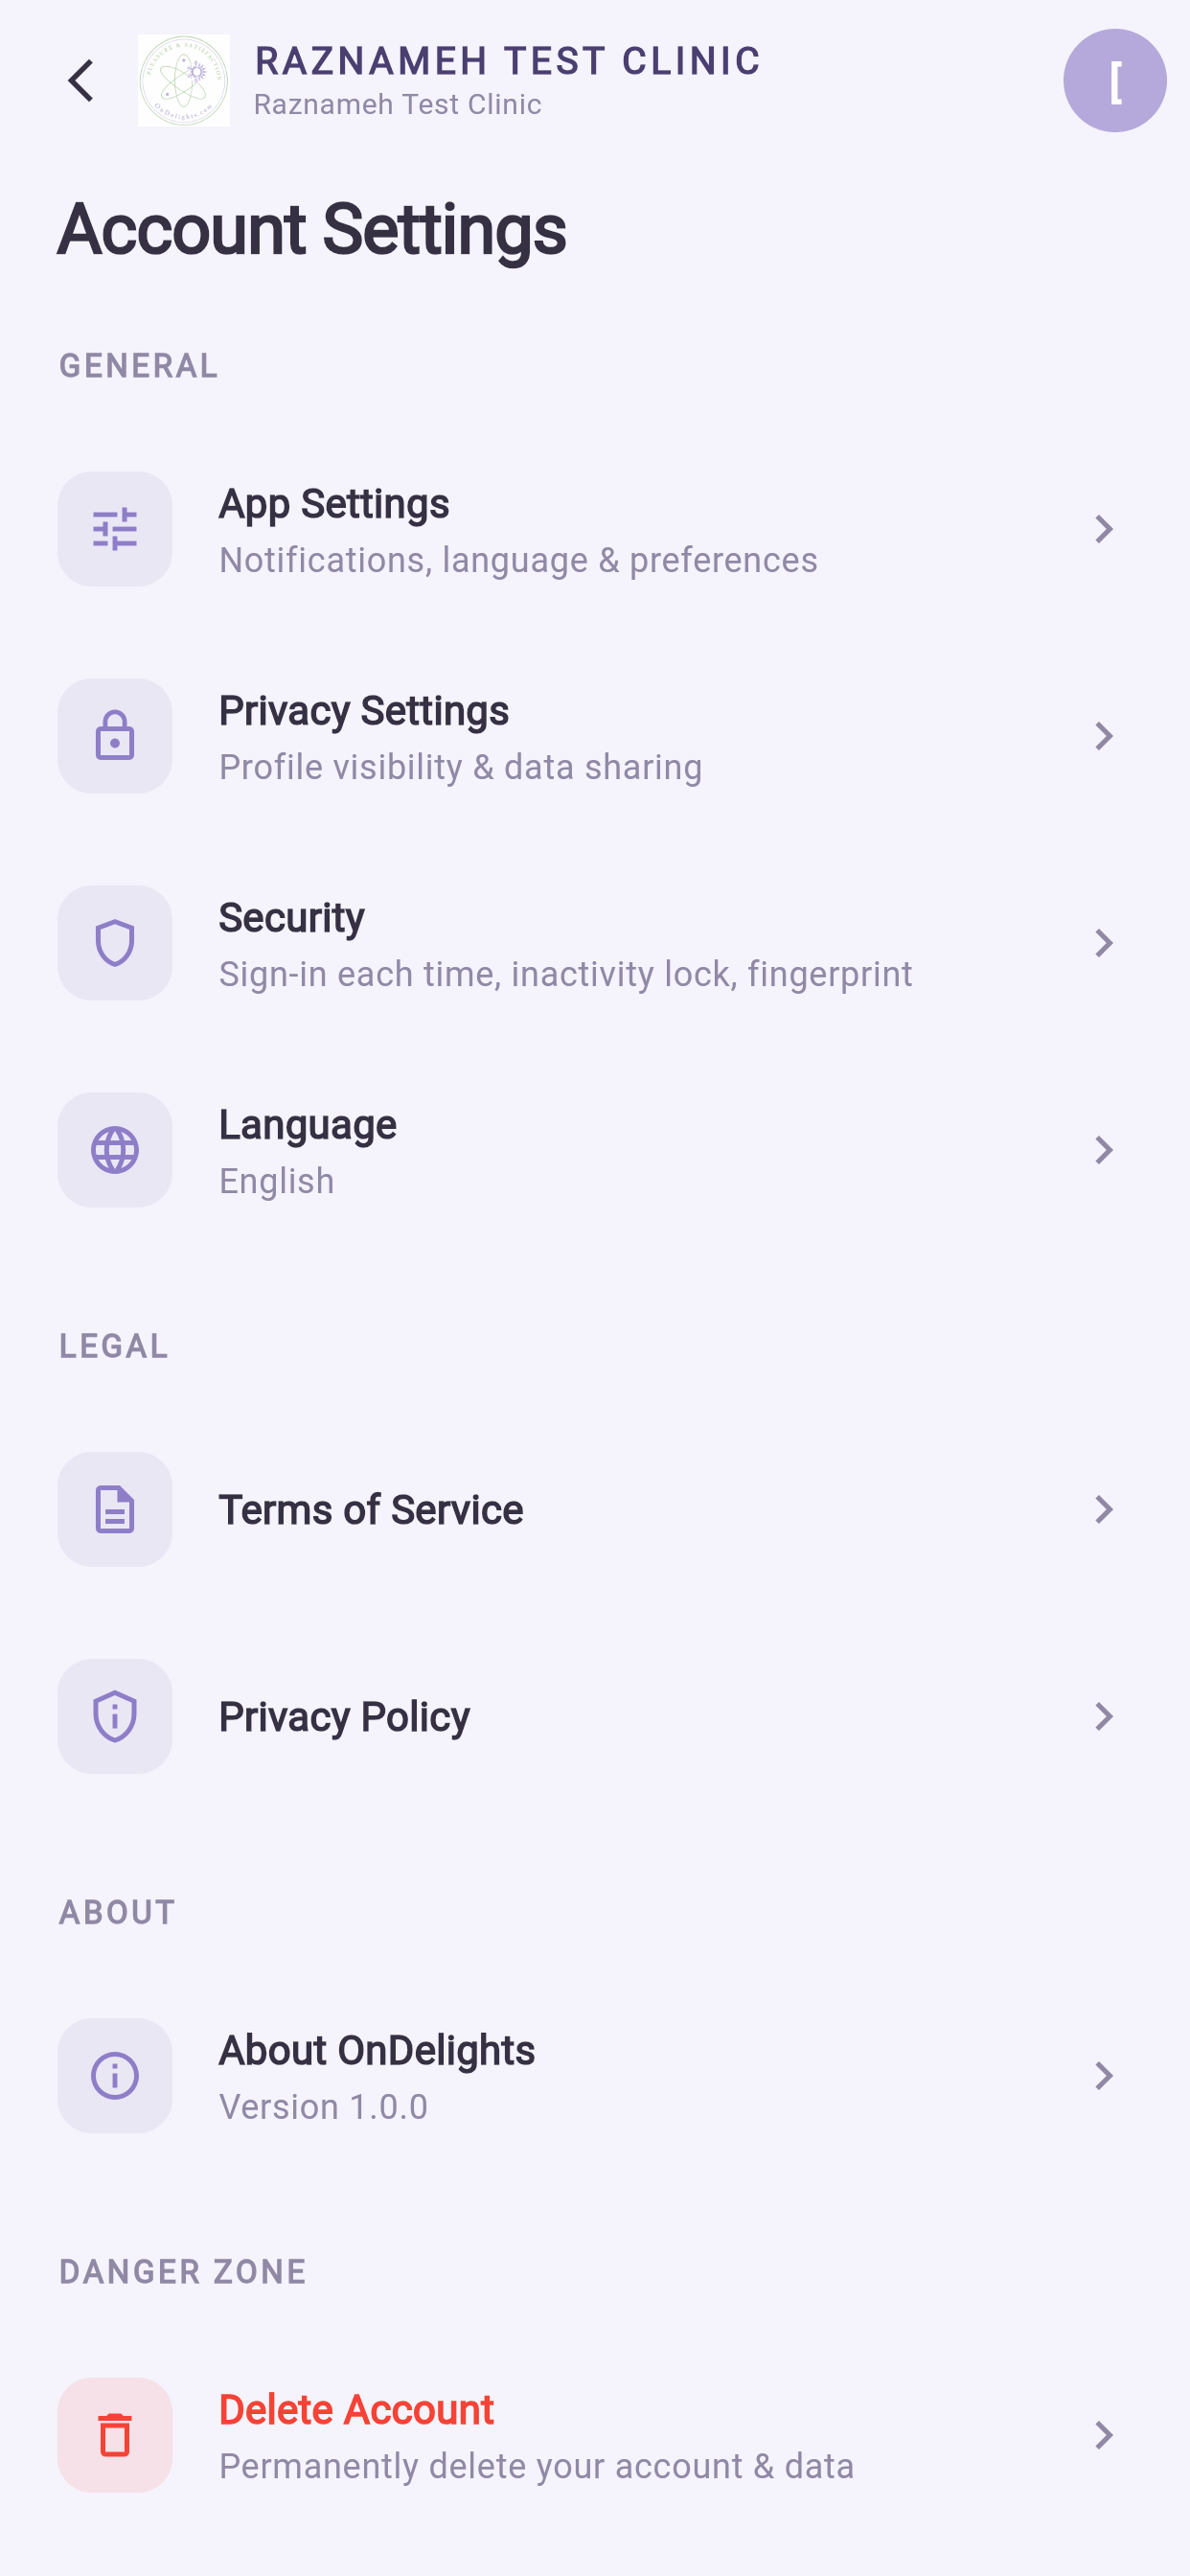
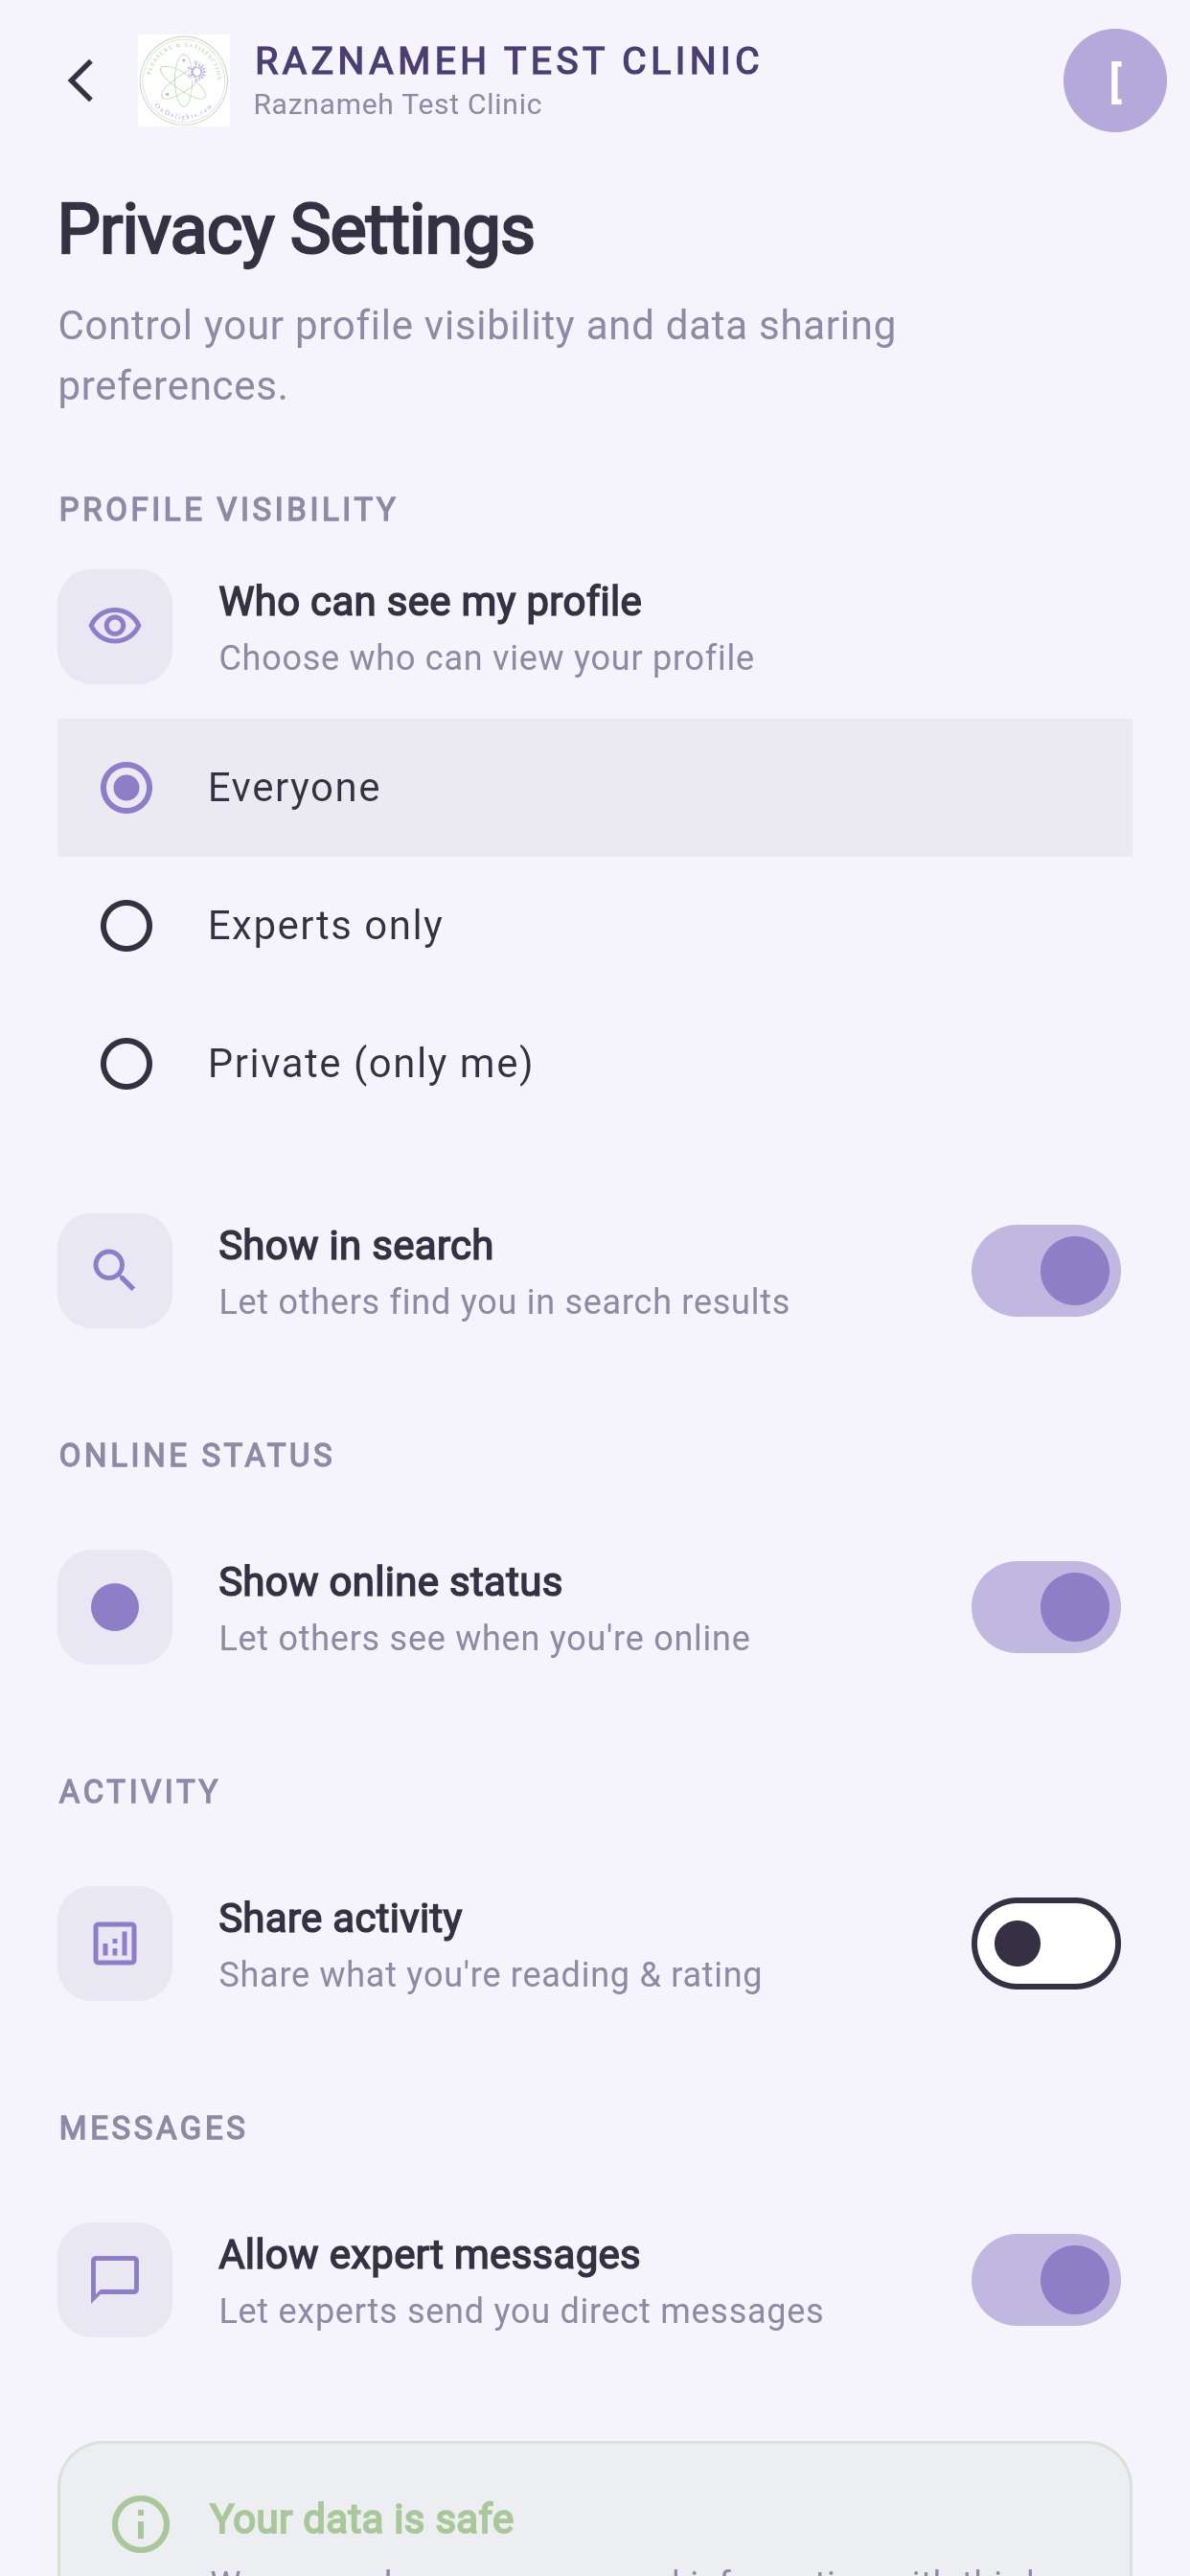
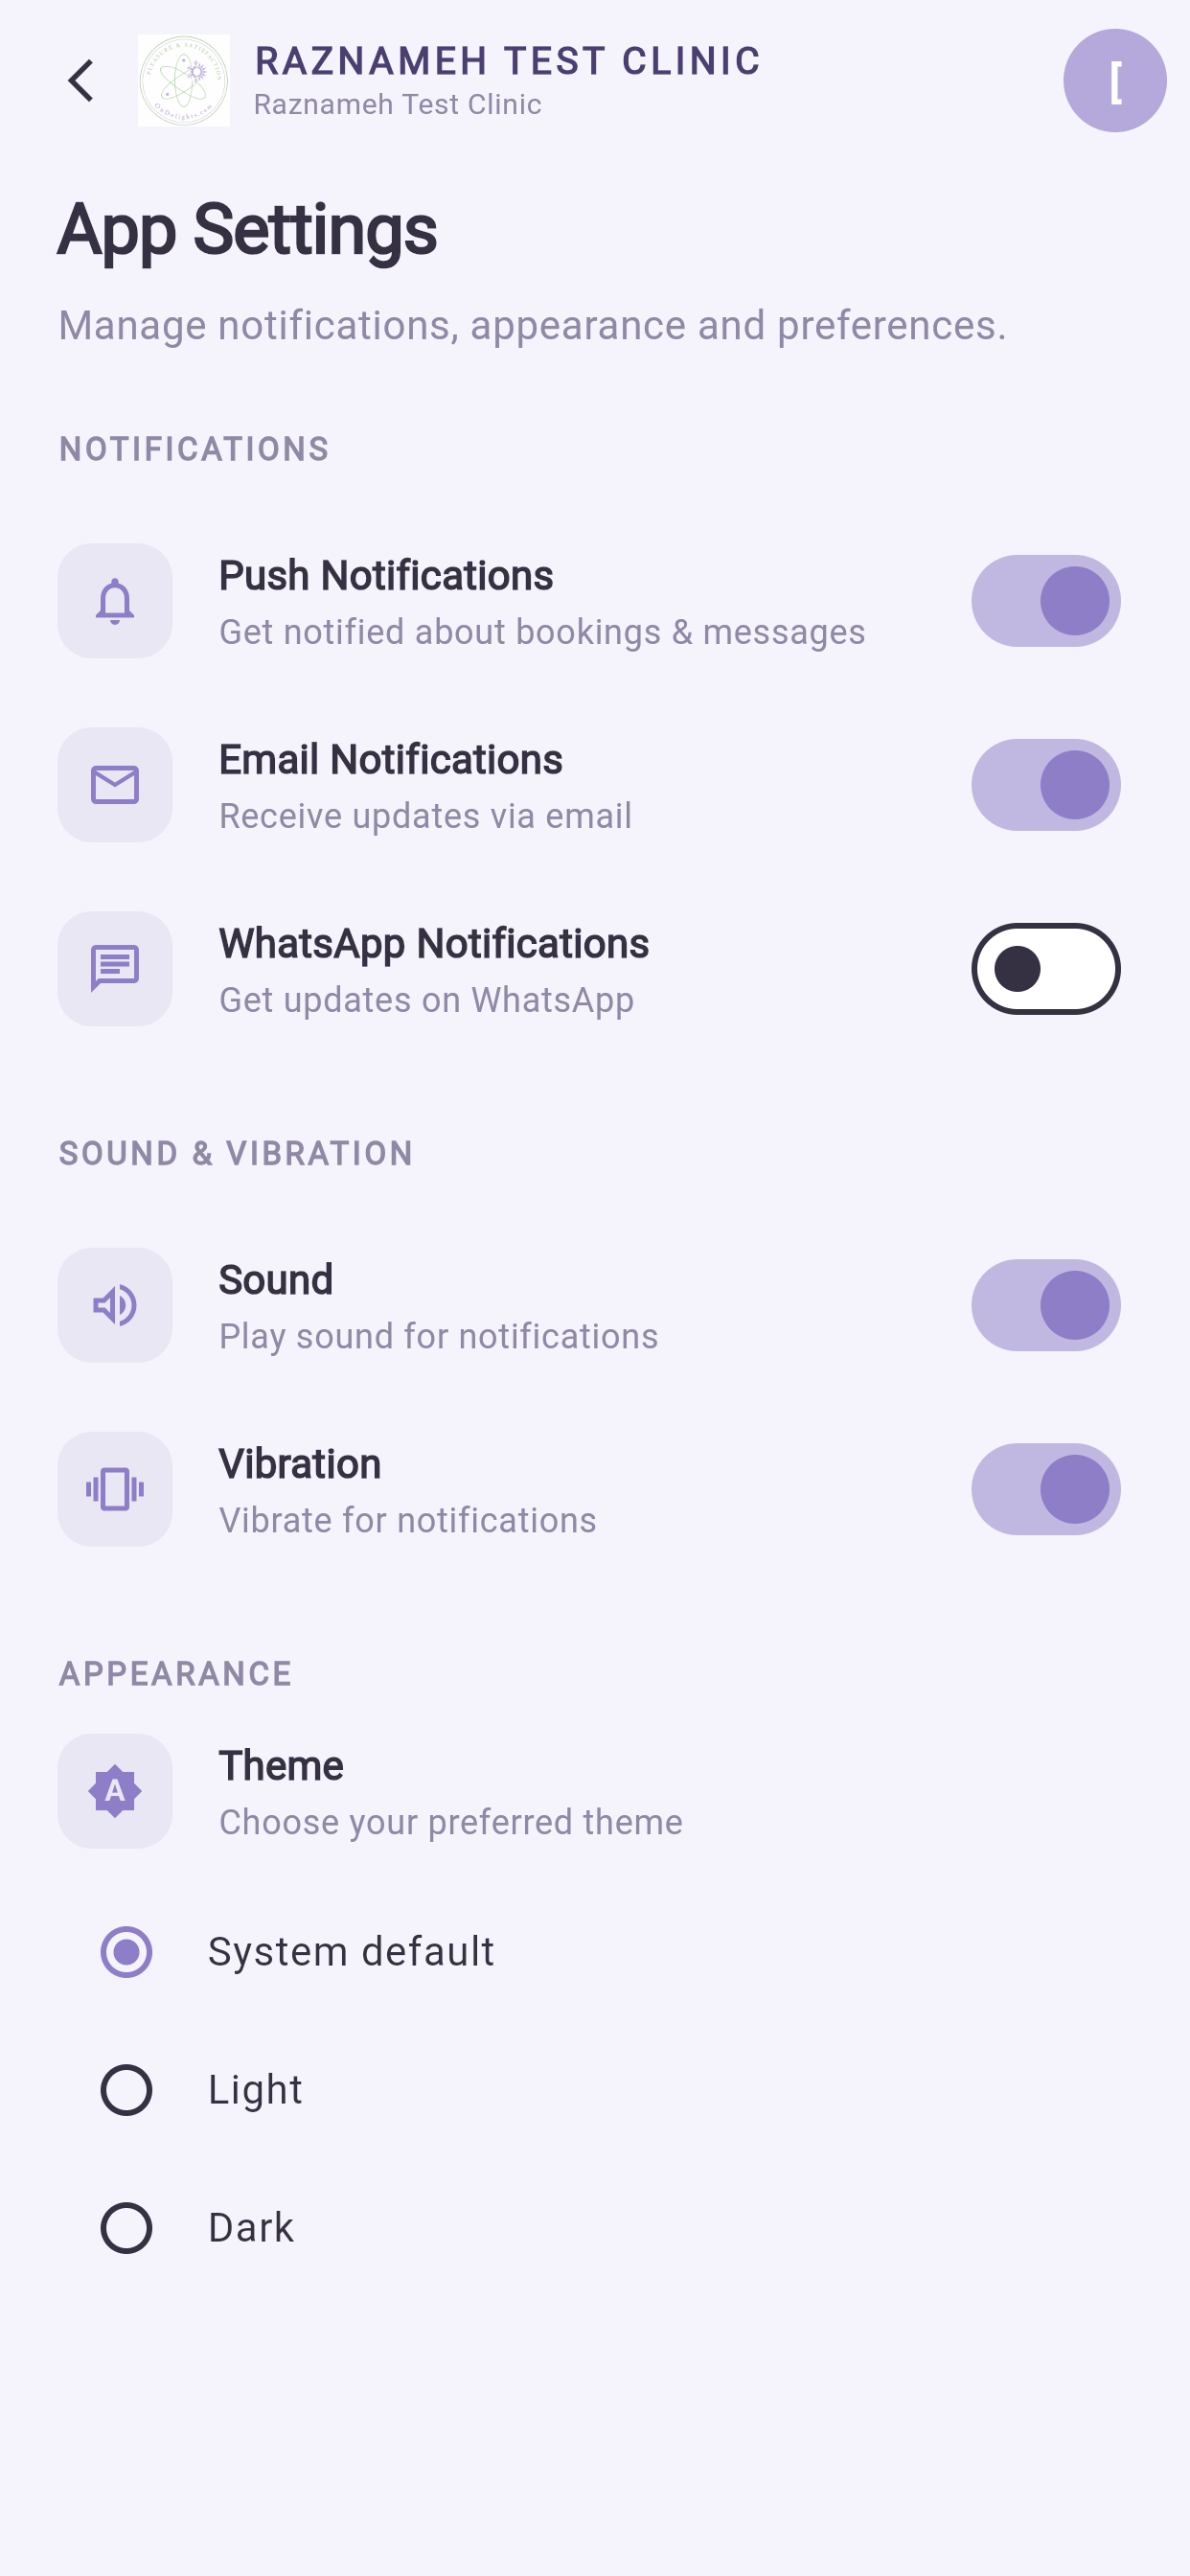
Profiel → Instellingen.
| Instelling | Wat ze doet |
|---|---|
| Pushmeldingen | Signalen over boekingen en berichten |
| E-mailmeldingen | Dezelfde berichten per e-mail |
| WhatsApp-meldingen | Berichten via WhatsApp |
| Geluid | Laat een geluid horen bij een melding |
| Trillen | Laat de telefoon trillen bij een melding |
| Thema | Licht of donker uiterlijk |
| Taal | 23 talen, van rechts naar links waar dat hoort |
Geluid en trillen uitzetten en push aan laten staan is een goede middenstand: u ziet de signalen nog steeds, zonder dat de telefoon u onderbreekt.
14Beveiliging op uw toestel#
Waar dit hoofdstuk over gaat — uw account beschermen op het toestel dat u bij u draagt.
Waarom het uitmaakt — uw telefoon draagt uw sessies, facturen en berichten met zich mee; een vergrendelscherm alleen is niet altijd genoeg.
Wat u ziet — hoe u veilig aangemeld blijft, hoe het appslot werkt, hoe u uw wachtwoord wijzigt, en wat u als eerste doet wanneer de telefoon kwijt of gestolen is.
Profiel → Instellingen → Beveiliging.
14.1 Aangemeld blijven#
| Keuze | Kies die wanneer |
|---|---|
| Aangemeld blijven | De telefoon alleen van u is en een eigen vergrendelscherm heeft |
| Vraag mij elke keer om aan te melden | Het een gedeelde telefoon is, of een van het werk of van het gezin |
14.2 Het appslot#
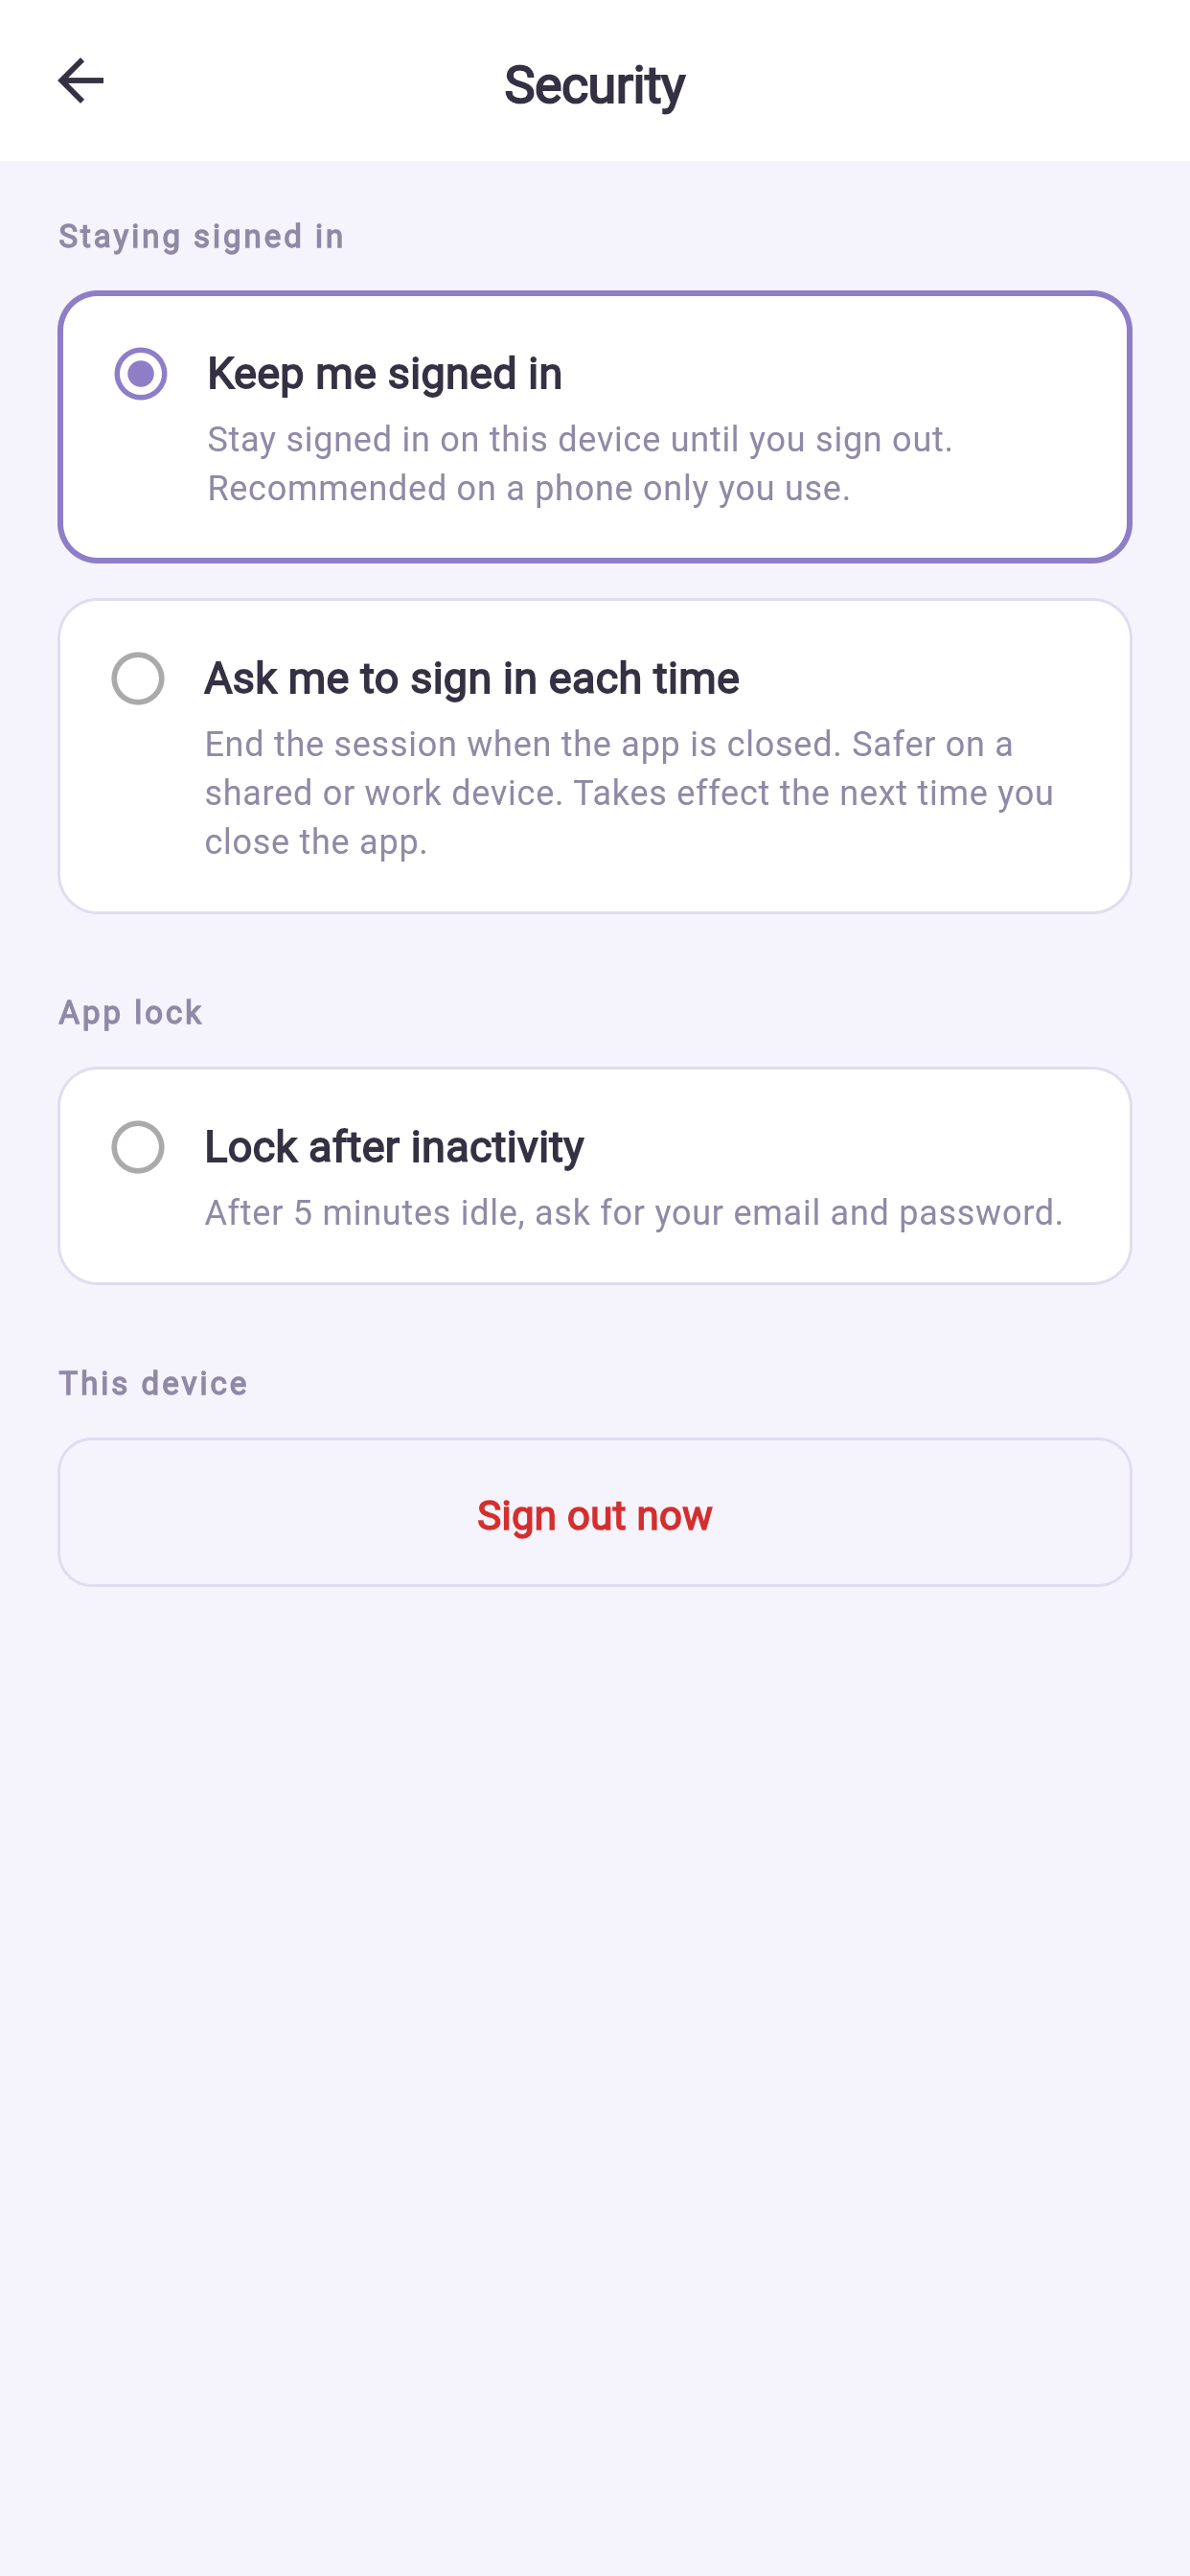
Zet Vergrendelen na inactiviteit (Lock after inactivity) aan en de app vergrendelt zichzelf wanneer u hem een tijd niet gebruikt hebt, of wanneer u ervandaan schakelt. U ontgrendelt met vingerafdruk, gezicht of uw patroon.
Nu vergrendelen (Lock now) vergrendelt hem meteen — handig wanneer u uw telefoon aan iemand geeft.
Dit is het aanzetten waard als er ooit iemand anders uw telefoon vasthoudt. Het beschermt uw sessies, facturen en berichten zelfs wanneer de telefoon zelf ontgrendeld is.
Verkeerde patronen zijn met opzet begrensd. Vier zijn er vrij — iedereen tekent er weleens eentje mis. Daarna laat elk verkeerd patroon u wachten, en het wachten wordt langer: 30 seconden, dan een minuut, dan vijf, dan vijftien. Uw wachtwoord werkt tijdens het wachten altijd. Na twintig verkeerde patronen vergeet de app het patroon helemaal en vraagt hij om uw wachtwoord, zodat er op een telefoon in andermans handen niet een nacht lang op te raden valt; stel daarna vanaf dit scherm een nieuw patroon in.
14.3 Uw wachtwoord wijzigen#
Hetzelfde scherm. Vul het huidige wachtwoord in, daarna twee keer het nieuwe. Andere toestellen worden mogelijk afgemeld.
14.4 Als uw telefoon kwijt of gestolen is#
- Wijzig uw wachtwoord vanaf een ander toestel of vanaf de website. Dat beëindigt de sessies elders.
- Gebruik het eigen zoek-en-wis-hulpmiddel van uw telefoonaanbieder.
- Laat het de ondersteuning van uw praktijk weten als er iets gevoeligs in uw account zat.
15Data, accu en offline#
Waar dit hoofdstuk over gaat — hoe de app zich gedraagt op mobiele data, op een telefoon die accu spaart, en zonder bereik.
Waarom het uitmaakt — accubesparing op Android is veruit de meest voorkomende reden dat herinneringen te laat aankomen.
Wat u ziet — wat er werkelijk data verbruikt, de accu-instelling die u aanpast, en precies wat u doet als u het bereik verliest midden in een boeking, een betaling of een gesprek.
15.1 Mobiele data#
Het dagelijks gebruik is licht. Twee dingen zijn dat niet: videogesprekken en video-inhoud. Gebruik voor allebei wifi waar het kan, zeker op een beperkte bundel.
15.2 Accubesparing#
Android-telefoons leggen apps op de achtergrond streng stil om accu te sparen, en dat kan meldingen ervan weerhouden op tijd binnen te komen.
Komen herinneringen te laat of helemaal niet: Instellingen → Apps → de app → Accu → sta onbeperkte achtergrondactiviteit toe.
15.3 Offline#
De app heeft voor bijna alles een verbinding nodig, omdat uw sessies en betalingen op de server staan. Inhoud die u al geopend hebt is misschien nog te zien, maar er laadt niets nieuws bij.
Verliest u het bereik midden in iets:
- Tijdens het boeken — er is niets bevestigd zolang u het bevestigingsscherm niet gezien hebt. Begin opnieuw.
- Tijdens het betalen — open de app opnieuw en kijk bij Facturen voordat u het nog eens probeert.
- Tijdens een gesprek — neem opnieuw deel vanaf de sessie. De behandelaar ziet u wegvallen.
16De app up-to-date houden#
Waar dit hoofdstuk over gaat — de app actueel houden.
Waarom het uitmaakt — updates dragen beveiligingsherstel met zich mee, en een versie die te oud is, praat niet meer goed met de server.
Wat u ziet — hoe u automatische updates aanzet, en wat de melding « nieuwere versie vereist » betekent.
Zet automatische updates aan in uw appwinkel. Updates dragen beveiligingsherstel met zich mee, en een verouderde app kan ophouden met de server te werken.
Zegt de app dat er een nieuwere versie nodig is, werk dan bij voordat u verdergaat — die melding betekent dat deze versie niet meer goed met de server kan praten.
17Problemen oplossen#
Waar dit hoofdstuk over gaat — een tabel van verschijnsel naar oplossing.
Waarom het uitmaakt — bijna elk probleem op een telefoon heeft een korte, bekende oplossing — en dit bespaart u het schrijven van een ondersteuningsticket.
Wat u ziet — zestien veelvoorkomende problemen met wat u probeert, in de volgorde waarin u het probeert.
| Probleem | Wat u doet |
|---|---|
| De app gaat niet open of valt bij het starten uit | Sluit hem geforceerd af en open hem opnieuw. Kijk daarna of er een update is. Herstart daarna de telefoon. Opnieuw installeren als laatste — u raakt geen gegevens kwijt, alles staat op de server |
| Blijft op het laadscherm hangen | Kijk uw verbinding na. Wissel tussen wifi en mobiele data om te toetsen |
| Aanmelden lukt niet | Kijk de spelling van het e-mailadres na. Gebruik Wachtwoord vergeten. Staat er dat het vergrendeld is, wacht dan een paar minuten — dat is de bescherming tegen raden |
| Aanmelden met vingerafdruk of gezicht doet het niet meer | Leg het opnieuw vast onder Instellingen → Beveiliging. De eigen biometrie van uw telefoon wijzigen wist het met opzet |
| Geen meldingen | Kijk de instellingen in de app na, daarna de meldingsinstellingen van uw telefoon, daarna de accubesparing (§15.2) |
| Herinneringen komen te laat | Accubesparing (§15.2) |
| De camera werkt niet voor de verificatie | Geef de app toegang tot de camera in de instellingen van uw telefoon, en open de app daarna opnieuw |
| Deelnemen aan een gesprek lukt niet | Geef toegang tot camera en microfoon in de telefooninstellingen. Sluit andere apps die de camera gebruiken |
| Het gesprek valt steeds weg | Ga over op wifi, zet uw eigen video uit om bandbreedte te sparen, en houd de app op de voorgrond |
| Er ontbreekt een sessie | Trek omlaag om te verversen. Kijk op het tabblad Alles, niet op een gefilterd tabblad |
| De boeking mislukte bij de laatste stap | Iemand was u voor met het tijdvak. Kies een ander — er is niets in rekening gebracht |
| De betaling lijkt mislukt | Kijk bij Facturen voordat u het nog eens probeert. Dubbele afschrijvingen worden voorkomen |
| De tijden kloppen niet | Zet de tijdzone bovenaan de boekingspagina op de plek waar u werkelijk bent |
| De tekst overlapt of staat krap | Heel grote systeemletters kunnen dat doen. Zet ze iets kleiner in de weergave-instellingen van uw telefoon |
| De app staat in de verkeerde taal | Profiel → Instellingen → Taal |
| Een functie uit deze handleiding is nergens te vinden | Uw praktijk heeft die functie uitgezet. Vraag het hun ondersteuning |
18Snelzoeker#
Waar dit hoofdstuk over gaat — het spiekbriefje van één pagina.
Waarom het uitmaakt — voor wanneer u weet wat u wilt en alleen nog hoeft te weten waar u tikt.
Wat u ziet — een tabel van taak naar tik, een korte controlelijst voor de sessie, en de vier stappen die u zet voordat u een ticket aanmaakt.
| Ik wil… | Tik |
|---|---|
| Een sessie boeken die ik al betaald heb | Profiel → Geboekte sessies → Te boeken → Een tijd boeken |
| Aan mijn sessie deelnemen | Profiel → Geboekte sessies → Ingepland → Deelnemen |
| Hem annuleren of verzetten | Profiel → Geboekte sessies → Verzetten / annuleren |
| Zien wat ik nog tegoed heb | Profiel → Mijn gekochte diensten |
| Een factuur ophalen | Profiel → Facturatie → Facturen |
| Mijn behandelaar een bericht sturen | Profiel → Chats met behandelaren |
| Een melding uitzetten | Profiel → Meldingen → instellingenpictogram |
| De app vergrendelen | Profiel → Instellingen → Beveiliging → Vergrendelen na inactiviteit |
| Me met mijn vingerafdruk aanmelden | Profiel → Instellingen → Beveiliging → Aangemeld blijven |
| Van taal wisselen | Profiel → Instellingen → Taal |
| Hulp krijgen | Profiel → Ondersteuningstickets → Nieuw ticket |
Voor elke sessie#
- Opgeladen, of aan de lader
- Op wifi als het kan
- Koptelefoon klaar
- Open de app een paar minuten van tevoren
Als er iets niet klopt#
- Trek omlaag om te verversen.
- Sluit de app en open hem opnieuw.
- Kijk of er een update is.
- Maak dan een ticket aan — met de datum, het bedrag en een schermafbeelding.
Functies verschillen per praktijk. Staat iets hieruit niet in uw app, dan heeft uw praktijk het uitgezet — vraag het hun ondersteuning.